How to Clean a Fridge Water Dispenser: Quick Cleaning Guide
- Nov 7, 2025
- 13 min read
Ever filled a glass of water from your fridge only to get a faint, funky taste? Or maybe the flow has trickled down to a frustratingly slow pace. These aren't just small annoyances; they're the telltale signs that your water dispenser is long overdue for a good cleaning. It’s a task that’s easy to forget, but it's crucial for both the quality of your water and the health of your appliance.
A quick wipe of the nozzle and tray once a week is a great start. But for a real clean, you’ll want to flush the water lines with a distilled white vinegar solution every six months or so to sanitize them and clear out any mineral buildup. This simple routine is the best way to stop bacteria from growing and make sure your water always tastes crisp and fresh.
Why You Should Clean Your Water Dispenser
The hidden nooks and crannies inside your dispenser’s nozzle and water lines are prime real estate for all sorts of unwanted gunk. Over time, that dark, moist environment becomes a breeding ground for:
Bacteria and Biofilm: Constant moisture is the perfect setup for bacteria to form a slimy layer known as biofilm inside the water lines.
Mineral Buildup: Even with great local water quality, from Burnaby to Richmond, hard water minerals like calcium can accumulate. This leads to clogs and that chalky white residue you sometimes see.
Mold and Mildew: Dark, damp spaces are where mold thrives. This can introduce musty odors and potentially harmful spores right into your drinking water.
The Benefits of a Clean Dispenser
Regular maintenance delivers more than just better-tasting water. A commitment to a clean refrigerator water dispenser has a direct impact on your health, your wallet, and your daily convenience. When you keep the system clean, you’re ensuring every glass of water is refreshing and free from contaminants.
It's this promise of clean, convenient water that has made these appliances so popular in the first place. The global market for refrigerators with water dispensers hit USD 8,632.26 million in 2024, and it's still growing. This trend, as detailed on OpenPR.com, shows just how much people value having chilled, filtered water right at their fingertips.
Neglecting your dispenser is like using the same water bottle for months without washing it. While the filter does a great job of removing impurities from the incoming water, it can't stop buildup from forming within the dispenser’s own components.
Ultimately, keeping your dispenser clean is a small investment in your appliance's lifespan and your family’s well-being. A clean system runs more efficiently, preventing clogs that can strain the mechanics and lead to expensive repairs down the road. Whether you’re looking for reliable house cleaning Vancouver or just want to improve your home’s hygiene, this small task delivers some pretty big rewards.
Gathering Your Cleaning Tools and Supplies
Before you jump into cleaning the refrigerator water dispenser, taking a couple of minutes to pull your tools together will make the whole job go much faster. When you have everything ready, you won't have to stop mid-clean to hunt for a brush or a cloth.
You don't need a lot of complicated gear, but a few specific things are must-haves. You probably already own most of them, especially if you're used to routine house cleaning Madison WI. Think of it like getting your station prepped before you start cooking—it just makes everything easier.
Your Essential Cleaning Checklist
Here's a quick breakdown of what you'll need to grab for a truly deep clean and why each piece matters.
Distilled White Vinegar: This is your best friend for this job. Its natural acidity is fantastic for breaking down mineral deposits and sanitizing the water lines without leaving behind any harsh chemicals.
A Small, Flexible Brush: A purpose-made dispenser cleaning brush works wonders, but even a basic, sturdy pipe cleaner is great for getting inside the nozzle and other tight spots where gunk likes to build up.
Soft Microfiber Cloths: Plan on having at least two. Use one for cleaning with the vinegar solution and keep another one dry for wiping everything down when you're done. They’re gentle enough not to scratch any surfaces.
Mild Dish Soap and Warm Water: This simple mix is all you need for soaking and cleaning the drip tray and any other removable parts.
Pro Tip: An old, clean toothbrush is a fantastic tool for scrubbing away any stubborn, chalky buildup on the dispenser tray. A small funnel can also be a lifesaver, helping you pour vinegar into the system without making a mess.
Having these basics organized is a simple step that pays off big. For a more complete list of items that can help with various tasks around your home, check out our guide on the essential tools for deep cleaning your home. With your supplies ready, you're all set to get started.
A Practical Walkthrough for Deep Cleaning
Alright, you've got your supplies ready. Now it's time to get into the deep clean itself. This whole process is pretty straightforward and doesn’t require any special skills—just a little bit of time and patience. We’ll go through it part by part to make sure your water ends up tasting as fresh and clean as it should.
First things first: safety. Before you start pulling things apart, find the water supply valve for your fridge and shut it off. It’s usually tucked away behind the refrigerator or under your kitchen sink. This simple move prevents any surprise puddles while you're working.
Preparing the Dispenser Area
With the water safely off, you can start removing any of the detachable pieces. The dispenser or drip tray is the easiest place to begin. This little tray is notorious for catching spills and can build up a stubborn film of mineral deposits and general grime over time.
Just gently lift it out of place. Pop it into a sink filled with warm, soapy water and just let it soak while you handle the rest. This will make scrubbing it clean later on a whole lot easier.
This simple infographic lays out the key tools for the job, reminding us that a good deep clean relies on just a few basic items.Having your vinegar, a small brush, and a cloth ready to go just streamlines everything. You can move from one step to the next without having to stop and search for what you need.
Flushing the Water Lines
This is where the real magic happens. To clean the refrigerator water dispenser from the inside out, you’ll be using a simple and effective mix of distilled white vinegar and water to sanitize the lines.
Go ahead and mix a solution of one part distilled white vinegar to one part water. Using a small funnel or even a turkey baster, carefully get this solution into the fridge's water line. How you do this can vary a bit between models, so taking a quick look at your owner's manual for the best access point is a smart move.
Once the solution is in, grab a glass and start dispensing until you can smell the vinegar coming through. That’s your cue that the solution has made its way through all the lines. Now, let it sit for about 10 minutes. This gives the vinegar time to work on breaking down any biofilm or mineral buildup. This step is especially important in areas with harder water, like some Madison neighborhoods, where deposits can form more quickly.
After the vinegar solution has had time to sit, the next part is probably the most crucial for taste: the flush. You'll need to run several gallons of fresh water through the dispenser to completely clear out any trace of vinegar. Don't be surprised if this takes a minute—patience here is the key to perfectly fresh-tasting water.
Rinsing and Reassembly
After the vinegar has done its job, it's time to turn the water supply back on. Start flushing the system by dispensing water into a large bowl or pitcher. You’ll want to keep going until the vinegar smell is completely gone. This might take a gallon or two of water, so just keep at it.
Now, let's get back to that dispenser tray you left soaking. Use your small brush or an old toothbrush to scrub away any gunk that’s left. Give it a good rinse with clean water, dry it off with a microfiber cloth, and snap it back into place.
Finally, take a damp cloth and give the dispenser nozzle and the area around it a good wipe-down. This hands-on, detailed approach is part of what makes our maid service Madison so effective—we focus on the little things that make a huge difference.
It’s also worth noting how much technology is changing our appliances. The trend toward smart homes is clear, with a growing demand for clean, reliable water. In fact, the smart water dispenser market is projected to grow with a CAGR of 15% from 2019 to 2033, and these advanced dispensers are already found in over 40% of new refrigerator models. You can discover more about the rise of smart water dispensers at Archive Market Research. By following these steps, you're making sure your dispenser—whether it's smart or standard—is providing the cleanest water possible.
Keeping Your Water Filter and Lines in Check
Even after you’ve done a thorough flush, the work isn’t quite finished. The path to truly fresh-tasting water runs through the system's core: the filter and its lines. Think of the filter as the gatekeeper, trapping impurities before they ever make it to your glass. If it's old or clogged, you're just undoing all the cleaning you just did.
Giving these hidden parts the attention they deserve is what separates a decent dispenser from a great one. The filter and water lines are the unseen pathways that ultimately decide the quality and taste of your water.
Choosing and Replacing Your Water Filter
First thing's first—you need the right filter. Your refrigerator's manual will have the specific model number you need, but you can usually just find it printed on the old filter itself. It’s critical to stick to the manufacturer's replacement schedule, which is typically every six months.
A water filter is a bit like a sponge; it can only absorb so much. Once it’s full, it stops working and can even start releasing trapped gunk back into your water. That’s often the culprit behind weird tastes and smells.
Once you have the new filter, swapping it out is usually straightforward:
Find the filter: It's often tucked inside the fridge, either in a top corner or down by the bottom grille.
Remove the old one: Most filters release with a simple twist or the push of a button. It's a good idea to have a small towel ready to catch any drips.
Pop in the new one: Insert the new filter and turn it until it locks firmly into place. Be careful not to overtighten it, which can damage the housing.
Prime the system: This is a crucial step that many people skip. Run about two to three gallons of water through the dispenser. This flushes out any loose carbon bits from the new filter and gets rid of air in the lines. The water might look a little cloudy at first, but it will clear up quickly.
Inspecting the Water Lines
With a fresh filter installed, now is the perfect time to give the water supply line a quick look. This is the thin plastic or copper tube connected to the back of your fridge. Gently check for any obvious cracks, kinks, or moisture where it connects to the fridge and the wall valve.
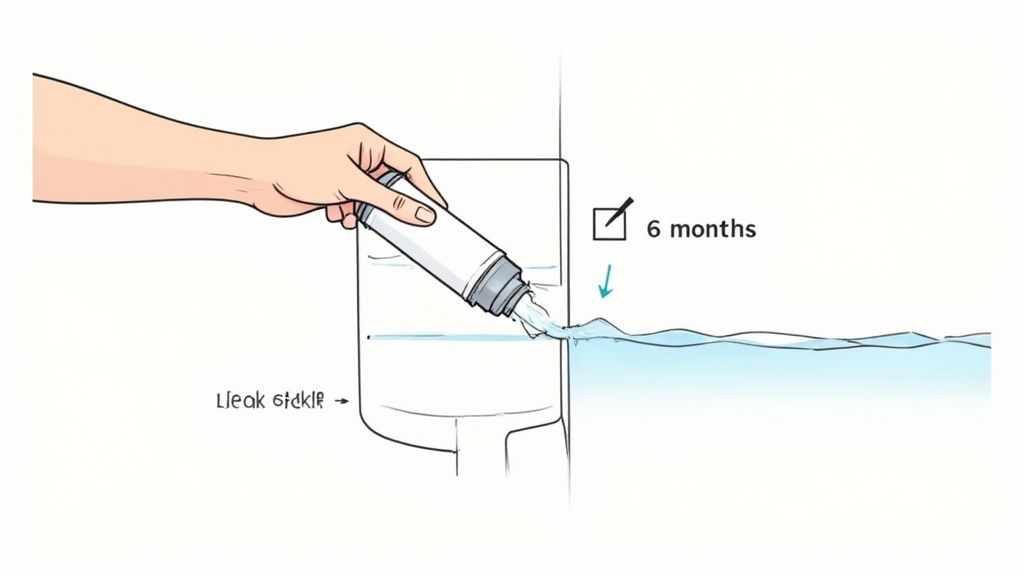
A kinked line can slow down your water flow, while a tiny crack can lead to a slow, damaging leak you might not notice for months.
For anyone dealing with mineral-rich water, buildup can be a problem inside the lines, not just on the surfaces you can see. If you're constantly fighting those chalky white spots, our guide on how to tackle hard water stains has some useful tips that apply to other parts of your home, too.
It’s clear that people are paying more attention to their water quality. In fact, the global market for household water dispensers is projected to hit USD 14.61 billion by 2035, driven by this demand for better filtration. You can read the full market analysis at Future Market Insights to see how the trend is growing. A little consistent upkeep, from filter changes to line inspections, goes a long way in ensuring every glass of water is as clean and fresh as possible.
How To Fix Common Dispenser Problems
Even with regular cleaning, your refrigerator’s water dispenser can sometimes act up. You might notice a slow trickle instead of a steady stream, or maybe the water has a strange taste. These issues are usually minor, and you can often fix them yourself without calling a technician.
Understanding what’s behind these common headaches is the first step to getting your dispenser back in top shape. Most problems fall into one of three categories: slow water flow, unpleasant tastes or odors, or minor leaks. A little patient troubleshooting is usually all it takes to solve the mystery.
Diagnosing Slow Water Flow
One of the most frequent complaints is a dispenser that’s just too slow. Before you start worrying about a major issue, it’s worth working through a few simple checks.
Check the Water Filter: A filter clogged with sediment and minerals is the #1 cause of reduced water flow. If it’s been more than six months since you last changed it, a fresh filter will likely solve the problem immediately.
Inspect the Water Line: Gently pull your fridge away from the wall and take a look at the thin water supply line. Make sure it isn’t kinked or pinched, which can easily restrict the flow. It’s a surprisingly common issue.
Purge Trapped Air: If you've recently changed the filter or moved the fridge, air can get trapped in the lines. To fix this, just press the dispenser lever for two to three minutes straight to push all the air out.
A slow dispenser is a real nuisance, especially on a busy morning. Taking a few minutes to check these common culprits can save you a lot of frustration and restore that satisfying, quick flow you're used to.
Tackling Unpleasant Tastes and Odors
If your water tastes metallic, musty, or just plain off, it's a clear signal that something needs attention. An old filter is often the problem, as it loses its ability to remove chlorine and other compounds that affect taste.
But what if you just installed a new filter and the taste is still wrong? That’s likely from harmless carbon dust that needs to be flushed out. Just run at least two gallons of water through the system to clear it. If the issue persists, a deep clean using the vinegar flush we covered earlier is an excellent next step.
A lingering bad taste is your dispenser’s way of telling you that a simple surface wipe isn't enough. It's a signal that the internal lines need a proper sanitizing flush to remove any lingering biofilm or residue.
When homeowners want a deeper level of freshness throughout their home, they often turn to a professional maid service Vancouver to handle the details. Just like a professional cleaning leaves your home sparkling, properly troubleshooting your dispenser ensures your water is pure and refreshing. Following these steps helps maintain a truly clean refrigerator water dispenser from the inside out.
Taking the time to clean your refrigerator's water dispenser is a great step toward a healthier, more pleasant home. It’s one of those small details that contributes to the bigger picture of a truly clean living space—making sure everything from your water to the air you breathe is fresh. We get it, though. Life gets busy, and deep-cleaning tasks like these can quickly slide to the bottom of the to-do list.
If you find yourself overwhelmed by the demands of keeping your home clean, from scrubbing appliances to tackling hidden dust, it might be the perfect time to call in some help. A professional cleaning service gives you back your most valuable resource—your time—while delivering a level of clean that’s tough to achieve on your own.
Professional Cleaning for Your Peace of Mind
For our readers in the Greater Vancouver area, from Richmond to Surrey and over to North Vancouver, our Vancouver cleaning team is ready to make your home sparkle. We handle all the details so you can relax and enjoy a spotless environment. Our crews bring the right expertise and tools for any challenge, leaving your home completely refreshed.
And for our community in Wisconsin, our maid service Madison team offers that same commitment to quality and detail. We understand the unique needs of local homes and are dedicated to providing a reliable, thorough service that makes your home shine.
A professional cleaning isn't just about appearances; it's about creating a healthier environment for you and your family. We handle the tough jobs, from grimy baseboards to dusty blinds, so you can focus on what matters most.
Letting experts manage the deep cleaning frees you from the stress and physical effort it takes. A pristine home also impacts your other senses, especially when it comes to musty smells that can linger. For more on that, our guide to getting rid of lingering cooking smells offers extra tips for keeping your space fresh.
Whether you're in Delta or Langley, a professional touch ensures no corner is overlooked. Let ShinyGoClean handle the hard work. You deserve to come home to a space that is not only clean but feels truly restorative. Contact our Vancouver team at 236-609-5631 or our Madison office at (608) 292-6848 today.
Frequently Asked Questions
Even with a good guide, questions always seem to pop up right in the middle of a project. It’s normal! Here are a few of the most common things people ask when they start cleaning their refrigerator's water dispenser.
Getting these little details right is what makes the difference between just going through the motions and actually ending up with fresh, clean drinking water. Let's clear up some of the common concerns.
How Often Should I Really Clean My Dispenser?
This is the big one. For day-to-day upkeep, giving the dispenser nozzle and tray a quick wipe-down is a great habit. Do it daily or weekly, whatever fits your routine.
But for the full deep clean—the one where you flush the lines with vinegar—you should plan on doing it every six months. The easiest way to remember is to just time it with your water filter replacement. Tying those two tasks together keeps mineral buildup and biofilm from getting a foothold.
Can I Use Bleach Instead of Vinegar?
It’s really best to avoid bleach for this job. While bleach is a fantastic disinfectant, it’s a harsh chemical that can actually damage the plastic tubing inside your dispenser over time.
More importantly, it can be incredibly difficult to flush out completely, potentially leaving a dangerous chemical residue in your drinking water. Distilled white vinegar is a much safer, yet still highly effective, natural alternative for sanitizing the lines.
What If My Water Tastes Like Vinegar After Cleaning?
Don’t worry, you haven't done anything wrong! This happens all the time and it’s super easy to fix. It just means the system needs a bit more flushing to get rid of every last trace of the vinegar solution.
Just keep running fresh water through the dispenser. Dispensing another three or four large glasses usually does the trick. If you have an icemaker, it’s also a good idea to toss out the first batch of ice it makes after you’ve finished cleaning. Once that vinegar taste is gone, you’re good to go.
When you want the rest of your home to feel as fresh as your clean water dispenser, ShinyGoClean is ready to help. For expert house cleaning in Vancouver or nearby areas like West Vancouver and Richmond, just call us at 236-609-5631. If you're in the Madison area, you can book our top-rated maid service in Madison by calling (608) 292-6848. Let us make your whole home shine! Book your service today at shinygoclean.com.
Article created using Outrank


Comments