How to Clean Between Glass on Oven: A Des Moines Guide
- Dec 17, 2025
- 15 min read
Cleaning your oven is one thing, but figuring out how to clean between the glass on the oven door feels like a whole different challenge. That hazy, greasy film trapped between the panes is stubborn, but completely fixable with either a bit of DIY effort or a quick call to a professional. The key is understanding that you can safely access that space for a crystal-clear finish.
Finally Tackle That Hazy Film Between Your Oven Glass
It’s a frustrating sight for any Des Moines homeowner: that stubborn, cloudy film trapped between the glass panes of your oven door. It makes your whole kitchen look a little less clean, no matter how much you scrub elsewhere.
This happens from a mix of grease splatters and condensation that get sealed in over time, especially after a long Iowa winter of hearty meals. But here’s the good news—a sparkling oven door is completely achievable, giving your kitchen that polished look you want.
In this guide, we'll walk you through two reliable paths to a crystal-clear view:
The DIY Approach: This path requires a bit of patience and the right tools but can be very rewarding.
The Professional Route: This option guarantees a perfect, streak-free result without any of the hassle or guesswork.
The challenge of this specific task is so common that it has driven significant growth in the global oven cleaners market, valued at approximately USD 2.5 billion in 2024. Many homeowners turn to aerosol sprays and gels designed to penetrate tight spaces, which can reduce cleaning effort by up to 40% compared to manual scrubbing alone.
Deciding Your Cleaning Path
Before you start, it helps to know what you’re getting into. To begin your journey towards a sparkling oven, you might want to look at a comprehensive guide to proper oven cleaning for some foundational knowledge.
Deciding between doing it yourself and calling for help often comes down to time, confidence, and how complicated your oven model is.
For many in Des Moines, the decision is clear. If you’re short on time or nervous about taking your appliance apart, a professional oven cleaning Des Moines service is the fastest way to get it done right. At Shiny Go Clean, we have the experience to handle any oven door, ensuring a perfect clean without any risk to your appliance. You can reach us at (515) 446-9726 to get it sorted.
DIY vs Professional Oven Glass Cleaning At a Glance
Sometimes a quick comparison is all you need to decide whether to tackle this job yourself or call in the experts from Shiny Go Clean in Des Moines.
Factor | DIY Method | Professional Service (Shiny Go Clean) |
|---|---|---|
Time Investment | 2-3 hours on average, depending on oven model and grease buildup. | Typically under 1 hour. |
Cost | Low initial cost for supplies (cleaner, cloths, maybe a tool). | Higher upfront cost but includes all labor, tools, and expertise. |
Risk Factor | Moderate risk of scratching glass, breaking clips, or reassembly issues. | Zero risk. Our technicians are trained and insured for any appliance. |
Results | Can be very good, but streaks or missed spots are common without experience. | Guaranteed streak-free, crystal-clear finish. |
Convenience | Requires you to find the time, gather supplies, and follow instructions carefully. | Just a quick phone call. We handle everything from start to finish. |
While the DIY route can save a bit of money, calling a professional saves you the time, hassle, and potential frustration of dealing with a tricky appliance. It really comes down to what you value more—your time or your budget.
Figuring Out Your Oven Door Type Before You Start
Before you even think about grabbing a screwdriver, the first step is to play detective with your oven door. Not all doors are made the same, and trying to force one open the wrong way is a fast track to frustration—or worse, a broken appliance. Nobody needs that headache.
Knowing whether your door was actually designed for easy disassembly is the most important thing you can figure out right now. It saves a ton of time, keeps you from snapping a hidden plastic clip, and makes sure this whole project starts off on the right foot. Most oven doors you'll run into in Des Moines homes fit into one of a few common designs.
Doors with Visible Screws
This is the most straightforward setup, and you’ll often find it on slightly older models. Take a good look around the inside edge of your oven door. You're looking for screws holding the inner and outer panels together.
Where to look: Scan along the top, bottom, and side edges of the door’s interior frame.
What it means: If you spot them, you're in luck. This design is almost always meant to be taken apart for cleaning. You’ll just need the right screwdriver to get going.
Seeing those screws is a great sign. It means the manufacturer expected homeowners to want to get in there and clean.
Doors with Hidden Latches or Clips
Many newer ovens have a much sleeker, more modern look, especially the kind you see in the new builds popping up around Waukee and Ankeny. To keep things clean, they often hide the fasteners. Instead of screws, you might find hidden latches or clips.
This design is a little trickier. You might find small release buttons, tiny slots meant for a flathead screwdriver, or a bottom drawer that has to be removed to get to the release mechanism. They're designed to be out of sight.
A Neighborly Tip: If you can't find screws or any obvious latches, don't just start prying at things. The last thing you want is the sound of a plastic clip snapping, leaving you with a door that won't close right.
Finding Your Oven Manual Online
What if you misplaced the original manual? It happens to the best of us. Your secret weapon here is the oven's model number, which is almost always on a sticker somewhere inside the door frame or on the back of the unit.
Just type "[Your Oven Brand] [Model Number] manual" into a search engine, and you'll almost certainly find a PDF version. That guide is gold—it will show you exactly how your specific door is put together and the proper steps for taking it apart.
If the manual looks like an engineering schematic or makes it clear the door is a sealed unit, it might be a good time to pause. Some modern ovens simply aren't designed for a DIY cleaning. If that's the case, or if you'd just rather not risk it, that’s where a professional oven cleaning Des Moines service comes in handy. Our team at Shiny Go Clean knows these models inside and out. Just give us a call at (515) 446-9726, and we’ll handle it for you—no manual needed.
A Practical Guide to Accessing the Inner Glass Safely
Alright, now for the hands-on part. Getting to that inner glass is the most technical step of this whole process, but don't let that scare you. With a little preparation and a steady hand, you'll have that door apart in no time.
The key is to work smart, not hard, and to always put safety first.
First things first, get your workspace ready. Lay a thick, soft towel or an old blanket on the floor right in front of your oven. This gives you a safe, padded spot to place the oven door once it’s off, preventing any scratches to your floor or the door itself.
Essential First Steps
Before you even think about touching a screw, unplug your oven from the wall or switch it off at the circuit breaker. This is a non-negotiable safety step. You’ll also want to be absolutely sure the oven is completely cool.
Next, gather a few basic items. You’ll likely need:
A Phillips head screwdriver.
A flathead screwdriver (sometimes needed for prying clips).
A small bowl or magnetic tray to keep screws and tiny parts from rolling away and getting lost forever.
Having the right equipment on hand is half the battle. If you're looking to build up your home maintenance kit, our guide on the best tools for a deep cleaning home has some great suggestions.
Removing the Oven Door
Most modern oven doors are actually designed to come off for easier cleaning. Open the door all the way and look for the small hinges where it connects to the oven frame. You should see a little locking tab or lever on each hinge. Flip these levers up and into their locked position.
Once the locks are engaged, slowly start to close the door. You’ll feel it catch and stop at a certain point—this is the removal position. Now, just gently lift the door up and away from the oven frame. It might be heavier than you expect, so use both hands and get a solid grip.
Our Pro Tip: Take photos with your phone at every single step of this process. It sounds simple, but having a visual guide of where each screw and clip belongs will make reassembly a thousand times easier. It’s a trick that has saved us from major headaches countless times.
Opening Up the Door Panels
With the door safely resting on your towel-covered floor, you can start taking it apart. This is where your earlier detective work comes in handy.
The flowchart below shows the two main types of door constructions you're likely to run into.
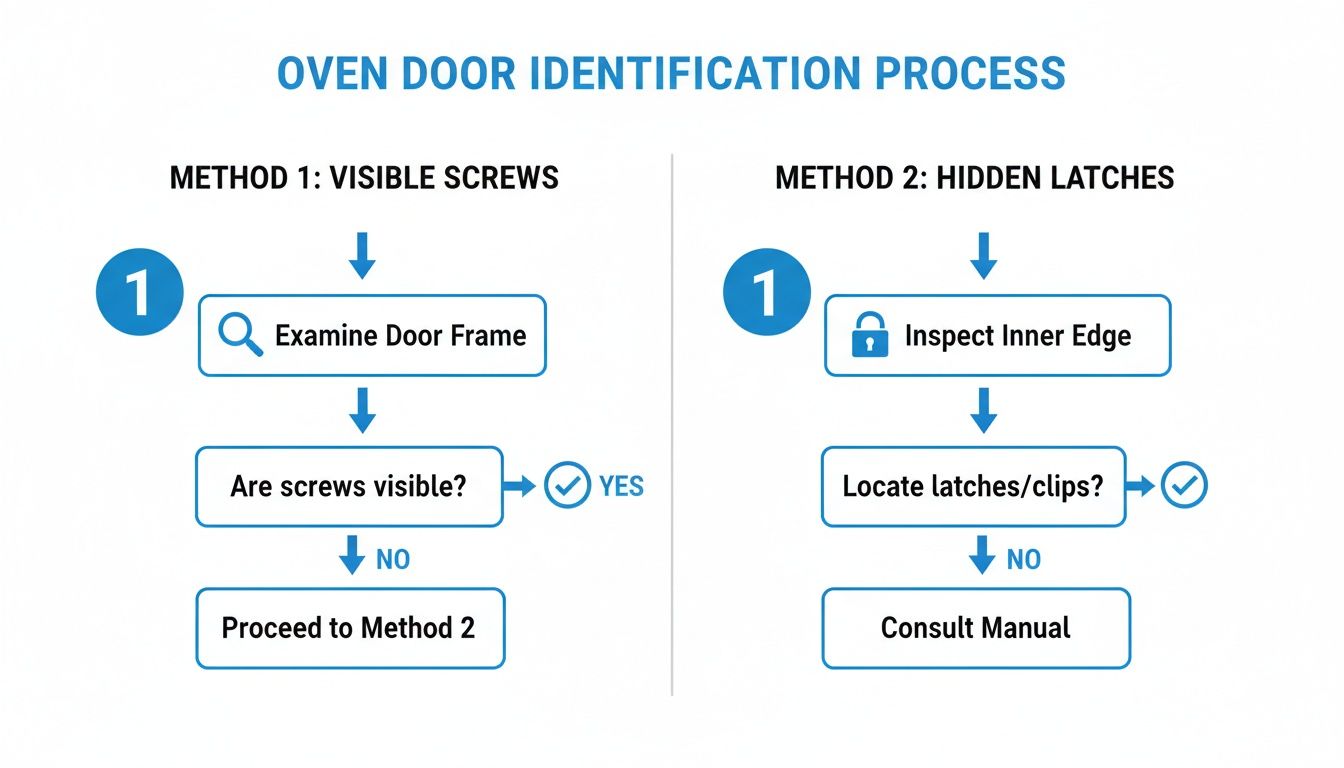
This visual guide helps you quickly figure out whether you should be looking for obvious screws or searching for more subtle hidden latches.
For Doors with Visible Screws: Carefully unscrew them and place them in your parts bowl. The inner panel should then lift off. Be gentle, as there might be a thin gasket or seal around the edge you don't want to damage.
For Doors with Hidden Latches: Look for small slots or clips along the bottom or side edges. You may need to use a flathead screwdriver to gently pop them open. Never use force. If something isn't moving, take a step back. Double-check your owner’s manual or re-examine the door for a missed latch.
Once the panels are separated, you’ll finally have clear access to both sides of the inner glass. Now, the real cleaning can begin.
Choosing the Best Cleaning Solutions for Baked-On Grime
Once you’ve safely accessed the inner glass, the real work begins. That stubborn, brownish haze of baked-on grime needs the right kind of cleaning solution to break it down without causing any damage. You have a couple of great options here—a gentle but effective DIY paste or a targeted commercial cleaner for tougher jobs.
Most of the time, a simple homemade solution is all you need. It’s gentle on the glass, you probably already have the ingredients, and it avoids the harsh fumes that can fill your kitchen.
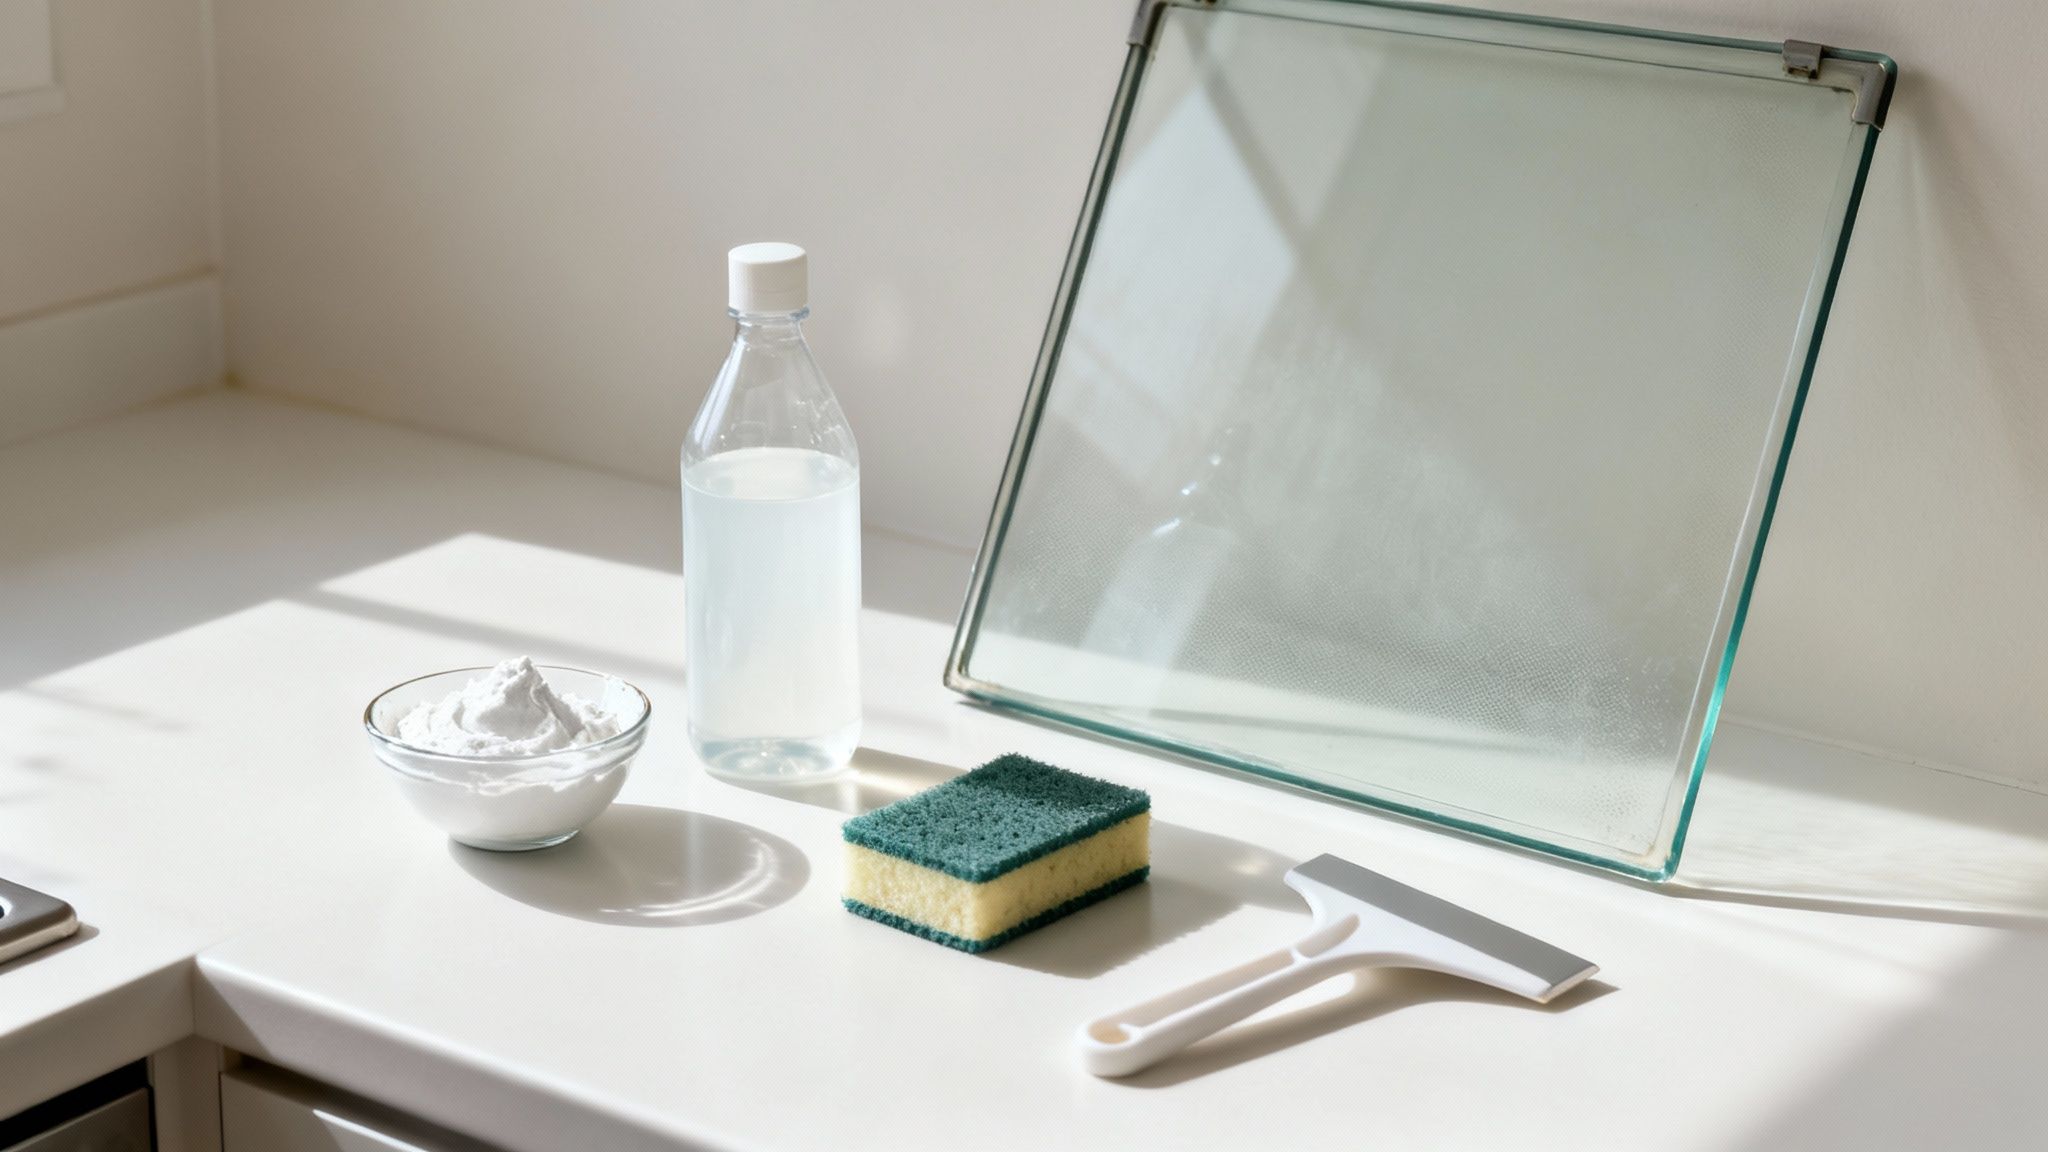
Our Go-To DIY Cleaning Paste
This is our favorite method for tackling moderate grease and food residue. It’s a classic for a reason—it just works.
Mix a thick paste: Combine about a half-cup of baking soda with just enough water to form a thick paste. You want a consistency similar to toothpaste so it clings to the glass instead of dripping right off.
Apply it generously: Spread the paste all over the greasy areas of the glass. Don’t be shy here; a thick, even layer is your best bet for breaking down the grime.
Let it sit: Give the paste at least 20-30 minutes to work its magic. This dwell time lets the baking soda do the heavy lifting, which means a lot less scrubbing for you.
After it has sat, grab a spray bottle filled with a bit of white vinegar and lightly spray the paste. It will start to fizz and foam, which helps lift the loosened grime off the surface. From there, use a non-abrasive sponge or a soft cloth to gently scrub the glass clean. A plastic scraper can also be your best friend for any really stubborn spots, as it won't scratch the glass.
We often recommend these simple but effective methods in our guide to natural cleaning products that actually work because they’re safe and surprisingly powerful.
When to Use a Commercial Cleaner
Sometimes, especially if it’s been a while since the last deep clean, you might be facing years of baked-on grease that a DIY solution just won't cut through. In those cases, a store-bought oven cleaner can be the right tool for the job.
The oven cleaner market is quite diverse, with gels holding a 45% market share because they are ideal for clinging to surfaces like glass. Interestingly, the popularity of DIY methods has also grown, with vinegar-steam techniques known to loosen up to 85% of debris in double-pane ovens. Read more about these oven cleaning market trends.
If you opt for a commercial cleaner, follow these tips for safe and effective use:
Read the Instructions: Always follow the manufacturer’s directions precisely regarding application and wait times. This isn't the time to guess.
Ventilate Your Space: Open up some windows or turn on your kitchen’s exhaust fan before you start. These products can have pretty strong fumes.
Wipe Thoroughly: After scrubbing, make sure you wipe away all of the cleaning residue with a clean, damp cloth. You don't want any chemical residue left behind when you heat your oven next.
Whether you go the DIY route or use a commercial product, the goal is a sparkling, streak-free finish. And if this part of the process feels like too much of a hassle, remember that our team at Shiny Go Clean is always ready to step in. We handle oven cleaning Des Moines jobs every day—just call us at (515) 446-9726 for a spotless result without the effort.
Reassembling Your Oven Door Without a Headache
Getting that glass sparkling clean feels great, but the job isn't finished until the door is back together correctly. This is where a bit of patience—and those photos you took earlier—really pays off. Putting your oven door back together is pretty much the reverse of taking it apart, but I have a few tips to help it go smoothly.

First things first: make sure every piece of glass is completely dry. Any lingering moisture can turn into ugly streaks or condensation once you heat up the oven. Grab a dry, lint-free cloth and give every surface one last wipe-down before you start.
Aligning and Securing the Glass
Carefully slide the inner glass pane back into its frame, checking your photos to make sure it’s oriented the right way. Some glass panes actually have special coatings and need to be installed facing the correct direction.
Next, pay close attention to any rubber or silicone seals you removed. These gaskets are crucial for keeping your oven’s temperature steady and efficient.
Check Their Condition: Look them over to make sure the seals aren't cracked, brittle, or damaged.
Seat Them Properly: Gently press them back into their grooves so they sit flush and create a tight seal. A loose seal means lost heat.
If a seal seems worn out, it might be a good idea to order a replacement from the manufacturer. It's a small part that makes a huge difference in your oven's performance.
Once the glass and seals are in place, reattach the inner door panel. Replace all those screws you carefully saved, tightening them until they are snug. Don't go overboard here—over-tightening can crack the glass or strip the screw threads.
Our Neighborly Advice: Tighten the screws in a star or crisscross pattern, just like you would when changing a tire. This distributes the pressure evenly and helps prevent the glass from shifting or cracking under stress.
The Final Test
With the door reassembled, it's time to put it back on the oven. Line up the hinges with the slots on the oven frame and slide it back into place. Once it's seated, open the door fully and flip the hinge locks back down to their original, unlocked position.
Gently open and close the door a few times. You want to make sure it moves smoothly and seals tightly against the oven frame. If everything feels secure, you can plug the oven back in. This last check ensures all your hard work results in a fully functional—and beautifully clean—oven.
If you hit a snag or just don't have the time for this project, remember that a professional oven cleaning Des Moines service is always an option. Our team at Shiny Go Clean can handle the entire process for you. Just call us at (515) 446-9726—we're happy to help.
When to Call for Oven Cleaning in Des Moines
Sometimes, what looks like a simple DIY job can quickly eat up your entire afternoon. You’ve had a look at your oven door, maybe you've even tried taking it apart, but something just isn’t clicking. That's completely fine—knowing when to hit pause and call in a pro is often the smartest move you can make.
After a long Iowa winter, the last thing you want is to spend a beautiful day wrestling with a stubborn appliance. If you feel like you’re in over your head, it might be time to let a professional service take over.
Signs It's Time for a Professional
Certain situations make calling an expert the safer, better choice. It saves you time, prevents accidental damage, and guarantees a result you’ll be happy with.
Think about calling us if you hit any of these roadblocks:
Complex Oven Designs: A lot of newer ovens, especially those in the new builds around Waukee and West Des Moines, have complicated door designs that aren’t meant for easy disassembly. If you can’t find clear instructions or feel like you have to force a part, it’s best to stop.
Brittle or Damaged Seals: When you open the door, do the rubber seals look cracked or feel stiff? An old, brittle seal can tear easily during cleaning, which will mess with your oven's efficiency. Our technicians know how to assess and clean around them safely.
Years of Baked-On Grease: If the grime between the glass is thick, black, and stubborn, a DIY paste probably won’t be enough. We use professional-grade solutions that dissolve years of buildup without harming the glass.
We handle this exact task every day in homes across Ankeny, Urbandale, and Johnston. A professional service like Shiny Go Clean not only saves you the headache but ensures a perfect, streak-free finish without any risk.
This is especially true as oven technology gets more advanced. Self-cleaning features, like heat cleaning ovens, are designed to tackle the very issue of hard-to-reach grime. These ovens use intense pyrolytic cycles that can reach 900°F to turn residue into ash, eliminating 99% of baked-on grease without chemicals. This can reduce the need for manual cleaning by 80% per cycle.
We Are Your Helpful Neighbor with the Right Tools
Think of us as the neighbor you can call when a project gets a bit too tricky. While this guide offers a solid walkthrough for cleaning your oven glass, some problems need more than just a good scrub. If you run into issues beyond cleaning or reassembly, remember that professional stove and oven repair services are available to handle mechanical problems.
For a spotless clean without all the hassle, our Des Moines oven cleaning team is ready to step in. Just give us a call at (515) 446-9726, and we'll get that oven door looking brand new in no time.
Common Questions About Cleaning Oven Door Glass
Even when you know the steps, it’s normal to have a few questions before you start taking an appliance apart. We hear these all the time from our neighbors in the Des Moines area who are trying to get that pesky oven glass clean. Here are some straightforward answers to help you out.
Can I Use a Razor Blade on the Glass?
We strongly advise against using a metal razor blade to scrape off baked-on grease. It’s a risky move that can easily leave permanent scratches on the glass surface. You just don't want to take that chance.
Instead, a much safer and still very effective option is a simple plastic scraper or a non-abrasive scouring pad. When you pair these with a good cleaning solution, you’ll get all the leverage you need to lift tough grime without damaging anything. It’s all about working smarter, not harder.
What if My Oven Door Has No Screws?
This is a common puzzle, especially in the newer homes you see around Johnston and Waukee. Many modern ovens are designed with a sleek, seamless look, which just means the fasteners are cleverly hidden.
If you don't see any visible screws, your door most likely uses a system of hidden latches or clips. You’ll usually find release mechanisms along the bottom or sides of the door frame. Before you try prying anything open, your best bet is to find your oven’s manual online using its model number. That guide will show you exactly how your specific door is meant to be opened safely.
A friendly tip from your neighbors at Shiny Go Clean: If it feels like you have to force a part, it's best to stop. A broken clip can be a much bigger problem than a dirty piece of glass.
How Often Should I Clean Between the Glass?
For most households here in the Des Moines area, a deep clean between the oven door glass is something you only need to tackle about once a year. You might do it more often if you notice a significant, hazy buildup starting to form that just won't wipe away.
A great way to prevent this from becoming a major project is to stay on top of regular maintenance. Wiping down the exterior and interior glass after spills—once the oven is completely cool, of course—can make a huge difference. This simple habit stops grease from getting baked on in the first place, keeping your view clearer for longer. The same principles apply to other glass surfaces, and you can find more tips in our guide on how to clean windows without streaks.
Is It Safe to Use Harsh Chemical Cleaners?
While powerful commercial oven cleaners can be very effective, they should be used with caution, especially in the tight space between glass panes. These harsh chemicals can sometimes damage the delicate rubber seals or special coatings on the glass if they aren't used carefully.
We always recommend starting with a gentler, DIY solution like a baking soda paste. It’s surprisingly effective and much safer for your appliance. If you do decide a stronger commercial cleaner is necessary, make sure your kitchen is well-ventilated by opening a window and always follow the product's instructions to the letter.
Feeling like this project is more than you want to handle? The team at Shiny Go Clean has the tools and expertise to get your oven glass sparkling clean without any of the hassle. Give us a call at (515) 446-9726 or visit us online to book your Des Moines oven cleaning service today.
Comments