How to Clean Oven Glass in Between Panes: A Madison Guide
- Dec 26, 2025
- 11 min read
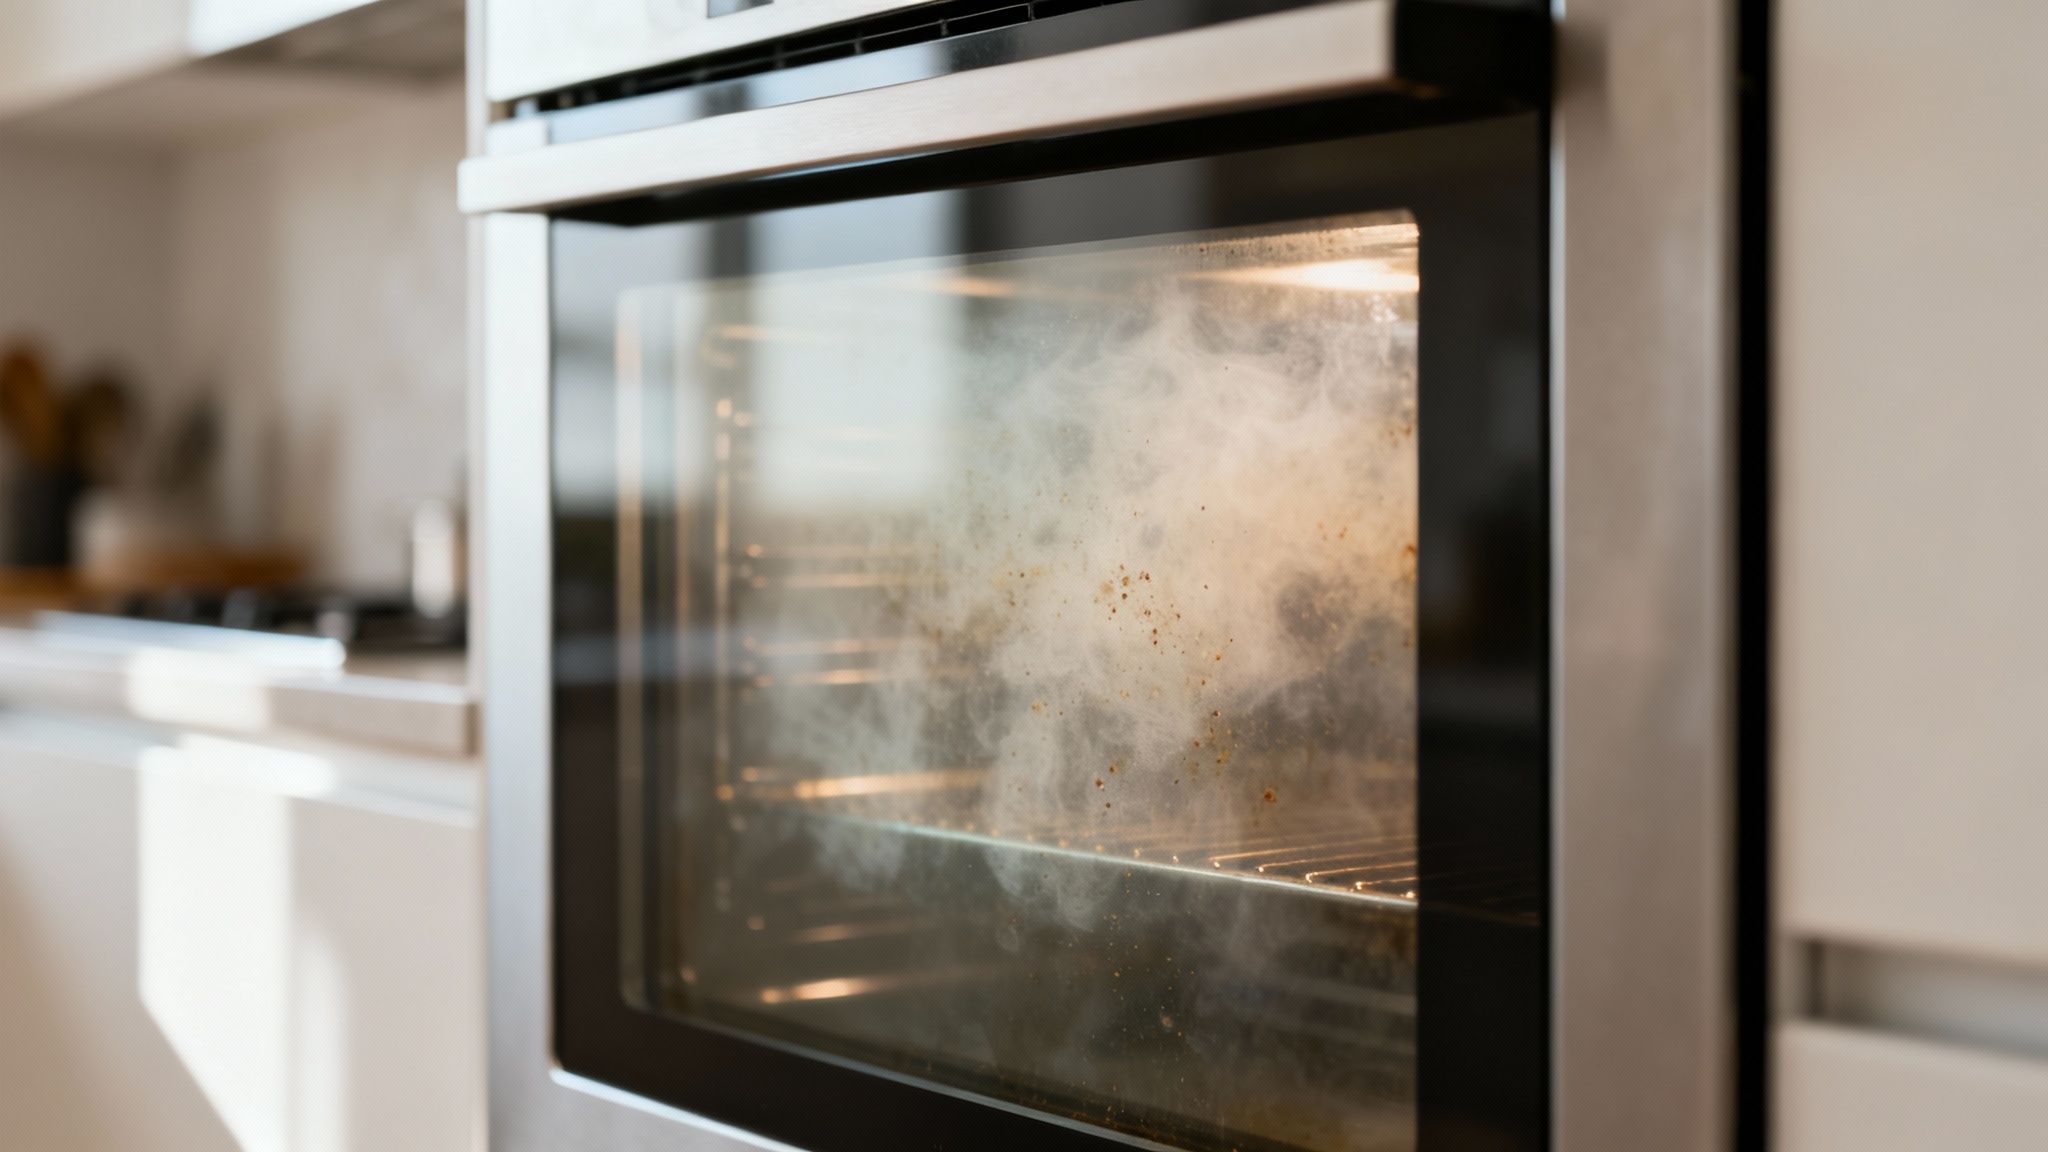
It’s one of the most common frustrations I hear about from homeowners in Madison, especially after a long winter of hearty, oven-cooked meals. You scrub the oven door until it shines, but a stubborn, hazy film is still trapped between the glass panes. It’s maddening.
This happens when grease, condensation, and tiny food particles sneak their way through the door's vents. Over time, the oven’s heat bakes that grime onto the inner glass again and again, creating a cloudy mess that surface cleaning just can’t touch.
This guide will walk you through two solid methods to get that glass crystal-clear again. We'll cover how to either take the door off for a deep, thorough clean or use a clever trick to clean it right where it is. If you're looking for professional oven cleaning in Madison, we can help with that too.
Where Does All That Grime Come From?
Your oven door isn't just one solid piece of glass. It’s actually built with two or three separate panes with a small air gap in between for insulation. To keep the outer glass from getting dangerously hot, manufacturers add vents-usually at the top or bottom of the door-to allow air to circulate.
Unfortunately, these vents are the culprits. With every roast or bake, microscopic grease particles and moisture get pulled into that space. The high heat then acts like a kiln, bonding this gunk to the glass and creating that foggy look you can’t seem to wipe away.
Local Insight: Here in Madison, those cold winters mean our ovens work overtime cooking up roasts, casseroles, and baked goods. All that extra use just speeds up the grime buildup between the glass panes, making this a much more common problem.
We get it. Between navigating the Beltline and enjoying the lakes, a deep oven clean is probably low on your priority list. This guide is for busy homeowners who just want a straightforward solution. Whichever method you choose, you can get that spotless, like-new look back.
Gathering Your Supplies For The Job
Before you dive in, a little prep work makes this whole task much simpler and safer. Taking just a few minutes to get your tools together means you won’t be scrambling mid-project with one hand on the oven door. Think of it like getting all your ingredients ready before you start a recipe-it just makes everything flow.
First off, you’ll probably need a basic Phillips head screwdriver, as most oven models use them. You’ll also want a few soft, clean microfiber cloths. These are fantastic because they clean effectively without leaving behind lint or, worse, scratching the delicate glass surfaces.
Choosing Your Cleaning Solution
You really don't need harsh, fumy chemicals for this job. In fact, I find that gentle, homemade solutions often work best and are much safer to use in your kitchen.
A simple DIY paste made from baking soda and a bit of water is my go-to recommendation. It gives you just enough grit to scrub away the grime without being abrasive. Another great option is a spray bottle filled with equal parts white vinegar and water. Chances are you have both of these in your pantry already!
Below is a quick comparison of these two powerhouse solutions.
DIY Oven Glass Cleaning Solutions
Solution | Ingredients | Best For | Pro Tip |
|---|---|---|---|
Baking Soda Paste | Baking soda + a few drops of water | Tough, baked-on grease and food splatters. | Make the paste thick, like toothpaste, so it clings to the glass without dripping everywhere. |
Vinegar & Water Spray | 1 part white vinegar + 1 part water | Lighter grease, streaks, and general grime. | Spray it on, let it sit for a few minutes to break down the grease, then wipe clean. Great for a final polish. |
Both of these are non-toxic and surprisingly effective, so you can clean with peace of mind.
For a full rundown of what to use around the rest of your home, you can always check out our complete house cleaning checklist for more non-toxic ideas. It's a great resource for tackling other tricky spots in your home.
Pro Tip: For those really stubborn, baked-on grease spots that look like they've been there since last winter, a plastic scraper or even an old gift card can be a lifesaver. It gives you the leverage you need to lift the gunk without risking a scratch on the glass.
Tools for the "In-Place" Method
If you decide to try the method that doesn't involve removing the door, you'll need a special tool. Don't worry, you can easily make it yourself! A thin ruler or a straightened wire coat hanger works perfectly. Just wrap the end with a damp microfiber cloth and secure it tightly with a rubber band.
Most importantly, unplug your oven from the wall before you even think about starting. Safety first, always. It’s also a good idea to lay an old towel or a thick blanket on the floor right in front of the oven. This protects your kitchen floor and gives you a soft spot to set the oven door if you choose to take it off. Having everything ready ensures you can work safely and get the job done right.
Choosing Your Cleaning Method: Door Removal vs. Cleaning In Place
When you're trying to figure out how to clean the oven glass between the panes, you really have two main paths to take. The right one for your home in Madison really comes down to your oven model and how comfortable you are with a bit of hands-on disassembly.
The first method, and honestly the most thorough, involves taking the oven door completely off. This approach is the gold standard because it gives you direct, wide-open access to every single surface of the glass. It’s your best bet for a true, deep-down clean that gets rid of every last streak and speck of baked-on gunk.
If you go this route, you'll need to safely unlatch the door hinges, lift the heavy door off its frame, and carefully set it down on a protected work surface to take it apart. For a really stubborn mess, you might even consider fully removing the oven door by following a detailed guide.
The No-Removal Technique
The second option is what I call the 'no-removal' technique. This is a fantastic alternative if your oven's design makes door removal a pain, or if you’d just rather not take anything apart-and that's perfectly okay! Not everyone is up for a mini-engineering project in the middle of their kitchen.
For this clever workaround, you'll fashion a simple tool. Think of a thin ruler or a straightened wire hanger, wrapped snugly with a damp microfiber cloth that you've secured with a rubber band. You then slide this DIY tool through the ventilation slots-usually found at the bottom of the door-to carefully wipe the inner glass surfaces.
This method takes a bit of patience and a gentle hand, but it can be surprisingly effective for tackling that hazy film without any heavy lifting. It's an ideal choice for a quicker, less intensive clean-up.
A Quick Comparison* Door Removal: More thorough and effective, especially for heavy buildup. This is how you get that perfectly spotless, factory-fresh look.* Cleaning In Place: Quicker, easier, and requires no disassembly. It's great for routine maintenance or tackling light to moderate haze.
Making The Right Choice For Your Oven
So, which path should you choose? If you’re dealing with years of baked-on grease-that kind of stubborn grime we often see after a long Madison winter-taking the door off is absolutely worth the extra effort. It pretty much guarantees a flawless result.
On the other hand, if you're just noticing a light film and want a quick fix, the in-place method is a brilliant, low-stress solution. Both methods will make a huge difference in how your oven door looks.
The desire for a clean oven is a big deal, and it's fueled a significant market. According to Fortune Business Insights, the global oven cleaners market hit about $1.5 billion in 2023. As new oven technologies come out, proper care is more crucial than ever to avoid scratches and damage.
A Practical Guide to Cleaning Between the Glass
Alright, you've sized up the job and picked your strategy. Now for the satisfying part-actually getting that glass clean. Whether you're taking the door off for a deep scrub or using the clever in-place method, we'll walk you through it. Think of this as getting a little friendly advice from a neighbor in Fitchburg or Monona; we’re here to help you get a fantastic result without the frustration.
This simple graphic shows the two main paths you can take to clean between your oven's glass panes.
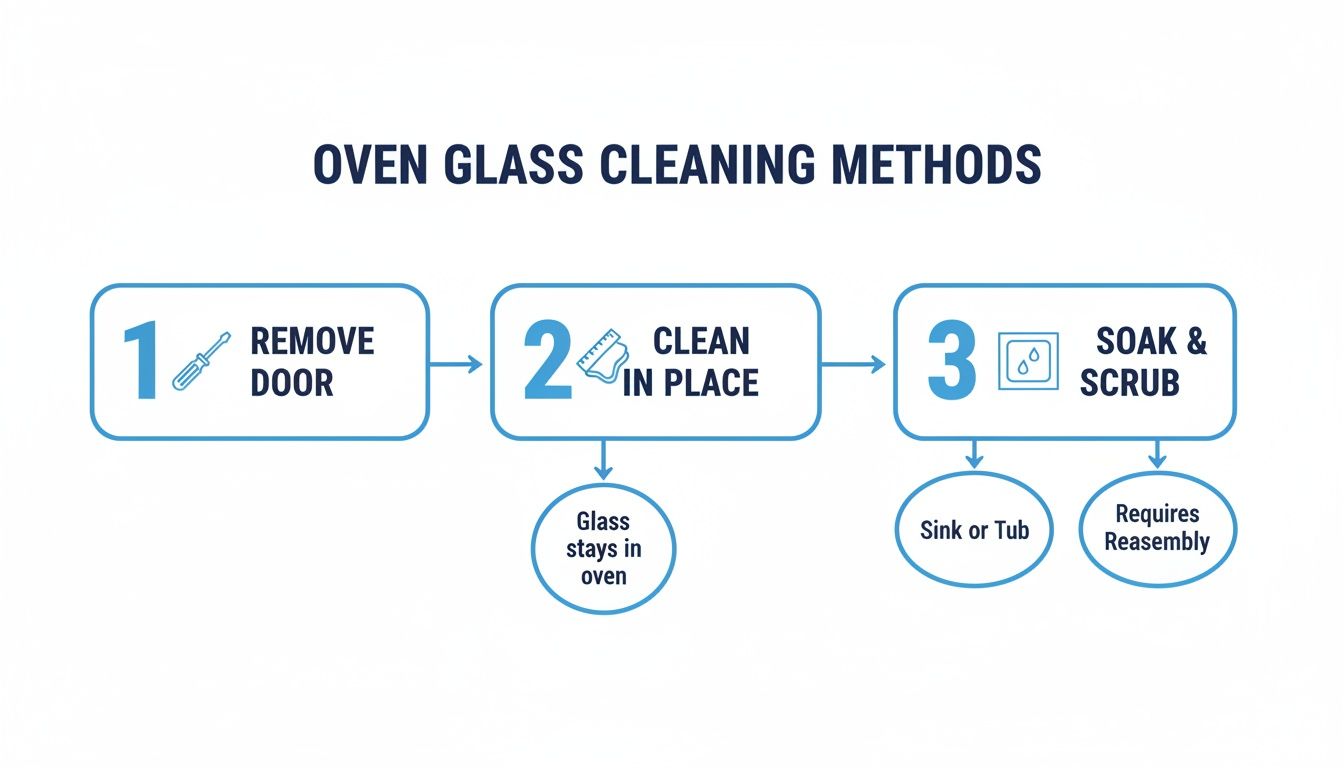
It really just comes down to this: removing the door is more involved, but cleaning it in place is a simpler, direct approach for less severe grime.
Method 1: The Door Removal Deep Clean
This is the most thorough way to get every last speck of grime. It might seem intimidating, but most modern oven doors are designed to come off fairly easily.
First, open your oven door completely. You’ll see small locking tabs or levers on each of the hinges. Flip these locks up-you might need a flathead screwdriver to gently pry them. Now, as you begin to close the door, it will stop partway. This is your cue to lift the entire door up and away from the oven frame. It will be heavy, so be prepared!
Once the door is off, lay it handle-down on the towel you prepared. You should see screws along the top or bottom edge holding the inner panel in place. Carefully remove these.
A Quick Tip: Grab a small bowl or a magnetic dish from the garage for your screws. They are tiny and have a magical ability to roll into the least accessible places. Keeping them contained saves a lot of headaches later.
With the screws out, you can gently separate the panels to access the inner glass panes. Now's the time to use your baking soda paste or vinegar spray to clean every surface. Once everything is sparkling, carefully reassemble the door in reverse order. Just be sure you don’t overtighten the screws, which can risk cracking the glass.
Method 2: The In-Place Cleaning Trick
This method is perfect for a quicker clean-up without any disassembly. You’ll need the tool we mentioned earlier-a thin ruler or wire hanger wrapped with a microfiber cloth and secured with a rubber band.
Slightly dampen the cloth with your cleaning solution. The key here is damp, not wet. You want just enough moisture to clean without having water dripping down between the glass panes. That would just create new streaks and be impossible to dry.
Next, find the vents at the bottom or top of your oven door. Carefully slide your cleaning tool into these slots. From here, it’s all about patience. Use slow, steady motions to maneuver the cloth across the glass, wiping away that hazy film. You may need to pull the tool out, rinse the cloth, and repeat a few times. It's a bit like playing that old "Operation" board game, but the reward is a beautifully clear oven door.
Putting It All Back Together
With the glass sparkling clean, the final step is putting everything back where it belongs. This isn't a part to rush. Rushing now can lead to frustration or, even worse, damage. Take your time here, just like you did with the cleaning, to make sure your oven is ready for your next culinary adventure.
First, gently guide the glass panes back into their frames or door panels. Look closely at any rubber gaskets or seals-they have to be lined up perfectly to ensure your oven holds heat the way it's supposed to. If a seal looks worn out or has a few cracks, this is the perfect moment to order a replacement.
Securing The Door and Checking Your Work
When it's time to put the screws back in, tighten them until they're just snug. It’s so important to avoid overtightening. Too much pressure can easily crack the glass. A good rule of thumb is to tighten until you feel a bit of resistance, then give it just a tiny extra turn and stop.
If you took the whole door off, reattaching it is your next big move. Line up the hinges with the slots on the oven frame and carefully slide the door back into place. Once it feels seated correctly, don't forget to push those hinge locks back down to secure it.
Final Check: Give the door a few gentle opens and closes. It should move smoothly without catching or making any weird noises. This quick test is all it takes to confirm the hinges are properly engaged and everything is aligned.
A final wipe-down of the exterior and a quick polish of any stainless steel will complete the job beautifully. Staying on top of this task prevents long-term buildup; in fact, regular cleaning stops about 40% of stubborn grime from becoming a permanent fixture.
If you followed all the steps but something still doesn't feel right, or if the reassembly feels a bit too tricky, don't hesitate to reach out. Our team at Shiny Go Clean is always here to help, and you can easily get in touch with us for professional advice or assistance.
When To Call For Oven Cleaning in Madison
Sometimes, a DIY project just isn't worth the headache. If you've tried all the steps and still see stubborn streaks, or if your oven door seems overly complicated to take apart, it’s smart to call for help. When baked-on grease is too stubborn for home remedies or you're worried about damaging your appliance, a professional can handle it safely and quickly.
As your local Madison cleaning experts, Shiny Go Clean tackles tough jobs like this every single day. Our fully vetted and insured teams have the right tools and experience to deliver a guaranteed spotless finish.
Save Your Time And Prevent Damage
Those really tough, baked-on messes can be difficult to remove without professional-grade solutions. In fact, industry reports show that risky home hacks can end up damaging the oven glass 15% of the time. It’s a common frustration-over 68% of households struggle with this exact problem at least once a quarter. The desire for a clean kitchen has fueled a huge market for effective products, which you can learn more about in this glass cleaner market report.
For exceptionally stubborn grime, or if you simply prefer to delegate the task, considering professional glass cleaning services can ensure the job is done right without any risk to your appliance.
Our oven cleaning service is often included as part of our deep cleaning for Madison homes. We handle the grime so you can get back to enjoying your weekend in Verona, Fitchburg, or right here in town. Let us make your oven look brand new again.
Ready to hand over this dreaded chore?
Give Shiny Go Clean a call at (608) 292-6848 for a free, no-obligation quote today.
A Few Last-Minute Questions About Cleaning Oven Glass
Here in Madison, we hear a lot of the same questions about cleaning that tricky spot between the oven glass panes. It’s a common frustration that stumps even the most careful homeowners. Here are some quick answers to the questions we get asked most often.
How Often Should I Clean Between The Oven Glass?
For most families, tackling this job once or twice a year is more than enough. If you’re a big fan of roasting or baking-especially during our chilly Wisconsin winters-you’ll probably notice that hazy buildup appearing a lot faster.
A good rule of thumb? Just clean it whenever you see streaks or smudges you can’t wipe away from the front or the inside of the door. That's your cue.
Can I Use A Harsher Chemical Cleaner To Speed It Up?
We really recommend you don't. Those aggressive, fume-heavy oven cleaners can easily damage the delicate seals around the glass or even permanently etch the surface. It's just not worth the risk.
A simple baking soda paste or a vinegar-and-water solution is much safer and works surprisingly well. It might take a little more patience and elbow grease, but your oven will thank you for it.
What If I Can't Get My Oven Door Off?
Whatever you do, don't force it! Some oven models simply aren't designed for the door to be removed easily by the owner. If that's the case with yours, the "in-place" cleaning method using a ruler or a wire hanger is definitely your best option.
If you’re still having trouble or just don't feel confident tackling it, that’s a clear sign it's time to call in a professional. For a better idea of what our deep cleaning services include, feel free to compare our cleaning packages and see how we can help.
Tired of battling baked-on grime? Let the professionals at Shiny Go Clean restore your oven to its former glory. Call us at (608) 292-6848 or book your Madison oven cleaning online in 60 seconds.
Comments