Search Results
280 results found with an empty search
- How Often Should You Clean Your Mattress and Box Spring?
Most people wash their sheets regularly but forget about what’s underneath. Your mattress and box spring are used every single night, yet they often go months or even years without a good cleaning. Over time, sweat, skin cells, and dust mites build up, even with clean linens on top. That mix can lead to unpleasant odors, stains, and a sleeping space that’s less than fresh. Summertime in Madison can bring on extra sweat, humidity, and allergens that settle into your bed. And if you live with pets, kids, or seasonal allergies, you’re probably feeling that extra layer of grime more than usual. A clean mattress and box spring make a world of difference, not just for the way your room smells, but for how well you sleep. Signs Your Mattress And Box Spring Need Cleaning It’s easy to ignore what’s hidden beneath your sheets, but the signs often become hard to miss. If your bed isn’t feeling as comfortable or fresh as usual, it might be time to take a closer look. You don’t need to spot every possible issue, but a few key signs stand out once you know what to watch for: - Visible stains: Sweat, spills, or pet accidents can leave obvious marks that soak into the surface. - Unpleasant odor: A musty or sour smell coming from your mattress is a warning something is trapped inside. - Allergy symptoms: Waking up with a stuffy nose or itchy eyes could mean dust mites or allergens have made themselves at home. - Itchy skin: Irritated skin can result from bacteria, dead skin cells, or lingering dirt affecting the surface layers. - Noise or sagging: If your box spring creaks, dips, or has broken slats, it may need repair or replacement, not just cleaning. These aren’t just eyesores. Many of these issues can affect your sleep quality, and some may even lead to health concerns over time. If your pet sleeps in your bed, or snacks and drinks are common in the bedroom, these signs may show up even sooner. Recommended Cleaning Frequency How often you clean your mattress and box spring depends on your living habits. For the average household, a deep clean twice a year is a good starting point. That clears away dust, skin flakes, sweat buildup, and anything else that might be hiding beneath the surface. If you have small children, indoor pets, or allergy sensitivity, you should consider bumping that up to every three to four months. Life brings messes, and the sooner you tackle them, the easier they are to manage. Beds in guest rooms may not need as much attention, but it’s a good idea to clean them before and after hosting overnight visitors. That way, guests can rest comfortably, and nothing unpleasant lingers after they leave. Keep in mind: - High-humidity areas or poorly ventilated rooms can increase the chance of mold or bacteria growth. - Eating in bed can lead to crumbs, spills, and even bugs if food particles aren’t caught early. - Sleeping with pets can introduce dander, fur, and tracked-in dirt that stays trapped until removed. Setting a seasonal reminder on your calendar to clean and inspect your mattress and box spring can help you build the habit. Your sleep space will smell fresher, feel better, and support a healthier rest. Effective Cleaning Methods Cleaning a mattress and box spring sounds simple enough, but it requires a certain approach to get it done right. A quick vacuum over the surface just won’t cut it when you're dealing with layers of built-up grime, body sweat, and dust hiding deep inside. These materials are thick, absorbent, and difficult to disinfect without the right tools or know-how. Professional bed cleaning services take care of what you can’t reach. They use tools that lift dirt and allergens from the core of the mattress. If you live in a hot, humid area like Madison, you’ve probably noticed how moisture in the air can make fabrics and soft surfaces feel sticky over time. That dampness doesn't just feel uncomfortable. It can attract bacteria and lead to odors if it sits there too long. A good pro team can help address things like: - Deep stains from spills or pet accidents - Lingering odors from sweat, humidity, or mildew - Dust mite buildup and allergy triggers - Debris hiding inside seams and corners Most at-home cleaners don't get past the top layer. That’s where the surface might look better afterward, but smell or health issues come right back. That’s why professional bed cleaning makes a noticeable difference between just looking cleaner and actually being clean where it counts. Maintaining A Clean Mattress And Box Spring Once you've had your bed cleaned, it's worth keeping it fresh for as long as possible. While deep cleaning needs to happen a couple of times a year, small habits can stop things from getting too dirty in between. Here are a few tips to help it stay in good shape: - Flip or rotate your mattress once every few months to keep it from wearing unevenly - Use a zip-up mattress protector to act as a barrier against sweat and dust - Vacuum mattresses and box springs with a clean brush attachment every time you wash your sheets - Avoid eating or drinking in bed to prevent spills - Keep pets off your bed if you’re sensitive to dander and fur You might also want to open a window or run a fan now and then to help improve airflow. That reduces trapped moisture, especially during those muggy Madison summers. If your mattress starts to feel damp, or the room smells musty, that’s a sign it might be time to get a professional back. Revitalize Your Bedroom With Professional Help A clean mattress and box spring can completely change how your nights feel. Your room smells better, your sheets stay fresher longer, and you wake up without feeling stuffy or itchy. You spend hours every night in that one spot. It deserves better than dust and sweat soaking in day after day. Keeping your bed clean isn’t just about appearance or smell. It’s about making the place where you rest actually supportive and healthy. Especially in cities like Madison, where summer heat pushes humidity levels up, doing this type of cleaning on a regular schedule saves you trouble down the line. A fresh, sanitized sleeping surface helps build a better sleep routine, and that reflects in your daily energy, mood, and focus. Transform your sleep space with our trusted bed cleaning service and enjoy the comfort of a fresher, healthier bed every night. Shiny Go Clean is here to eliminate hidden allergens, deep-set odors, and stains so you can rest easier. Contact us for a free quote or to schedule a service. You can also reach us at: 608-292-6848 .
- Maintaining a Clean Office: Tips and Benefits
Maintaining a clean office isn't just about aesthetics—it impacts the overall efficiency and health of your workspace. When you walk into an office that feels fresh and organized, it sets a positive tone for the day. A tidy environment not only reflects professionalism but also inspires creativity and boosts morale. For many businesses in the Madison, an office is more than just a place to work; it's a hub where ideas form and collaboration thrives. Ensuring this space remains clean is crucial for productivity and fostering a welcoming atmosphere. But why is a clean office so important? Think about how much time you and your employees spend there. A cluttered or untidy office can be distracting and lead to decreased efficiency. Around 94% of workers feel more productive when working in a clean workspace . Moreover, dust and allergens lurking in corners may contribute to health issues, resulting in more sick days. By prioritizing cleanliness, you create a healthier and more inviting space where employees can focus better and feel motivated to perform at their best. Why Keeping an Office Clean Matters The importance of a clean office extends beyond just having tidy desks or spotless floors. A well-maintained office influences several aspects of workplace dynamics. When everything is neat and organized, employees tend to feel more at ease and focused on their tasks. Imagine walking into a clutter-free office each morning—the atmosphere feels brighter, and the day's tasks seem more manageable. A clean environment naturally fosters a sense of pride and responsibility among team members. One of the key benefits of maintaining a clean office is improved productivity. Employees are more likely to perform better when they're not hindered by a chaotic or messy space. Cleanliness reduces distractions and makes it easier for everyone to find the tools they need, allowing for more efficient workflow. Moreover, a clean office is healthier. Regular cleaning can help prevent the spread of germs and allergens, reducing illness and the number of sick days taken. This means fewer disruptions and a more consistent work pace. A clean office also sends a strong message to clients and visitors about your business's attention to detail and commitment to professionalism. A positive first impression can influence perceptions and build trust with potential clients or partners. When they see that you take pride in the cleanliness of your workspace, they are more likely to believe you will extend that care to the services you offer. In summary, keeping an office clean is more than just about appearances. It's about fostering a productive, healthy, and welcoming environment that benefits both employees and visitors. By investing time in cleaning, you set the stage for success and create a space where everyone feels valued and ready to give their best. Daily Cleaning Routines for a Tidy Office Maintaining a tidy office each day involves setting up a simple daily routine that helps save time and creates a pleasant work environment. Having a clutter-free desk is one key step. Encourage everyone to spend a couple of minutes each day clearing unnecessary papers and organizing office supplies. Keeping surfaces clean ensures that everything is easy to find, which can save time and headaches when searching for important documents. Here's a quick list of daily tasks to keep an office tidy: - Wipe down desks and electronic devices, such as keyboards and phones. - Stack papers neatly and dispose of any unwanted materials. - Empty trash bins daily to avoid overflowing and unpleasant odors. - Clean communal areas like break rooms and kitchenettes, wiping counters and washing any dishes left behind. Engaging employees in daily cleaning routines fosters a sense of ownership and teamwork. When everyone does their part, the office remains neat and welcoming, improving mood and productivity. Weekly Office Cleaning Tasks While daily tasks help manage surface-level cleanliness, weekly cleaning tackles areas that need regular attention. Start by scheduling weekly vacuuming or mopping to ensure floors remain spotless. Regular floor maintenance prevents dirt buildup and helps maintain a professional appearance. Here are a few more weekly tasks to consider: - Dust shelves, window sills, and other surfaces where dust might accumulate. This can be important in the Madison area where the outdoor environment can bring a significant amount of dust in establishments. - Clean common areas and shared equipment, such as printers and copiers, to minimize dust and germ build-up. - Refresh restroom supplies, ensuring enough soaps and tissues are available. - Sanitize doorknobs and switches frequently touched to keep germs at bay. Weekly cleaning routines help uphold a high standard of cleanliness that minimizes potential hazards and makes the office environment more welcoming for both employees and visitors. Deep Cleaning Tips for a Spotless Office Deep cleaning involves more thorough tasks that reach beyond everyday maintenance, tackling areas often overlooked. This might include washing windows, cleaning light fixtures, and attending to hard-to-reach areas like high shelves or the tops of cabinets. This level of cleaning keeps the environment healthy and extends the life of office furniture and equipment. It's worth considering hiring a professional cleaning service for deep cleaning tasks. Professionals have the tools and expertise to handle detailed work efficiently. Beyond aesthetics, deep cleaning helps prevent larger maintenance issues by identifying and addressing problems early. Creating a Cleaning Schedule that Works Creating a set cleaning schedule ensures nothing slips through the cracks. Balance daily, weekly, and monthly cleaning tasks to maintain an organized and efficient routine. Assign specific tasks to individuals or teams and rotate them regularly to distribute the workload evenly. Consistency is key. Keep track of tasks and assess the effectiveness of the schedule periodically, adjusting as needed to fit the office's evolving requirements. Over time, employees will appreciate the structure and clarity, knowing what's expected. Transforming office cleanliness from a chore into a streamlined routine results in a more productive, enjoyable workplace for everyone. Concluding a regular cleaning routine with professional help keeps your office looking and feeling fresh every day. If you're thinking about upgrading your workspace, consider how an office cleaning service in the Madison area can make the difference. Shiny Go Clean is here to help you maintain a spotless environment that supports better focus, fewer distractions, and a healthier team overall.
- Professional Window Care: Removing Tough Stains
Windows are one of the first things people notice when they walk up to a home. Clean windows don’t just improve curb appeal. They also let in more natural light and make your space feel fresher and more open. When sunlight streams through spotless glass, it brings a different energy into the room. But keeping windows crystal clear isn’t always as simple as grabbing a cloth and spray bottle. Some stains are stubborn and don’t go away with regular cleaning. Things like hard water spots, bird droppings, or stuck-on pollen can cling to the glass no matter how many times you wipe. During the summer in Wisconsin, especially around areas like Madison and Verona, WI, windows are exposed to intense heat, dust, and debris. These conditions can cause stains to set in faster. That’s where understanding the type of stain and knowing how to treat it properly makes a big difference. Identifying Tough Window Stains Not every smudge or spot on your window is the same. Some can be gone in seconds with a microfiber cloth, while others hang around until properly treated. The first step to getting clean windows is knowing what you're dealing with. Here are some of the most common types of stubborn window stains: 1. Hard Water Stains: These show up as cloudy streaks or circles, often caused by sprinklers or rainwater drying on the glass. 2. Bird Droppings: Besides being unsightly, these can actually damage the surface of the glass if left too long. 3. Pollen and Dust: This is especially common during spring and early summer in Wisconsin when everything is in bloom and winds pick up. 4. Sap or Tar: These can come from nearby trees or heavy traffic and often require more than soap and water to remove. You’ll know a stain might need professional help if: - It doesn’t fade after a few cleanings - It leaves a rough or sticky residue on the surface - It’s starting to etch or discolor the glass around it A homeowner in Madison once had sprinkler water spraying directly onto a side window for weeks. The water dried over and over in the summer heat, creating chalky white marks that became permanent-looking. When regular cleaners didn’t help, that was the signal to bring in someone with the right tools to fix it safely. Understanding what causes these issues gives you a better shot at solving them and helps you avoid more damage in the long run. Effective Methods for Removing Tough Stains When faced with stubborn window stains, having some effective strategies in mind makes all the difference. For those looking to try some home remedies, a few household items might come in handy. Vinegar and baking soda are popular choices for tackling tough spots. Mixing equal parts vinegar and water can create a simple cleaning solution. Apply it to the stain, leave it on for a few minutes, then wipe away with a clean cloth. For heavier deposits, adding a sprinkle of baking soda to the vinegar solution boosts the cleaning power. But these home approaches don't always deliver results. When DIY methods fall short, it’s better to reach for specialized cleaning products. These are made to tackle problems like hard water or tar without scratching or dulling the glass. They work faster and leave a better finish. Tools matter too. A quality squeegee or microfiber cloth can make a world of difference. Using the right tools alongside professional-grade products helps give windows a streak-free finish that really shines. Preventive Measures to Keep Windows Stain-Free Now that your windows are spotless, how do you keep them that way? It starts with regular upkeep. Adding window cleaning to your monthly home care routine stops grime from building up and keeps everything looking fresh. But regular wiping isn’t the only thing that helps. Here are a few ideas to lessen the mess: - Trim trees or tall shrubs near windows to keep sap and leaves away - Point sprinklers away from the house to reduce water stains - Put up screens that block out bugs and dirt Cleaning gets easier when there's less mess to deal with in the first place. Protective window treatments can also be helpful. Certain coatings repel dust and water, making stains less likely to stick. These make windows easier to maintain between cleanings and keep the shine lasting longer. Keeping windows stain-free isn’t about deep cleaning every week. It’s about smart habits and a little forward thinking. The Role of Professional Window Cleaning Services Sometimes no matter how many sprays, wipes, or scrubs you try, stains hang on. That’s where hiring experts can make a big difference. Professional window cleaners show up with commercial tools, stronger formulas, and years of experience. They don’t just make your windows look good. They take the time to identify the type of stain and use the right method to make it disappear. Here’s what you can expect from a professional window cleaning service: - A close look at each window to spot the tough areas - The use of pro-grade products that tackle stains without damaging the glass - Results that last longer and help your whole home feel cleaner In Dane County, the heat and dry air in summer can bake stains into the surface. Acting quickly and calling in experts before things get worse saves money down the line. Plus, it gives you peace of mind knowing the job is done right. There’s no second guessing whether you’re using the wrong product or causing more harm. When done professionally, clean windows can last longer between sessions and make your entire space look more put together. Clear Views Ahead A clean window doesn’t just reflect sunlight. It reflects the pride you take in your home. Getting rid of tough stains helps brighten each room and opens up your view of the outdoors. Whether it’s pollen from a spring breeze or a stubborn water mark left by the sprinkler, these annoyances don’t have to last forever. With the right care, stains can be managed before they cause problems. From regular cleaning to protective treatments, there are smart ways to stay ahead of grime. And when the stains go beyond what a cloth and spray can handle, it might be time to call in a trusted professional. Keeping windows clear helps every part of your home feel fresher. It’s one small thing that makes a big visual impact. Ready to experience the difference professional care makes? Keep your home as bright and inviting as possible by choosing Shiny Go Clean for expert window cleaning services . Maintaining the clarity of your windows not only enhances your view but also protects the quality of your glass. Let us help you enjoy a clearer outlook today.
- When Should You Schedule Carpet Steam Cleaning
Carpet steam cleaning is one of those things that can make a big difference, but a lot of folks aren't quite sure when they should actually book it. It’s easy to overlook your carpets since messes and odors build up slowly over time. But when left untreated, all that dirt and grime gets deep into the fibers, making the carpet look worn and feel less fresh under your feet. Steaming doesn’t just make your floors look clean again, it kills bacteria, lifts stains, and helps your space smell better too. But when’s the right time to schedule a steam clean? Answering that can help keep your carpets in good shape longer. There are simple signs your home might be due for one, like leftover food smells after hosting a dinner party or clouds of dust getting kicked up during renovations. Living in a place like Verona WI, where family gatherings, pets, and busy schedules are common, it’s easy for carpets to take on more than they can handle. Waiting too long can lead to permanent wear or trapped smells that just don’t disappear with vacuuming. The Best Times To Schedule Carpet Steam Cleaning There’s no one-size-fits-all answer to when you should get your carpets steamed, but there are clear moments when it makes more sense than others. Timing it right protects your home, keeps things more comfortable, and saves your carpets from deep damage. Here are some of the best times to schedule your next steam cleaning. 1. After Hosting a Big Gathering Birthday parties, game nights, and family holidays are often fun but messy. People come in and out with shoes on, drinks can get spilled, and crumbs dive into the carpets before anyone catches them. After everyone’s packed up and gone, a professional carpet steaming can get rid of all the built-up dirt and lift any stains or food odors left behind. 2. When Seasons Change Madison summers are hot and winters can still get wet. At the end of spring or fall, when the weather shifts, it’s a great time to freshen up carpets. During the warmer months, pollen and allergens get tracked inside. During the cooler months, mud and salt can leave build-up over time. Carpet steaming helps eliminate lingering allergens and refreshes the overall feel of your home as you prepare for the season ahead. 3. After Renovations or Construction Even the cleanest construction project leaves behind dust that settles deep. Whether it’s a full room remodel or small home fix, microscopic dust and debris can land between carpet layers. Post-construction, it's common to see hazy lines around furniture or a gritty texture underfoot. Steaming can lift that hidden layer of grime and help bring your carpets back to pre-project condition. Make sure the space is fully cleared and that HVAC filters are changed beforehand. 4. When You’re Moving In or Out New place? Get a clean slate by steaming carpets before bringing in your furniture. It clears out whatever the last tenant left behind and gives your home a fresh start. On the way out, a professional clean can help meet rental requirements and leave the property in good shape for the next person. If there’s a deposit at stake, clean carpets can help ensure you get it back. 5. If You Have Pets at Home Even the most well-behaved dog or cat leaves paw prints and fur behind. And if your pet has ever had an accident indoors, you know that smell isn’t easy to get rid of. Regular carpet steaming can handle accidents, cut down on dander, and remove smells that standard cleaners can’t. It also helps keep the air cleaner for everyone in the home. Whether it's a seasonal shift or cleaning up after a celebration, scheduling your carpet steam cleaning at the right time can help your floors look better and feel more comfortable underfoot. Jobs like renovations or moves make steam cleaning more than just a good idea, they make it a real need. Factors That Indicate Your Carpet Needs Steam Cleaning Understanding when to steam clean your carpets involves picking up on some key signs. These let you know your carpets are ready for a deeper clean than your vacuum can handle. 1. Visible Stains and Spills Accidents happen, and they often leave a mark. Spilled drinks, muddy shoes, or dropped food are common culprits. These spots not only look bad but get harder to remove over time. Ignoring them can also lead to discoloration, which affects the carpet’s appearance long term. Professional steam cleaning is a strong option to lift those stains and bring your carpet back to life. 2. Odors and Mustiness If your room smells off, it could be your carpet. Carpets can trap the smells of old spills, pet accidents, or whatever’s been tracked in from outside. Some odors go deeper than any spray or powder can treat. These smells usually settle in the padding below your carpet. Steam cleaning reaches deep enough to clear out odors from the source and leaves your space smelling fresh again. 3. Increased Allergy Symptoms If someone in the house is sneezing more or rubbing their eyes often, the carpet might be to blame. Carpets hold onto dust, pollen, and pet dander. These allergens become stuck inside the fibers where your vacuum might miss them. Steam cleaning can help reduce symptoms by removing pollen and dust that pile up over time. Advantages of Professional Carpet Steam Cleaning Not all cleaning is created equal. Relying on a regular vacuum can only take your carpet so far. Bringing in professionals adds deeper results that go beyond looks. 1. Deep Cleaning Efficiency Professional-grade steam cleaners dig into areas that home machines or vacuums can’t reach. They pull up layers of dirt, allergens, and debris that are stuck down between the fibers. That means better air quality, refreshed flooring, and a more comfortable space for everyone. 2. Time and Effort Saving Renting or owning a steam cleaner takes effort. You have to move around furniture, learn how the machine works, and make multiple passes to see results. A professional crew already knows how to deal with all types of flooring and carpet materials. Choosing them saves your time and gets the job done right the first time. Making The Most Of Your Carpet Steam Cleaning Service Getting carpets professionally cleaned is a great decision, but a little prep work can make the process even smoother. Here are a few tips to get the best out of every steam cleaning visit. - Preparing Your Home - Clear the room of small items or breakables so nothing is in the way. - Move furniture if you can, or ask ahead if movers are needed. - Point out any major stains or trouble spots so they get the care they need. - Make sure pets are in a safe place and out of the rooms being cleaned. - Post-Cleaning Care - Let your carpets dry fully before placing large items back in the room. - Use fans or open windows to help things dry faster. - Add rugs to high-traffic areas to keep new dirt from piling up. - Vacuum often to help protect the work that’s been done. Bring Out the Best in Your Home with Cleaner Carpets Knowing when to schedule a carpet steam cleaning can help you avoid damage and keep your living space comfortable all year round. Good timing goes a long way, whether it’s after a party, a remodel, or during a change in season. If you’ve been seeing stains, smelling something musty, or dealing with allergy symptoms at home, it could all point back to your carpet. A professional steaming service offers a deep clean you can’t match with regular tools. Pets, parties, dust, or just time itself can take a toll on your carpet. But with the right service and a bit of planning, your floors can feel soft, clean, and look brand new again. To keep your carpets looking and feeling fresh, it's important to know when they need attention. Recognize the signs, understand the timing, and let Shiny Go Clean guide you with our expert carpet steaming service . With the right care, you can maintain your home's comfort and cleanliness without the stress. Contact Shiny Go Clean for a free quote! You can also call us at: 608-292-6848
- Is $30 an Hour Good for House Cleaning?
When figuring out how much house cleaning costs, it's important to understand the different elements that contribute to these rates. From the size of your home to how often you need a cleaning service, many factors can impact what you pay. This is especially true in Madison, where the dust can settle in every corner due to the local weather. Pet owners might find themselves battling pet hair on a daily basis, making cleaning services even more valuable. Choosing a house cleaning service isn't just about the price tag. It's also about the peace of mind you get when professionals handle the details. Whether it's tackling the pileup of dust or making sure pet hair doesn't take over, a reliable cleaning service can make a huge difference in your home. Let's explore what makes a good cleaning rate and how external factors specific to Madison can influence these costs. Factors Influencing House Cleaning Rates Several key factors determine how much you might pay for house cleaning services. Here’s a closer look at what influences these rates: - Size and Condition of the Home: Larger homes typically require more time and effort to clean, which can increase the cost. Similarly, if the home hasn’t been cleaned in a while and requires more intensive attention, the price may go up. - Frequency of Cleaning Services: Regular cleanings often cost less per visit because the home stays tidier over time. You can opt for weekly, bi-weekly, or monthly services. Those who choose more frequent visits might find that they save in the long run. - Specific Tasks and Services Included: Rates also vary based on what's included in the service. Basic cleaning might cover general dusting and vacuuming, while more comprehensive services might include things like deep cleaning the kitchen or scrubbing bathroom grout. It's always a good idea to assess the unique needs of your home, especially in a city like Madison. With the city's weather patterns, dust build-up requires ongoing care. This makes choosing the right cleaning plan crucial to ensure your home stays fresh and inviting. Pet owners also have to think about regular removal of pet hair to keep their space comfortable and clean. As you consider cleaning services, take note of these factors to make an informed decision about what works best for your household needs. Is $30 an Hour Fair for House Cleaning? When considering whether $30 an hour is reasonable for house cleaning, it helps to look at a few important points. First, think about regional costs. Madison, like many big cities, has its own economic landscape that affects everything from groceries to services like house cleaning. The living expenses here can impact what people see as a fair rate, as well as what businesses need to charge to cover their costs. It's also useful to compare rates in Madison with those in other areas. While $30 an hour might seem high to some, in places with a higher cost of living, this might be the norm. Understanding these regional differences gives a clearer picture of what's fair. Cleaning services around Madison take into account many elements, including how different homes are and what kind of care they need due to local weather conditions. A Special Note on Pet Hair and Dust in Madison Homes Madison homeowners face unique challenges, especially with the area's climate. Dust settles more quickly due to the dry conditions, leading to layers of grime that can quickly build up. Regular cleaning becomes key to keeping homes healthy and looking their best. Pet hair poses another challenge. Whether it's a dog or cat, furry friends shed a lot, leaving hair on furniture, rugs, and sometimes even hard-to-reach spots. This can make cleaning a bit tricky. Here are a few challenges you might face: - Removing hair from upholstery often requires special tools or extra effort. - Tiny dust particles can mix with pet dander, leading to allergies or respiratory problems. - Regular cleaning appointments help manage this by staying ahead of the accumulation. Understanding these specifics about Madison homes can make it clearer why rates might be set as they are. Cleaning services must deal with these conditions effectively, often necessitating particular products or techniques. Why Choosing the Right Cleaning Service Matters Making the right choice for a cleaning service isn't just about finding the lowest price. It's about finding a team that understands the quirks of Madison living and can handle local challenges with expertise. The team you pick should feel more like an extension of your home care routine, bringing you peace of mind and freeing up time for what's important to you. With distinct factors at play, such as Wisconsin weather and the potential for pet-related mess, choosing a service that meets your specific needs can transform your living space. It’s all about achieving that comfortable, clean environment where you and your family can thrive. For those dealing with the constant dust and pet hair that comes with living in Madison, our team at Shiny Go Clean is here to help. Take a look at our full range of cleaning services in Madison to find a solution that keeps your home feeling fresh, clean, and comfortable all year round.
- A Quick Way to Refresh Guest Rooms in Madison, WI
September arrives fast in Madison, WI , and packed routines come right along with it. Between work, school, and the first signs of cooler weather, preparing for guests often gets bumped down the list. It is usually not until someone texts that they are coming by that the race to get the guest bedroom ready begins. Getting that space in shape does not have to feel rushed. A clean and calm guest room changes everything when visitors walk in, helping them feel instantly welcome. Fresh bedding, clear surfaces, and a tidy setup show you care, even when the visit is short. With a solid plan and reliable support, bedroom cleaning services help you turn a quick tidy into something that lasts, with less pressure on your own schedule. Fresh Air and Clear Surfaces Set the Tone Start with basics before adding extras. Open the window and let some outside air in, then swap out the bedding. That simple step makes the guest space feel instantly less stale and more inviting. Fresh sheets and a cool breeze can change the entire mood of a room in minutes. Pay attention to the surfaces. Guests quickly notice dust on nightstands or smudges on mirrors and dressers. These spots are often ignored day-to-day, but they make the biggest impression. Even window ledges, often missed during quick cleans, stand out at eye level when someone sits on the bed. A little time spent dusting, airing the room, or folding a blanket neatly makes a difference. These simple touches replace panic with a sense of quiet care, making your space feel prepped without last-minute stress. Tackling the Hidden Spots Guests Notice Busy weeks can make it easy to overlook details, especially in guest rooms rarely used. But guests, especially those staying overnight, spot everything. Stillness in the space gives them plenty of time to see the corners below chairs and the area behind nightstands or closet doors. Baseboards and floor edges gather dust and lint quickly, just like the closet bottom or space under the bed. Most families miss these until an unexpected overnight visitor spots them. Webs near vents or under furniture are other areas that get forgotten, but are some of the most obvious signs of neglect when guests drop their bags. Consistent, detail-focused cleaning makes these hidden areas less stressful. When professional bedroom cleaning services handle deep and hard-to-reach spots, you will not worry about missing a thing. Your guest room stays comfortable, even if life gets busy and you are pulled in many directions. Timing Your Room Refresh Before Seasonal Visits The end of summer in Madison, WI is a prime time to get ready before fall events and family gatherings set in. The weather makes airing out a room easy, and the calendar is still quiet enough to allow for an uninterrupted clean. Being ready early does not only reduce stress when company visits. It provides peace of mind for daily surprises, like a friend needing a place to stay or a family member visiting at the last minute. Refreshing the space now keeps you flexible throughout the season. Getting ahead makes it much easier to avoid frantic prepping. The clean guest room becomes part of your home’s new rhythm instead of a recurring emergency project. Keeping It Clean With Less Stress Once your guest room looks and feels fresh, maintaining it is a lighter lift. Weekly habits, like letting in fresh air or handling laundry in the guest space, help keep it from getting musty or cluttered. It is easier to spot something out of place and tidy up when you use the room on a regular basis, even just for a small task. Consistency is key. When you rely on a cleaning routine that covers more than the basics—like dusting behind furniture or vacuuming unreachable corners—you will not fall behind. Support from bedroom cleaning services in Madison, WI means the heavy lifting is managed, so you can focus on life, not scrubbing before guests arrive unexpectedly. Over the long run, these small steps make a big difference. A whole-house cleaning routine that includes the guest room helps keep buildup away, even if you only have visitors once in a while. Your house starts to feel set up, not like it is always one step behind. A Better Space for Guests, Without the Rush A guest room does not need anything fancy. It just needs to be clean, calm, and ready. That could mean fresh bedding, floors free of dust, or nicely folded blankets at the foot of the bed. Those things matter to visitors and help everyone relax. Guests do not remember perfect style, but they always remember a space that is cared for. With routines shifting this September, now is a natural time in Madison, WI households for a quick reset. A little planning today takes away the future scramble and lets you welcome friends or family with ease. Whether your guests stay for one night or a whole week, the comfort of a clean room will stick with them and leave you less stressed when the doorbell rings. Getting ready for visitors can come with a long to-do list, but we’re here to help make it simpler. Our Madison, WI -based team at Shiny Go Clean offers support for homes of all sizes, whether it's refreshing high-traffic areas or tackling those often-overlooked corners. See where our bedroom cleaning services might fit into your home routine, and give us a call at 608-292-6848 when you're ready to get started.
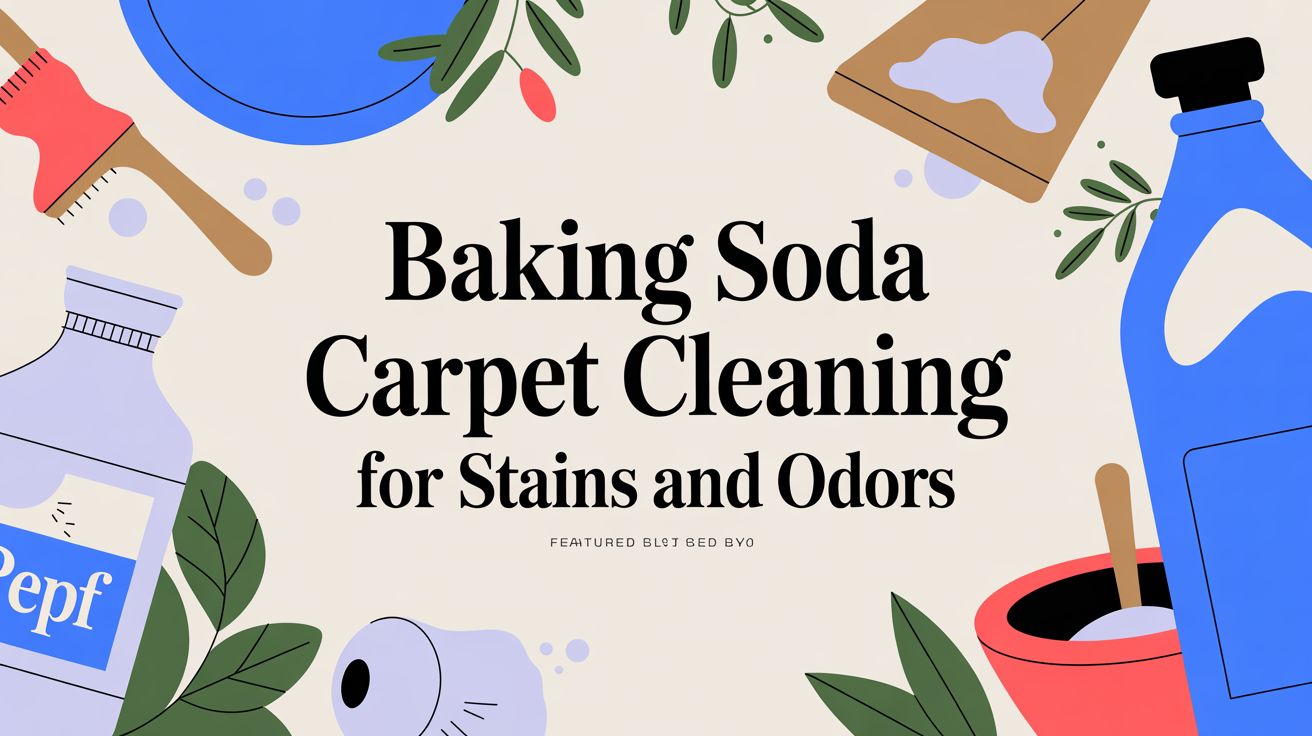
- Baking Soda Carpet Cleaning for Stains and Odors
Without a doubt, baking soda is excellent for cleaning carpets . Its mild alkaline properties are fantastic at breaking down everyday dirt and neutralizing those stubborn acidic odors from pets or spills. It's a simple pantry staple that acts as a gentle abrasive, lifting grime without being harsh on your carpet fibers. Honestly, it’s one of the safest and most effective natural solutions for freshening up your home. Why Baking Soda Is a Carpet Cleaning Powerhouse Before you reach for a bottle of harsh chemicals, it’s worth understanding why this simple white powder works so well. Baking soda, or sodium bicarbonate, is a go-to for families in Dane County because it solves common carpet problems on a chemical level—safely and affordably. Its real power lies in its unique properties. The mild alkalinity is perfect for cutting through the grease and grime that gets tracked into our homes day after day. But more importantly, it doesn't just mask unpleasant smells; it chemically neutralizes them. Neutralizing Stubborn Odors Think about the most common household smells—pet accidents, spilled coffee, or that lingering smoky scent. Most of them are acidic. Because baking soda is a weak base, it creates a chemical reaction when it comes into contact with these acidic molecules, effectively neutralizing them. This is exactly why it’s so good at eliminating smells for good, rather than just covering them up with heavy fragrances. A deep clean with baking soda doesn't just hide odors; it gets rid of the source. It’s a foundational step for anyone looking to refresh their living space without resorting to synthetic sprays or costly treatments. Gentle Yet Effective Cleaning Action Beyond its deodorizing magic, baking soda’s fine crystalline structure makes it a fantastic gentle abrasive. The particles are just coarse enough to scrub away dirt embedded deep in carpet fibers without causing the fraying or damage you might risk with some commercial cleaners. This makes a simple baking soda treatment a safe bet for most types of carpet. This isn't just a household secret, either. The global baking soda market was valued at around USD 4.70 billion and is projected to hit about USD 9.40 billion by 2035 , with the cleaning industry being a major driver. Its ability to absorb odors and break down fatty acids has made it a superstar natural alternative. Ultimately, using baking soda just aligns with the goal of a healthier, cleaner home. For more ideas on effective, non-toxic solutions, check out our guide on natural cleaning products that actually work . How to Prep Your Carpet for the Best Results It’s tempting to jump right in and sprinkle baking soda everywhere, but that’s a common mistake that can actually trap dirt and make things worse. To get a truly effective clean, you need to prep the area first. Think of it like painting a wall—you wouldn’t start slapping on paint without cleaning the surface first, right? The most critical first step is a thorough vacuuming. This isn’t just a quick pass over the middle of the room. Your goal here is to pull up all the loose dust, pet hair, and crumbs so the baking soda can get straight to work on the deeper-set grime and odors. The Power of a Deep Vacuum Start by using your vacuum’s standard floor head to clean the main carpeted areas. Go slowly. Make overlapping passes from a few different directions to really lift as much dirt as possible from the carpet fibers. Next, it’s time to switch to your attachments for the detail work: Crevice Tool: Get this right into the edges where the carpet meets the baseboards. It’s a favorite hiding spot for dust bunnies and hair. Upholstery or Brush Tool: This one is perfect for running along the baseboards themselves and for getting into the corners of carpeted stairs. Putting in this extra effort ensures you're not just turning loose dirt into a muddy paste when you apply your baking soda later. For homeowners in busy areas like Burnaby or Surrey, this step alone can make a huge difference in how fresh your home feels. The Non-Negotiable Patch Test Before you go sprinkling baking soda all over your living room, you absolutely have to do a patch test. While baking soda is safe for most carpets, it's always better to be cautious and avoid any potential discoloration. Taking just five extra minutes for a patch test can save you from a costly mistake. It’s the single most important step to protect your carpet investment. Find a small, hidden spot to run your test—under a sofa, behind a door, or inside a closet are all great options. Just apply a small amount of your baking soda mixture to the area, let it sit for the recommended time, and then vacuum it up completely. Check the spot carefully for any changes in color or texture. If everything looks good, you're ready to move forward with confidence. This simple precaution is a professional best practice we recommend to all our clients, whether they need house cleaning in Madison WI. Choosing Your Baking Soda Application Method Once your carpet is prepped and ready, it's time to pick the right approach. The method you choose really comes down to what you're trying to accomplish. Are you doing a quick all-over refresh, or are you tackling a specific, stubborn spot? Both dry and wet applications work wonders, but they're built for different jobs. The classic dry sprinkle is your go-to for general deodorizing. It’s fast, simple, and perfect for neutralizing those everyday household smells that seem to build up out of nowhere. This method is all about spreading a light, even layer to soak up odors before you vacuum them away for good. But for a deeper clean, especially in high-traffic hallways or on noticeable spots, a wet application is your best bet. By making a paste or a spray, you’re letting the baking soda get to work more intensely, breaking down the kind of ground-in dirt that a simple sprinkle can't always lift. To make it easier to decide, here’s a quick guide to see which method fits your situation best. Baking Soda Cleaning Methods At A Glance Cleaning Goal Method Ingredients Recommended Dwell Time General Deodorizing Dry Sprinkle Baking Soda 15 minutes to overnight Spot & Stain Removal Paste Baking Soda, Water Until completely dry Large Soiled Areas Spray Solution Baking Soda, Warm Water About 1 hour This table should help you quickly match your cleaning needs with the right tools and timing. Now, let’s dig into how to execute each one properly. The Dry Sprinkle for a Fresh Carpet The most common way to use baking soda on carpets is the dry application. It's the ideal trick for a weekly or monthly refresh to keep your home smelling clean, especially if you have pets or live in a busy area like Madison. To get a perfectly even layer, resist the urge to just shake the box over the carpet. That almost always leads to clumps and an uneven coat. Instead, grab a tool from your kitchen for much better control. A Flour Sifter or Fine-Mesh Sieve: This is the secret weapon for a professional-level sprinkle. It guarantees you get a light, even dusting across the entire surface. A Shaker Jar: A clean parmesan cheese shaker or a jar with holes poked in the lid also works beautifully to control the flow and prevent heavy spots. After you've sprinkled, just let it sit. For a quick refresh, 15 to 30 minutes is plenty. For more persistent odors, like those from a damp Richmond winter, leaving it for several hours or even overnight can make a huge difference. Wet Applications for Targeted Cleaning When you're dealing with more than just smells—think a muddy paw print or a food spill—a wet application gives you the extra muscle needed to lift the stain. This is where you create a simple but powerful cleaning solution. The demand for effective, versatile cleaning products is growing, with the global carpet cleaner market projected to reach USD 1,106.3 million by 2033 . This growth shows just how much people value versatile products, and many new formulas are incorporating the natural power of ingredients like baking soda. Simple Baking Soda Paste Recipe: Mix a half-cup of baking soda with a few tablespoons of water until you have a thick, spreadable paste. You're looking for a consistency similar to frosting. This paste is perfect for dabbing directly onto a stain. Use a spoon or your fingers to apply it, gently working it into the carpet fibers without scrubbing too hard. Let it dry completely—this is the most important part—before scraping off the excess and vacuuming the spot thoroughly. For larger soiled areas, a spray is much more practical. Just mix two tablespoons of baking soda into a spray bottle with two cups of warm water and shake it well. Lightly mist the area, let it sit for about an hour, then blot and vacuum. Before you start any of this, the simple decision tree below shows the crucial prep steps you can't skip, no matter which method you choose. As the visual guide shows, vacuuming first and doing a quick patch test are non-negotiable. These steps are what ensure you get a safe and effective clean every time. Targeted Treatments for Tough Carpet Stains While a general sprinkle of baking soda is great for everyday deodorizing, those stubborn, set-in stains need a more focused attack. Not every spill is the same, so your cleaning method shouldn't be either. Whether it's a tipped-over coffee mug in your Richmond home office or a greasy pizza slice that landed face-down in the living room, a targeted treatment is your best shot at getting it all out. The real key is to move fast and use the right mixture for that specific kind of stain. And always remember the golden rule of stain removal: blot, don't rub . Rubbing just grinds the mess deeper into the carpet fibers, making it a nightmare to lift out later. Tackling Oily and Greasy Stains Oil-based stains from salad dressing, butter, or greasy foods are a special kind of tricky because they repel water. For these, you need something that can soak up the oil before you even think about cleaning the spot. A simple mix of baking soda and cornstarch does this beautifully. Blot Immediately: Grab a clean, dry cloth and press firmly to absorb as much of the grease as you can. Mix an Absorbent Powder: In a small bowl, mix equal parts baking soda and cornstarch. Cover the Stain: Sprinkle the powder generously over the entire greasy area. Don’t be shy—make sure it’s completely covered. Let It Sit: Give the mixture at least 15-30 minutes to work its magic. For really bad stains, an hour or more lets it draw out even more of the oil. Vacuum Thoroughly: Once time's up, vacuum the powder away. The stain should be much lighter, if not gone completely. This method works because the powder pulls the grease up and out of the carpet fibers, trapping it so it can be easily vacuumed away. Removing Pet Urine Stains and Odors Pet accidents are a common headache, leaving behind both a visible stain and a lingering acidic odor that can invite your furry friend back to the same spot. Baking soda is perfect here because it neutralizes the uric acid causing that smell. For a deeper dive into this all-too-common problem, check out our guide on removing pet stains from your carpet and furniture . Pro Tip: For fresh pet urine, first blot the area with a clean towel to soak up as much liquid as possible. Then, cover the spot generously with baking soda and let it sit overnight to fully absorb the odor before vacuuming it up in the morning. It's clear that people trust simple, effective solutions for these messes. The carpet spot remover market was valued at a whopping USD 1.1 billion globally and is projected to nearly double by 2034. Baking soda-based products and similar conventional removers dominate this market, holding a 72.4% share , which just goes to show how much people rely on their power and affordability. You can read the full research on these spot remover market trends . Lifting Organic Stains Like Wine and Coffee Spills like red wine, coffee, or juice can send anyone into a panic, especially on a light-colored carpet. For these organic stains, a paste made from baking soda and hydrogen peroxide can be a lifesaver. But a word of caution: hydrogen peroxide can have a slight bleaching effect, so it's absolutely critical to test this solution on a hidden spot first, like inside a closet or under a sofa. Here’s a reliable game plan for those heart-stopping spills: First, blot the spill with a clean, dry cloth to get rid of any excess liquid. Next, create a paste by mixing one part hydrogen peroxide with two parts baking soda. Then, apply the paste directly to the stain, gently dabbing it onto the carpet fibers. Let it sit for about an hour, or until the paste is completely dry to the touch. Finally, scrape off the dried paste with a dull edge and vacuum the area thoroughly. For homeowners from Burnaby to Delta, having these simple recipes ready gives you the confidence to handle almost any carpet emergency. But for those tougher, set-in stains that just won't budge, the professional maid service in Madison from Shiny Go Clean is always here to help. Common Baking Soda Cleaning Mistakes to Avoid Baking soda is a fantastic DIY tool for carpet cleaning, but a few simple missteps can turn a good effort into a frustrating mess. It's easy to get it wrong, and plenty of homeowners learn the hard way. With a little foresight, though, you can get it right the first time. One of the most frequent errors is using too much water when you're making a paste or a spray. It feels like more moisture should mean a deeper clean, but this can really backfire. Soaking your carpet can actually damage the backing and padding underneath, and that can lead to mildew growth and musty odors—the very problem you were trying to fix. Always aim for a damp application, never a saturated one. The Problem with Leftover Residue Another common issue is not vacuuming thoroughly enough. After you’ve let the baking soda sit and do its job, it’s absolutely critical to get every last bit of that powder up. If you don't, you'll be left with a chalky, white residue that just dulls your carpet’s color. Worse, any powder left behind will start to attract and hold onto new dirt, creating a muddy paste over time. To make sure that doesn't happen, try these vacuuming tips: Go Slowly: Move your vacuum at about half your normal speed. This gives it the time it needs to lift all those fine particles from deep within the fibers. Multiple Passes: Vacuum the entire area from a few different directions—go north-to-south first, then switch to east-to-west. This helps agitate and lift the powder from all sides of the carpet fibers. Check Your Bag/Canister: Always start with an empty vacuum canister and a clean filter. That fine powder can clog up your vacuum fast, which kills its suction power. A thorough, multi-directional vacuuming isn't just a final step; it's the most critical part of the entire process. Rushing here can undo all your hard work. Avoiding Unwanted Chemical Reactions Finally, a dangerous mistake is mixing baking soda with certain commercial cleaners. You should never combine baking soda with a store-bought carpet shampoo or stain remover unless the product label explicitly says it's safe to do so. Mixing chemicals without knowing what you're doing can create some nasty, unexpected reactions, potentially releasing harmful fumes or even causing permanent discoloration on your carpet. Stick to simple, proven combinations like baking soda with water or a little bit of vinegar. Following this advice helps ensure everyone from Verona to Madison has a safe and effective cleaning experience. For those jobs that require more than a simple DIY approach, our professional maid service in Madison at Shiny Go Clean is always ready to step in and restore your carpets. When Your Carpet Needs Professional Care While baking soda carpet cleaning is a fantastic tool for routine deodorizing and handling minor spills, it definitely has its limits. Sometimes, a DIY approach just won’t deliver the deep, restorative clean your carpets truly need. Knowing when to call in the professionals is key to protecting your investment and ensuring a genuinely clean home. If you're dealing with stubborn, set-in stains that have been there for weeks, it's time to put down the shaker box. The same goes for persistent odors that keep coming back no matter what you do, or if you have delicate fibers like wool or silk. These scenarios call for specialized equipment and professional-grade solutions that get deep into the carpet padding without causing damage. Signs It Is Time to Call a Pro Think of it this way: your DIY methods are like daily maintenance, but a professional service is like a deep-tissue massage for your floors. When you need guaranteed results for deeply embedded dirt or overwhelming odors, a professional service is the most effective and safest choice. This is especially true after events like a flooded basement or a significant pet accident. For those in Madison, our reliable maid service Madison provides the same exceptional care. You can reach us at (608) 292-6848 or shinygoclean.com/madison . If you're still on the fence, you can learn more about the signs your carpet needs professional shampooing in our detailed guide. Common Questions About Cleaning Carpets with Baking Soda We get a lot of questions about the little details of using baking soda on carpets. Getting these things right is what makes the difference between a quick refresh and a deep, effective clean. Here are some of the most common ones we hear from our Madison cleaning . How Long Should I Leave Baking Soda on My Carpet? For a light, everyday refresh, letting it sit for 15 to 30 minutes is usually enough to pull out minor odors. Simple. But if you're dealing with something more stubborn—like lingering pet smells or that mystery spill from last week—don't be afraid to leave it on longer. Several hours, or even overnight, can work wonders. Just make sure to keep kids and pets out of the room while the baking soda does its thing. Can Baking Soda Damage My Vacuum Cleaner? This is a great question because, yes, that super-fine powder can be tough on your vacuum. To keep it from causing trouble, always start with a completely empty bag or canister and a fresh, clean filter. Once you’re done vacuuming up all the baking soda, empty the canister right away and clean or replace the filter again. It’s an extra step, but it’s worth it. Vacuums with strong suction and quality filtration, especially those with HEPA filters, tend to handle the fine powder much better. Is It Safe to Mix Baking Soda with Essential Oils? Absolutely, and it's a fantastic way to create your own scented carpet freshener without harsh chemicals. It's easy to do. Just mix 10-15 drops of an essential oil you love (lavender and lemon are popular choices) into one cup of baking soda. Put it all in a jar with a lid, shake it up really well to get the oil distributed, and then sprinkle it over your carpet. Always test it on a small, hidden spot first, since some oils can potentially discolor very light-colored carpets. When DIY methods just aren't enough to tackle deep-seated dirt or stubborn stains, Shiny Go Clean is here to help. Our professional cleaning services can restore your carpets and bring a fresh feeling back to your home. Book your cleaning today . Article created using Outrank
- How to Clean Screen Doors in Your Madison Home
Cleaning your screen doors is simpler than you might think. A quick pass with a soft-bristle brush or a vacuum attachment gets rid of loose dust and cobwebs, and a simple wipe with a damp microfiber cloth finishes the job. This takes just a few minutes but does wonders for keeping your screens clear and improving airflow. But if that still sounds like one chore too many on your list, Shiny Go Clean is here to help homeowners in Madison. Your Quick Guide to Sparkling Clean Screens Let's be honest, nobody in Madison wants to spend their weekend scrubbing screens. Between work, family, and everything else demanding your time, a chore like this easily slides to the bottom of the to-do list. The good news? You don't need a huge block of time or a cart full of special supplies to get them looking great again. Most of the time, a few common household items make a noticeable difference. But when you’d rather have a professional handle it, our team is ready to help right here in Madison. If you’re looking for a reliable team to take care of tasks like this, you can check our availability and get a fast quote by calling 608-292-6848 . Getting Started with the Basics First things first, you don't always have to take the screen door off its hinges. For light dust or that familiar yellow-green film of spring pollen in Madison, you can easily clean the screen right where it is. It’s a simple, two-part process: Start by Dry Dusting: Always get the loose stuff off first. A vacuum with a soft brush attachment is perfect for this, but a dry microfiber cloth or a soft brush works just as well to lift away dust and cobwebs. Wash Gently: Mix a few drops of mild dish soap into a bucket of warm water. This solution is tough enough for grime but safe for almost any screen material, from fiberglass to aluminum. When you're ready to wash, dampen a microfiber cloth in the soapy water and wring it out well. Then, just wipe the screen from top to bottom. This simple technique prevents messy drips and streaks from forming. For another perspective on keeping screens in great shape without causing damage, this expert guide on how to clean window screens offers some great tips. The goal is to make screen cleaning a manageable part of your routine, not a dreaded project. A quick wipe-down every few weeks can prevent the heavy buildup that requires more effort later on. By folding this small task into your regular tidying, you’ll enjoy clear views and fresh air all season. For more ideas on how to organize your chores, check out our weekly cleaning schedule template for your Madison home . Screen Cleaning Methods at a Glance Not sure which method to use? It really just depends on how much time you have and how dirty the screens are. Here's a quick comparison to help you decide. Cleaning Method Best For Time Estimate Tools Needed Quick Wipe-Down Light dust, pollen, and weekly upkeep. 5-10 minutes per screen. Microfiber cloth, soft brush or vacuum, spray bottle with water. Deep Clean Heavy grime, stains, and seasonal cleaning. 20-30 minutes per screen. Bucket, mild dish soap, soft brush, garden hose, old towels. Choosing the right approach saves you time and effort. The quick wipe-down is perfect for regular maintenance, while the deep clean is what you'll want for that once-a-season refresh to get your screens looking brand new. Assembling Your Screen Cleaning Toolkit Before you tackle that layer of dust and grime, gathering your supplies will make the job go faster. The good news? You probably have everything you need tucked away in a closet or under the sink. Of course, if you’d rather not hunt for supplies at all, our professional cleaners in Madison arrive with everything needed to make your screens sparkle. It’s the easiest way to get the job done. Essential Tools for Every Screen Whether you’re doing a quick five-minute wipe-down or a full seasonal wash, these are the non-negotiables. Each one has a specific job to do, ensuring you get a great result without accidentally damaging your screens. Soft-Bristle Brush: This is your most important tool. A brush with soft bristles is just what you need to dislodge dirt and stubborn pollen from the mesh without stretching or tearing it. An old paintbrush or even a soft-bristled hand broom will work perfectly. Microfiber Cloths: You’ll want at least two . Microfiber is fantastic because it traps dust and soaks up water without leaving behind annoying lint, which is the secret to a streak-free finish. Vacuum with Brush Attachment: For pulling off loose debris like cobwebs, pet hair, and surface dust, nothing beats a quick pass with a vacuum. The soft brush attachment is key—it protects the screen from the hard plastic of the vacuum head. These simple items form the foundation of any screen cleaning project. If you're building out your cleaning arsenal, you might find some good ideas in our guide covering the essential tools for deep cleaning your home . Simple and Safe Cleaning Solutions You really don't need harsh chemicals to get your screens sparkling. A gentle, homemade solution is often the most effective and safest option for your family, pets, and the screen material itself. Your Go-To Cleaning Mix: Just mix about 1/4 cup of mild dish soap into a gallon of warm water. This simple formula is powerful enough to cut through grime but gentle enough for all screen types, including fiberglass and aluminum. For a little extra cleaning power on tougher spots, you can add a half-cup of white vinegar to your soapy water solution. Vinegar is a natural degreaser and helps break down more stubborn buildup. Always remember to have a second bucket or a hose ready with plain water for a thorough rinse. With this toolkit ready to go, the job of cleaning your screen doors feels much more manageable. But if you’d rather we handle it, booking is easy. Cleaning Screens Without Removing Them For most of the year, taking your screen doors off just to clean them is overkill. It's a hassle most of us don't have time for. Luckily, you don't need to. Cleaning them right where they hang is the fastest way to get them looking fresh again, especially when dealing with that seasonal layer of Madison pollen or just the everyday dust that settles on everything. The secret from the pros? Always clean in two stages: dry first, then wet. If you jump straight to wiping with water, you’ll just turn all that loose dust and grime into a muddy, streaky mess that’s even harder to get off. Starting dry saves you a ton of frustration. With the right technique, you can get a great result in less than 30 minutes . Start with a Dry Dusting Before a single drop of water touches that screen, your first move is to get rid of all the loose stuff. The best tool for this is your vacuum with a soft brush attachment. It gently lifts away cobwebs, pet hair, and surface dirt without any risk of stretching or snagging the delicate mesh. No vacuum attachment? No problem. A simple soft-bristle brush works just as well. Even a clean, new paintbrush will do the trick. Just work from the top of the screen down, using gentle, overlapping strokes. You’ll be shocked at how much dirt comes off with this one simple step. Pro Tip: Before you start, lay an old towel or a drop cloth on the floor right inside the door. It will catch all the falling dust and debris, saving you a second cleanup job on your floors afterward. The Gentle Wet-Cleaning Method Once the loose dirt is gone, it’s time to wash. A simple solution of a few drops of mild dish soap mixed into a bucket of warm water is all you need. Here’s the trick to applying it without making a drippy mess: Grab Two Microfiber Cloths: You’ll want one for washing and a separate one for drying. Microfiber is perfect because it cleans effectively and doesn’t leave annoying lint behind. Work from Top to Bottom: Dip your washing cloth into the soapy water, then wring it out until it’s just damp, not dripping wet. Gently wipe the screen starting from the top and working your way down. This keeps dirty water from running over the sections you’ve already cleaned. Follow Immediately with the Dry Cloth: As soon as you finish wiping a section, go over it with your dry microfiber cloth. This is the most important step for preventing water spots and streaks from showing up. This two-cloth technique gives you a deep clean without soaking the screen or leaving puddles on your floor. It's a quick, effective answer to the question of how to clean screen doors without making it a huge project. For many homes in Madison, this is all it takes to keep the views clear and the fresh air flowing. If even this sounds like too much to add to your plate, we're here to help. You can easily book a professional clean with us in just a few minutes. Deep Cleaning Your Screens for a Total Refresh Sometimes a quick wipe-down just won't cut it. When your screens have been battered by a long season of pollen, dust, and stubborn grime, they need a deep clean—the kind of seasonal reset that makes your whole home feel fresh again. This is the exact approach professionals take to get that spotless, like-new finish. If you're looking for a professional team to handle this in Madison, we’re happy to help. You can learn more about what that entails in our complete guide to deep cleaning . Safely Removing Your Screen Doors Before you can get scrubbing, the screen needs to come off its track. Most modern sliding screen doors are designed with adjustable rollers at the top and bottom, which makes this job a lot less intimidating than it sounds. First, look along the top and bottom edges of the door frame for small, recessed screws. Using a screwdriver, turn the screws to retract the rollers (usually counter-clockwise). You'll feel the tension release. Once the rollers are pulled in, grab the frame on both sides. Lift the door up into the top channel, then carefully swing the bottom edge out toward you. The whole thing should pop right out of the track. Always have a partner help you, especially with larger or heavier doors. This prevents you from accidentally dropping the door or twisting the frame, which can cause damage. The Ultimate Wash and Rinse Method With the screen off, find a clean, flat spot to work, like a driveway or back patio. It’s a great idea to lay down an old blanket or tarp first. This protects the screen from getting scratched up. Now for the wash. All you need is a simple, effective cleaning solution: mix about a quarter cup of mild dish soap into a gallon of warm water. Dip a soft-bristle brush into your soapy water and start scrubbing. Use gentle, circular motions on both sides of the screen to lift out all that trapped dirt. This simple visual breaks down the core process for any screen cleaning job, whether the screen is on or off the frame. It always comes down to these three actions—removing loose debris, washing away grime, and drying completely—to get a streak-free, crystal-clear finish. After a good scrub, it's time to rinse. Use a garden hose with a gentle spray nozzle setting. Never use a pressure washer , as the force is strong enough to tear right through the mesh. Rinse both sides thoroughly until you can't see any more soap suds. To finish, just lean the screen against a wall or fence and let it air dry completely before you pop it back into place. Solving Common Screen Cleaning Problems Even after a good cleaning, you might notice a few stubborn spots. It’s frustrating, but don’t worry—most common screen problems are easy to fix without rewashing the entire door. This isn’t about starting over. It’s about knowing how to tackle specific, tricky areas that need a little extra attention, from sticky tree sap to embedded pet hair. Think of this as your troubleshooting guide for getting that professional-level finish. Handling Stubborn Stains and Buildup Some messes won’t give up with a simple soap and water wash. Bird droppings and tree sap are two of the most common offenders, and they both need a more direct approach. For Tree Sap: Gently dab the spot with a microfiber cloth dipped in rubbing alcohol. Let it sit for a minute to dissolve the sap, then wipe it away before cleaning the area again with your regular soap solution. For Bird Droppings: Lay a damp, soapy cloth over the area for about five minutes. Once it’s had time to loosen, you can gently scrub it away with a soft-bristle brush. For Mildew Spots: If you see small, dark spots of mildew, a mix of equal parts white vinegar and water is a great solution. Spray it on, let it sit for about ten minutes , and then scrub gently. Many of the same principles apply here as in our guide to dealing with mold on window blinds . Pesky Pet Hair and Screen Damage Pet owners know the struggle—fur seems to weave itself right into the screen mesh. For that deeply embedded pet hair, try using a rubber-edged squeegee or even a simple rubber glove. Just drag it across the screen, and you’ll see the friction ball up the hair, making it easy to pick off. While you’re up close, you might discover a small hole, a tear, or even a bit of sagging in the screen. A simple screen repair kit from the hardware store can be an easy fix for minor issues. If the damage looks significant, though, cleaning might just make it worse. Sometimes, cleaning isn’t the real issue. Persistent problems might mean it’s time to call for professional screen door repair or replacement services . Knowing when to patch it up versus when to replace it is key to keeping your home in good shape. In fact, screen door maintenance is a big deal. The global market for these kinds of home improvements is projected to hit USD 3.1 billion by 2035 . It just goes to show how much a well-maintained screen contributes to your home’s comfort and value. When to Call a Professional Cleaner in Madison Knowing how to clean your own screen doors is a great skill, but let's be honest—sometimes it's just not the best use of your weekend. Your time is valuable, and some jobs are simply too big or too much of a pain to tackle yourself. For any busy Madison homeowner, recognizing when to pass the job to a professional isn't giving up; it’s just being smart. If you’re staring at a house full of dirty screens, with half of them on the second story, the idea of spending a Saturday teetering on a ladder probably doesn’t sound very appealing. Or maybe you're getting your home ready to sell in the competitive Madison real estate market. In that case, a perfect result isn't just a nice-to-have, it's a necessity. When Professional Help Is the Smartest Choice Hiring a professional cleaning service is all about being strategic with your time and energy. It’s an investment in getting the job done right, done efficiently, and without the weekend-stealing hassle. You know it’s time to make the call when: The Job Is Just Too Big: If you have a dozen or more screens, especially on upper floors, the job quickly becomes time-consuming and even a little risky. It's the perfect kind of task for a trained and equipped team. You're Selling Your Home: Clean screens and windows make an incredible first impression on potential buyers. A professional touch ensures every single detail is perfect, helping your property stand out. You're Simply Overwhelmed: Life gets busy. If the thought of one more household chore makes you want to crawl back into bed, delegating is a fantastic way to reclaim your weekend for family, friends, or just some well-deserved relaxation. A professional cleaning service shows up with the right equipment, proven methods, and an efficiency that’s tough to match on your own. We can often get done in a couple of hours what might take you an entire day, leaving a streak-free, polished finish every time. The Value of Professional Expertise More and more, homeowners are seeing the real value in specialized care. It’s not a luxury; it’s essential maintenance. The global door and window cleaning service market was valued at USD 1.2 billion in 2024 and is expected to grow to USD 2.1 billion by 2033 . For homeowners here in Madison, this trend means better access to reliable, trained specialists who provide customized solutions. You can read more about the growing professional cleaning market and see why so many people are making the switch. When the DIY path feels like one chore too many, we can take it from here. At Shiny Go Clean Madison, we make getting that help simple and completely stress-free. Ready to take screen cleaning off your to-do list for good? Get a fast, no-obligation quote by calling us at 608-292-6848 or book your cleaning in just a few minutes through our online booking portal . Common Questions About Screen Cleaning When it comes to screen doors, a few questions pop up time and time again. Here are the answers we usually give Madison homeowners who want to keep their screens looking their best and functioning properly. How Often Should I Actually Clean My Screens? We’ve found that a quick wipe-down or vacuum every 1-2 months is plenty to handle the everyday dust and pollen here in Madison. This little bit of upkeep makes a huge difference. For a deeper clean, we recommend tackling them at least twice a year. The first is usually in the spring to wash away all the winter grime, and the second is in the fall to get them ready for the colder, wetter months ahead. Can I Just Use a Pressure Washer to Save Time? We strongly advise against this. It might seem like a quick fix, but pressure washers are far too powerful for screen mesh. It’s incredibly easy to stretch, tear, or completely blow a hole through the delicate material. You can even dent or damage the frame itself. A garden hose with a gentle spray nozzle is a much safer and more effective choice. The goal is to gently wash away dirt, not blast it into oblivion. What’s the Best Way to Handle Tree Sap or Bird Droppings? For sticky messes like tree sap, the trick is to treat the spot before you wash the whole screen. Just dab the area with a cloth soaked in a bit of rubbing alcohol to dissolve the sap. Dried-on bird droppings are another common problem. Let a damp, soapy cloth sit on the spot for a few minutes. This softens it up, making it easy to gently scrub away with a soft brush before you rinse everything clean. My Screen Is Older and Feels Brittle. How Should I Clean It? If your screen has some years on it or feels fragile to the touch, you’ll want to be extremely gentle. This is a perfect case for cleaning the screen in place without removing it. Use a very soft brush or a microfiber cloth with minimal pressure. Avoid any kind of heavy scrubbing. If you’re worried you might cause damage, this is one of those times when calling a professional in Madison for an expert touch is the safest bet. When the DIY approach feels like one chore too many, Shiny Go Clean Madison can help. Get your weekend back and let our team handle the details. Call us at 608-292-6848 or book your clean online in minutes .
- A Powerful Baking Soda and Vinegar Bathroom Cleaner
A baking soda and vinegar bathroom cleaner is one of the most reliable and natural ways to tackle common bathroom grime. It’s a simple, two-ingredient mix that creates a satisfying fizzing reaction, helping to lift soap scum, hard water stains, and mildew without the overpowering fumes that come with most chemical cleaners. Why This Natural Cleaner Works Wonders If you're tired of holding your breath while scrubbing the shower, you’re not alone. So many homeowners in Madison are looking for cleaning methods that get the job done without overwhelming chemical smells- a common issue in small, enclosed bathrooms. The combination of baking soda and white vinegar is a fantastic alternative that’s both budget-friendly and surprisingly strong. The magic is all in the simple chemistry. Baking soda (sodium bicarbonate) is a mild alkali that works as a gentle abrasive, perfect for scrubbing away built-up soap scum without scratching your tub or sink. On the other hand, vinegar (acetic acid) is a mild acid that’s brilliant at dissolving hard water deposits- a common issue with Wisconsin's water- and cutting right through mineral buildup. The Power of the Fizz When you mix the two, they react and create carbon dioxide gas. That’s the fizzing action you see, and it’s doing more than just putting on a show. The bubbling helps agitate and loosen dirt, grime, and tough stains from surfaces like tile grout and sink drains, making everything much easier to wipe away. It's this kind of effectiveness that has more and more people rethinking how they clean. The preference for eco-friendly solutions is growing fast, with the natural household cleaners market valued at USD 6.56 billion and projected to hit over USD 18 billion by 2033 . This surge shows that families everywhere are choosing healthier, more sustainable options for their homes. Key Benefits for Your Bathroom So, what makes this duo a must-have in your cleaning caddy? It actually deodorizes. Baking soda doesn't just mask unpleasant bathroom odors; it absorbs and neutralizes them. It’s a great stain remover. The gentle scrubbing power of a baking soda paste can lift stubborn surface stains from porcelain sinks and tubs. It’s incredibly cost-effective. Both ingredients are cheap and can be bought in bulk, saving you a ton of money compared to specialty bathroom sprays. It’s safe for most surfaces. This is a go-to solution for ceramic tile, porcelain, fiberglass, and even chrome fixtures. Here’s a quick-reference table to help you get the right mix for the right job. Baking Soda & Vinegar Bathroom Cleaning at a Glance Bathroom Surface Best Mixture Best For Sinks & Tubs Paste: 1/2 cup baking soda, few tbsp water Soap scum, light stains, general grime Grout Paste + Spray: Apply paste, spray with vinegar Mold, mildew, discoloration Drains Direct Pour: 1/2 cup baking soda, 1 cup vinegar Clogs, odors, buildup Toilets Direct Pour: 1 cup vinegar, 1/4 cup baking soda Hard water rings, stains, deodorizing This simple chart shows just how versatile these two household staples can be. This simple mix proves you don't need a cabinet overflowing with harsh products to get a sparkling clean bathroom. For more insights, check out our guide on whether natural cleaning products actually work . Crafting Your Perfect DIY Cleaning Mix Forget getting lost in complicated recipes online. The best baking soda and vinegar bathroom cleaner is the one you can whip up in seconds with stuff you already have. The real trick is just knowing which consistency works for which mess- a thick paste for the tough spots and a light spray for everyday wipe-downs. Think of it this way: for stubborn soap scum or those dingy grout lines, you need something with staying power. That's where a thick paste is your best friend. But for a quick, daily clean of your sink, countertop, or faucet, a diluted spray is far more practical. A key takeaway from years of experience is this: always mix your solutions right before you plan to use them. The fizzing reaction between baking soda and vinegar is where the cleaning power really kicks in. If you pre-mix a big batch, it will lose its punch and you'll just be left with salty water. The Go-To Baking Soda Paste For those tough, stuck-on messes, like the ring around the tub or buildup in the grout, a paste is the perfect tool. It’s thick enough to stay put, giving the gentle abrasive in the baking soda time to work its magic. Here’s our simple, proven formula: Start with about a half-cup of baking soda in a small bowl. Slowly add one to two tablespoons of water and stir until you get a thick, spreadable consistency, almost like toothpaste. Slather it directly onto the problem area with your fingers or a sponge. Let it sit for about 10-15 minutes before you start scrubbing. This simple paste is fantastic for cutting through grime without scratching your surfaces. It gives you the scrubbing power you need for a truly deep clean. The Everyday All-Purpose Spray For daily maintenance and lighter cleaning jobs, a spray is your best bet. It’s perfect for wiping down sinks after brushing teeth or cleaning countertops. It’s also the second half of the one-two punch for cleaning grout- you spray it over the paste to get that satisfying, grime-lifting fizz. It's interesting how versatile this simple mixture is. In fact, a simple DIY fix with white vinegar and water is also a go-to for other household tasks, like tackling stubborn hard water spots on windows. For your bathroom spray: Grab a clean spray bottle and fill it halfway with white vinegar . Top it off with an equal amount of water . Give it a gentle shake, and you're ready to go. A little pro tip: invest in a decent quality spray bottle that gives you a fine, even mist. This ensures you get consistent coverage on surfaces without completely drenching them. And if you're interested in exploring more green cleaning options, our guide to plant-based bathroom cleaners is a great next read. A Soaking Solution for Showerheads If your showerhead has lost its oomph, hard water buildup is almost always the culprit. To get the flow back, you can create a simple soaking solution. Just fill a plastic bag with straight white vinegar. Secure it over the showerhead with a rubber band, making sure all the clogged parts are fully submerged. Let it soak for a few hours or even overnight, and the buildup should dissolve right off. Your Guide to a Spotless Bathroom Alright, you've got your paste and spray mixed up and ready to go. Now for the fun part: seeing what this simple baking soda and vinegar bathroom cleaner can actually do. We'll walk through how to hit every part of your bathroom- from the tub to the toilet- using techniques that really work and leave a genuine shine behind. There's a good reason this DIY cleaner has become so popular. It's gentle, it's safe, and it gets the job done without harsh fumes. In fact, a lot of people are making the switch, with some studies showing that around 30% of households now lean on natural alternatives like these. It's part of a bigger shift toward products that are just plain safer for families and the environment. You can see how this trend is changing homes everywhere and why it's more than just a passing fad. This whole method really boils down to three simple actions: make the paste, spray the vinegar, and let it soak on the tough spots. The key is to let the fizz do most of the heavy lifting. That means way less aggressive scrubbing for you. Tackling Grimy Grout and Tiles Dingy grout lines can make an entire bathroom look and feel dirty, no matter how clean the rest of it is. This is especially true in the new construction homes you see popping up around Waukee, where everyone expects that perfect, clean finish. Luckily, the paste-and-spray combo is ideal for this. First, grab some of the baking soda paste and apply a thick layer directly onto the grout lines. You can use your fingers or a small brush- just don't be shy with it. You want to see full coverage. Let that paste sit for a solid 15 minutes . This gives the baking soda time to get to work breaking down all that built-up grime. Next, spray the paste with your vinegar solution until it's good and soaked. You’ll see it start to fizz right away. That’s the chemical reaction lifting the dirt right out of the pores. While it's still fizzing, grab an old toothbrush or a stiff grout brush and give the lines a good scrub. Once you're done, just rinse the whole area with warm water and you're set. Reviving Sinks and Faucets Between toothpaste splatters, soap residue, and hard water spots, sinks and faucets can lose their sparkle pretty quickly. To fix it, just sprinkle a light layer of dry baking soda all over the sink basin. Then, spritz it with your all-purpose vinegar spray until it starts to foam up. Use a soft sponge to scrub the basin, focusing a little extra on the drain and around the base of the faucet. For chrome fixtures, a microfiber cloth dipped in the vinegar solution is all you need to wipe away water spots and leave a streak-free shine. Banishing Soap Scum from Showers and Tubs Soap scum is a uniquely stubborn problem. It's a nasty combination of soap residue, body oils, and minerals from the water, and it creates that cloudy film on shower doors and a grimy ring in the tub that feels almost impossible to get off. Your baking soda paste is the perfect weapon against it. My best advice for soap scum is to work on a dry surface. If the shower is wet, the paste will just slide off. Start by applying a generous amount of paste to the affected areas and let it sit for a good 20-30 minutes before spraying it with vinegar and scrubbing. This process takes a little bit of elbow grease, but the results speak for themselves. If you feel like you're in a constant battle with buildup, you might find some extra help in our dedicated guide on removing stubborn soap scum from shower tiles . Naturally Disinfecting the Toilet For a routine toilet clean, this natural duo is fantastic. Start by pouring about one cup of white vinegar directly into the toilet bowl and let it sit for several minutes. After it's had a moment to soak, sprinkle a half-cup of baking soda into the bowl. That immediate fizzing reaction will help loosen stains and hard water rings. Grab your toilet brush and scrub the entire bowl, then just let it sit for another 10 minutes before flushing. You'll have a fresh, clean finish without any of those harsh chemical smells. Common Mistakes to Avoid Getting incredible results with a baking soda and vinegar bathroom cleaner is usually a breeze, but a few common missteps can really sabotage your hard work. Honestly, knowing what not to do is just as important as following the right steps. Think of it as a few friendly tips from a local neighbor who's seen it all, helping you get that perfect shine without any headaches. The absolute biggest rule- and the most important one- is to never use this acidic cleaner on natural stone . If you’ve got beautiful marble, granite, or travertine countertops or tiles in your Verona's bathroom, keep the vinegar far, far away. The acid reacts with the stone and causes etching , which is a dulling of the surface that’s permanent. Always, always stick to pH-neutral cleaners made specifically for stone. Don't Pre-Mix Your Cleaner It’s tempting to mix up a big batch of cleaner to have on hand, but trust me, it’s a bad idea. The fizzing reaction you see when you combine baking soda and vinegar is where all the magic happens. That fizz creates carbonic acid, which is fantastic at breaking down grime, but it's super unstable and quickly turns into plain old carbon dioxide and water. Mix them ahead of time, and the solution just goes flat, losing nearly all its cleaning power. You’re basically left with slightly salty water that won't have the muscle to lift any real stains. For maximum power, always make your paste and have your vinegar spray ready to use right away. Forgetting to Rinse Thoroughly Another easy mistake to make is not rinsing the surfaces well enough after you're done scrubbing. Once the water evaporates, any leftover baking soda residue can leave a hazy, white film behind, which is especially noticeable on darker tiles or shiny fixtures. After you've scrubbed and the fizzing has died down, give the area a good rinse with plenty of clean, warm water. For things like faucets or shower doors, a final wipe-down with a clean, dry microfiber cloth will guarantee a streak-free, sparkling finish. That final step truly makes all the difference between a clean-enough job and one that looks professionally done. If you're finding grout to be a particular struggle, you're not alone. You can get more focused advice by reading about the common mistakes in bathroom grout cleaning and how to avoid them . A complete rinse is what makes all that scrubbing worth it in the end. When to Call a Professional Cleaner The baking soda and vinegar bathroom cleaner is an absolute powerhouse for weekly upkeep and tackling everyday grime. But let's be real- sometimes you’re facing a mess that needs more than a little fizz and some elbow grease. Knowing when to put down the spray bottle and pick up the phone is the key to protecting your time, sanity, and even your home’s surfaces. It's okay to admit when a cleaning job is just too big. If you're in a busy family neighborhood in Madison juggling work, school, and sports, dedicating an entire Saturday to scrubbing a bathroom just isn’t in the cards. That’s where calling in the experts for a one time cleaning in Madison becomes a smart investment, not a luxury. Your time is valuable. If a deep clean would take you four hours, but a professional team can do a better job in half the time, hiring a service like Shiny Go Clean is a practical choice that buys you back your weekend. When DIY Isn't Enough A natural cleaner is fantastic for surface mildew, but widespread or dark mold growth can signal a much deeper problem. While your homemade mix is great for daily grime, persistent mold that keeps coming back often means there's a bigger issue at play. It's crucial to know when to call in professional mold remediation companies for a thorough assessment. They have the right equipment and training to handle it safely and effectively. Here are a few other clear signs it's time to call for backup: Deep-Set Hard Water Scale: Years of mineral buildup can become as hard as rock, especially on shower doors and fixtures. Professional cleaners have access to specialized tools and stronger (but still safe) products to dissolve it without scratching your glass or chrome. Move-Out Cleaning Pressure: When your security deposit is on the line, "good enough" won't cut it. A professional move out cleaning Madison service ensures every nook and cranny is spotless, from inside the oven to the baseboards, meeting those tough landlord expectations. You're Simply Overwhelmed: Life gets hectic. If you're feeling overwhelmed by house cleaning, hiring a recurring service can lift a huge weight off your shoulders and keep your home consistently fresh without you having to think about it. DIY Cleaning vs Professional Service Deciding between tackling a bathroom clean yourself and calling in a pro often comes down to the specific task and how much time you have. Here’s a quick guide to help Madison homeowners know when to grab the baking soda and when to call Shiny Go Clean. Cleaning Task Best for DIY (Baking Soda & Vinegar) When to Call Shiny Go Clean Madison Weekly Wipe-Downs Perfect for keeping sinks, counters, and toilets fresh and sanitized between deep cleans. N/A - This is a great DIY task! Minor Soap Scum A simple paste of baking soda and water can gently scrub away light buildup on tubs and tile. For years of caked-on soap scum that resists scrubbing and requires specialized tools. Grout Discoloration Great for lifting surface stains and everyday grime from light-colored grout lines. When grout is deeply stained, moldy, or you need it professionally steam-cleaned and sealed. Hard Water Spots A vinegar spray can dissolve fresh mineral spots on faucets and shower doors. For thick, crusty scale that has been building up for months or years and won't budge. Move-Out Clean Not recommended; it's tough to meet landlord standards and get a security deposit back. We provide a guaranteed, top-to-bottom clean that covers every detail required. Deep Seasonal Clean It’s possible but can take an entire weekend and a lot of energy. When you want a truly deep cleaning Madison WI service done efficiently, freeing up your valuable time. Ultimately, DIY is fantastic for maintenance. But for restorative cleaning that makes your bathroom look new again, a professional service is the way to go. The Professional Advantage It's fascinating to see how cleaning preferences are shifting globally. The Asia-Pacific region, for example, has become the fastest-growing market for household cleaning products, now worth a massive USD 119.9 billion . This trend highlights a worldwide interest in effective, reliable cleaning solutions, whether they're DIY or professional. It shows us that Madison residents aren't alone in valuing high-quality results. You can read the full research about these global market dynamics to learn more. When you're ready for that next level of clean, the Shiny Go Clean team in Madison is here to help. We handle the tough jobs so you don't have to. Give us a call or text at (608) 292-6848 to get a quote for your deep cleaning needs. Questions We Hear All the Time Even with a method as simple as cleaning with baking soda and vinegar, it’s normal to have a few questions before you get started. We get it. To help you feel completely confident, here are answers to some of the most common things homeowners in Madison ask us. Can I Add Essential Oils to Make It Smell Better? Absolutely. Adding about 10-15 drops of your favorite essential oil to the vinegar spray is a great way to cut the sharp vinegar scent. We find that lemon, tea tree, or lavender oils work really well because they don't just smell fresh- they also have natural antibacterial properties, which gives your cleaner an extra punch. Just a quick heads-up: if you have pets, especially cats, it’s a good idea to check if the oil you picked is safe for them. A quick search online is usually all it takes to be sure. How Often Should I Be Doing This? For day-to-day upkeep, a quick wipe-down of your sinks and countertops with the vinegar spray a few times a week is plenty. But for a true deep clean of the shower, tub, grout, and toilet, we recommend pulling out the paste-and-spray method at least once a month . Of course, that can change depending on your home. A busy family bathroom in any Dane County neighborhood is going to need a more thorough scrub more often. If you find it’s tough to keep up, that's usually the point where a recurring house cleaning service can take the task off your plate. Is This Cleaner Safe for My Septic System? Yes, this cleaner is completely septic-safe. This is a great question, and one we hear a lot from homeowners in areas like Verona or Waunakee that might not be on the city sewer. Both baking soda and vinegar are biodegradable and won't harm the good bacteria that keep your septic tank working properly. Unlike harsh chemical cleaners that can throw your system's balance way off, this natural duo is a worry-free choice. You can clean effectively without having to stress about the impact on your home’s plumbing or the local environment. It’s one of the best parts about using such a simple, natural solution. When DIY cleaning isn’t cutting it anymore and you want those deep, restorative results, Shiny Go Clean is ready to step in. Our professional team provides reliable, high-quality house cleaning Madison WI and for the surrounding communities, handling the tough jobs so you can actually enjoy your home. Book your professional cleaning service today at https://shinygoclean.com .
- A Madison Homeowner's Guide to Removing Tough Stains From Your Toilet Bowl
It’s frustrating to deal with toilet bowl stains that just won't go away. But the secret to getting rid of them isn't more scrubbing-it's figuring out what you’re up against in the first place. Most of those tough, chalky rings or reddish streaks come from mineral deposits in our local water supply here in Madison, not from a lack of cleaning. Once you can identify the source of the stain, you can finally choose a method that gets rid of it for good. If you're ready to skip the DIY and have a professional handle it, you can check availability in Madison and get a fast quote right now. Why Your Madison Toilet Has Stains That Just Won't Budge We hear the same story from homeowners all across Madison. You scrub and scrub, but those unsightly rings and streaks in your toilet bowl seem to reappear almost overnight. This isn't a reflection of your cleaning habits; it's a direct result of our region's unique water composition. The two main culprits behind these persistent stains are hard water and iron. Understanding the difference between them is the first step toward picking a cleaning method that actually works, saving you time and sparing you from using generic cleaners that don't stand a chance. The Problem With Hard Water That stubborn, chalky white ring that forms at the waterline? That’s limescale , a buildup of calcium and magnesium from hard water . Here in Dane County, our water hardness averages 8-10 grains per gallon , which is what causes these deposits to form so quickly-a common headache in many Madison households. These mineral deposits bond tightly to the porcelain, making them incredibly resistant to regular toilet bowl cleaners and a quick scrub. We've seen how understanding how hard water affects your plumbing is key to both preventing and tackling these stains before they get worse. Over time, the layers just keep building up, becoming thicker and even more difficult to remove. Rust Stains From Iron If you’re seeing reddish-brown streaks running down the sides of the bowl, you're most likely dealing with iron. The source can be naturally occurring iron in well water or, in some older homes, rust leaching from galvanized iron pipes. Just like limescale , these rust stains can be tough to handle with standard cleaning products. A 2018 survey found that 88% of Americans clean their toilets more frequently than any other spot in the house , yet these stains persist. It’s because the right tool for the job matters. Identifying Common Toilet Bowl Stains in Madison Homes Not sure what you're looking at? Use this quick guide to figure out what kind of stain you're dealing with and what's causing it. Stain Appearance Common Name Primary Cause in Dane County White, chalky, or greyish ring at the waterline Limescale or Mineral Scale High levels of calcium and magnesium in the local water supply Reddish-brown streaks or a ring Rust Stains Iron from well water or aging plumbing pipes Pink or orange film, often at the waterline Serratia Marcescens Airborne bacteria that thrives in moist environments Bluish or greenish stains Copper Stains Corroding copper pipes, often due to acidic water Black or dark brown spots, often under the rim Mold or Mildew Lack of ventilation and consistent moisture Once you know the culprit, you can choose a cleaning solution that targets the specific problem instead of wasting time with a generic cleaner. As this visual guide confirms, chalky white buildup points directly to hard water, while those reddish-brown marks mean you have an issue with iron or rust. For homeowners in our area, this knowledge is power. If you’re consistently fighting a losing battle with those chalky rings, our in-depth article provides more specific tips. Check out our guide on how to clean hard water stains in Madison for a focused strategy. Your Stain-Fighting Toolkit Before you can tackle those stubborn toilet stains, you need the right tools for the job. Walking in prepared makes all the difference, turning a frustrating chore into a task you can handle with confidence. Having what you need within arm's reach means you can work faster and, more importantly, safer. First things first: safety. A sturdy pair of waterproof cleaning gloves is a must. They protect your hands from grime and any cleaning products you use. It’s also a good idea to get some air moving, so crack a window or switch on the bathroom fan before you get started. Essential Cleaning Implements You don't need a massive collection of supplies, just the right ones. While you probably have a few of these already, a couple of specific tools can be game-changers for the stubborn buildup we often see in Madison homes. A High-Quality Toilet Brush: Don’t skimp here. A brush with stiff bristles is your best friend. Look for one that includes an under-rim scrubber to get into that hidden ledge where mildew and hard water scale love to collect. A Pumice Stone (with handle): This is the secret weapon for those thick, crusty mineral rings that just won’t budge. A pumice stick grinds down the deposits without scratching the porcelain-just make sure you keep both the stone and the toilet surface wet the entire time. Non-Scratch Scouring Pads: For lighter stains or working on more delicate parts of the toilet, these pads give you a bit of extra scrubbing power without causing any damage. DIY vs. Commercial Cleaners When it comes to the cleaners themselves, you’ve got options, from pantry staples to powerful store-bought formulas. The right choice really depends on the stain you’re fighting. Many people are surprised to learn how effective simple, natural solutions can be. For many Madison homes, the a-ha moment comes when they discover a simple, food-safe powder can often outperform harsh chemical cleaners on mineral stains. It’s about using the right acid to dissolve the specific deposit. Pantry Solutions: White Vinegar: The acetic acid in vinegar is fantastic for dissolving light to moderate hard water scale. It’s also great for everyday maintenance. Baking Soda: This is a gentle abrasive and a natural deodorizer. When you combine it with vinegar, you get a fizzy, stain-lifting reaction that’s perfect for a light scrub. Citric Acid: This powder is a true powerhouse against tough mineral deposits and rust. It essentially binds to the minerals, breaking the stain’s grip on the porcelain. It’s a game-changer for those ugly brownish rings. If you want to learn more about how these simple items work together, check out our guide on using baking soda and vinegar for bathroom cleaning in Madison . Store-Bought Products: Acidic Toilet Bowl Cleaners: For severe hard water, look for products that list hydrochloric acid as an ingredient. These are incredibly effective but require very careful handling and good ventilation. Rust Removers: If iron is causing reddish-brown streaks, a cleaner containing oxalic acid is your best bet. It’s specifically formulated to chemically lift rust stains away. With your toolkit ready, you’re set to take on specific stains with the right approach. Next, we’ll walk through the exact methods for getting rid of those frustrating hard water rings for good. How to Remove Hard Water Stains and Limescale Rings Alright, let's get into the nitty-gritty of those chalky, stubborn hard water stains and limescale rings so common in Madison homes. This is the most frequent issue we see, and thankfully, it’s one you can beat. The secret isn't scrubbing harder; it's using the right product and giving it time to do its job. The first, most important step is to get the water level in the toilet bowl as low as possible. Your cleaner can't work if it's diluted by a gallon of water. Just turn off the water supply valve behind the toilet, then flush until the bowl is nearly empty. A small cup is perfect for scooping out what's left. Using Acidic Cleaners to Dissolve Minerals Hard water stains are really just mineral deposits, mostly calcium and magnesium. To break them down, you need a mild acid. This is where simple things like white vinegar or, for tougher jobs, powdered citric acid, really shine. They work by chemically dissolving the mineral bonds. Start with distilled white vinegar. Pour enough into the empty bowl to completely cover the stain line. Now for the hard part: be patient . Let it sit for at least four hours , but leaving it overnight is even better. The acid needs that time to slowly break down the buildup. If vinegar doesn’t quite do the trick, it’s time to bring in something stronger: citric acid. This food-safe powder is a powerhouse against mineral scale. Just sprinkle a few tablespoons onto the damp, stained porcelain and let it sit for several hours. Once it has worked its magic, a quick scrub with your toilet brush should lift the softened stains right off. Tackling Tough, Layered Buildup With a Pumice Stone Sometimes you’re dealing with a ring that's been building up for years. It’s thick, crusty, and feels like it’s become part of the toilet itself. For these extreme cases, a pumice stone is your best friend. It acts like targeted sandpaper, grinding away the mineral deposits without scratching the porcelain. Here’s how to use it safely: Always keep it wet. Submerge the pumice stone in the toilet water for a few minutes before you start. A dry stone can absolutely scratch the porcelain. Scrub gently. Use gentle, back-and-forth pressure right on the stain. You’ll feel the stone grinding down the mineral ring. Rinse and check. Periodically flush or add water to rinse away the residue and check your progress. You'll see the stain start to disappear. It’s a common myth that hard water stains are a hygiene issue. While they look unappealing, they're just mineral deposits. The real problem is that their rough surface can harbor bacteria, which is why proper removal is a key part of a truly clean bathroom. The battle against limescale doesn't stop at the toilet. If you're seeing this buildup elsewhere in your home, it's worth checking out this ultimate guide to getting rid of limescale for good . Fighting tough toilet stains is a huge issue. Limescale is a problem in an estimated 85% of U.S. homes with hard water. These figures show why so many busy professionals in Madison prefer our deep cleaning services-we tackle these exact challenges with proven methods day in and day out. If you’re finding that these steps require more time and effort than you have, don't worry. This is exactly what our deep cleaning service is for. For more detailed strategies, you can also check out our guide on how to remove water stains from toilet bowls in Madison . Getting Rid of Rust Stains and Other Discoloration While hard water stains are a top complaint in Madison, those reddish-brown streaks caused by rust are a close second. It’s a startling sight, for sure, but there’s no need to panic. The stains usually come from high iron content in the water or from older plumbing, and you can absolutely get them out with the right approach. Your everyday toilet cleaner probably won't be enough to tackle these. Just like with hard water, rust requires a cleaner that can specifically dissolve the iron causing the stain. Starting With Gentle DIY Solutions Before you go for the heavy-duty commercial stuff, a simple acid from your pantry is often surprisingly effective. Citric acid , the same ingredient that gives lemons their tartness, works wonders on rust. It chemically binds to the iron particles, loosening the stain’s grip on the porcelain. To give this a try, start by getting as much water out of the toilet bowl as you can. Shut off the water valve, flush, and then use a cup or sponge to bail out the rest. Next, mix a few tablespoons of powdered citric acid with just a little water to form a thick paste. Slather this paste directly onto the rust stains until they're completely covered. You’ll want to let it sit for at least an hour, but for really set-in stains, letting it work for a few hours is even better. Once it's had time to do its job, grab a stiff-bristled toilet brush and give it a good scrub. You should see the rust start to lift right off. When to Use a Commercial Rust Remover If the DIY paste isn't cutting it, or you’re up against stains that have been there for months, it might be time for a specialized commercial rust remover. These products are formulated with one job in mind. Look for a cleaner that contains oxalic acid . It’s the key active ingredient that is most effective at dissolving iron oxide-the chemical name for rust. When you’re using these more powerful products, always follow the safety directions on the label. That usually means: Wearing gloves to keep it off your skin. Ensuring good ventilation by opening a window or turning on the bathroom fan. Never mixing it with other cleaners , especially bleach, which can create dangerous toxic gas. Apply the cleaner as instructed, let it sit for the recommended time, and then scrub away before flushing. This is often the knockout punch for even the most stubborn rust discoloration. A friendly tip from our team: If rust stains come back quickly after a deep clean, it could be a sign of a bigger issue with your pipes or water supply. It might be worth looking into a water softener or having a plumber take a look. Tackling Mold and Mildew Sometimes, the stains you’re seeing aren't from minerals at all. If you notice dark, splotchy patches, especially up under the rim, you’re likely dealing with mold or mildew. The toilet bowl is a damp, dark environment, which is a perfect breeding ground for it. For these organic stains, a simple mix of white vinegar and baking soda often works well. The vinegar helps to kill the mold spores, and the baking soda gives you a bit of gentle scrubbing power. Just spray the area with vinegar, sprinkle on some baking soda, let it fizz for about 15 minutes , and then scrub it clean. Rust stains aren't just a bathroom problem, either. If you’re noticing them pop up elsewhere, our guide might help. Learn more about how to remove rust from a stainless steel sink with some simple fixes. When to Let a Professional Handle It You’ve poured in the vinegar, scrubbed with a pumice stone, and maybe even whipped up a few DIY pastes. But that stubborn toilet stain is still there, staring right back at you. There comes a point where more elbow grease and another trip to the store just isn’t the right answer. There’s a clear line between a tough cleaning job you can handle yourself and a problem that really needs a professional touch. Knowing when to wave the white flag can save you hours of frustration and even prevent you from accidentally damaging your toilet’s porcelain finish. Signs It’s Time to Call for Help This isn't about giving up; it's about making a smart call. If you find yourself in any of these situations, it’s probably time to let a professional team take over and get rid of those tough toilet bowl stains for good. The stains come right back. You scrub the toilet until it sparkles, but that hard water ring or rust streak reappears in just a few days. This usually points to a bigger issue with your plumbing or water that cleaning alone can’t fix. The stains are ancient. Layers of mineral deposits that have been building up for years can be almost impossible to remove without professional-grade products and the right techniques. The surface feels damaged. If you run your finger over the stain and the porcelain feels rough, etched, or pitted, aggressive scrubbing could easily make it worse. A pro can figure out what’s going on and use methods that won’t cause more damage. You just don't have the time. Let's be honest, nobody wants to spend their Saturday wrestling with a toilet, especially busy Madison families. Your time is valuable. The Professional Advantage for Stubborn Stains Hiring a professional cleaning service is about more than just convenience-it’s about getting real expertise and seeing actual results. When you bring in a team like Shiny Go Clean Madison, you're getting cleaners who have seen it all and know exactly what works on which type of stain. We have the right tools and professional-grade solutions that are far more effective than what you can buy at the store. We know how to safely and efficiently tackle deep-set rust and years of limescale, bringing your toilet back to a like-new condition without you lifting a finger. When a property needs to be market-ready, "good enough" simply isn't an option. Realtors and property managers in Madison rely on our deep cleaning service because we deliver a consistent, move-in ready clean that helps properties sell or rent faster. This is a big deal for homeowners and real estate professionals in Madison. A sparkling clean bathroom is a major selling point. If you need flawless results for your home, our deep cleaning service is the answer. For a fast, easy booking process, you can email us at madison@shinygoclean.com or call us directly. Thinking about whether to keep scrubbing or call in the pros? Here’s a quick comparison to help you decide. DIY vs Hiring Shiny Go Clean Madison Factor DIY Approach Shiny Go Clean Professional Service Time Investment Several hours of scrubbing, plus multiple store trips. Just a few minutes to book online. We handle the rest. Tools & Products Store-bought cleaners that may or may not work. Professional-grade solutions and specialized tools. Effectiveness Results can be hit-or-miss, especially on old stains. Guaranteed removal of even the most stubborn buildup. Risk Potential to scratch or damage the porcelain with harsh tools. Safe, expert techniques that protect your fixtures. Cost Cost of various cleaners, pumice stones, and your time. A single, transparent price for a guaranteed result. Ultimately, a professional clean is the fastest way to get the results you want without any of the guesswork or frustration. If you’re tired of fighting a losing battle with that toilet stain, our Deep Cleaning service is designed for exactly these kinds of tough jobs. Let us save you the headache. Get a fast quote and check our availability in Madison today. Common Questions We Hear About Toilet Stains When it comes to toilet stains, we get a lot of the same questions from homeowners here in Madison. It's frustrating to deal with stubborn rings and rust spots. Let's walk through some of the most common issues so you can tackle those tough stains with confidence. Can Bleach Actually Remove Toilet Stains? This is a question we hear all the time, and the answer usually catches people by surprise. While bleach is a fantastic disinfectant, it’s not a stain remover for hard water or rust. It can make a stain look like it’s gone by whitening it, but it doesn’t dissolve the mineral deposits causing the problem in the first place. In fact, with rust stains, bleach can backfire. It can trigger a chemical reaction that actually sets the stain deeper into the porcelain, making it even harder to remove later. So, while it’s great for sanitizing, bleach just isn’t the right tool for the tough, built-up stains we see so often around Dane County. You’re far better off with an acidic cleaner like vinegar or citric acid that breaks the minerals down. How Long Should I Let Cleaners Sit in the Bowl? Patience really is your best friend when you’re fighting stubborn toilet stains. The right amount of time depends on the cleaner and how bad the stain is, but the general rule is to give it as much time as you can. These cleaners need time to work their magic and dissolve the minerals. For Vinegar: You’ll want to let it sit for at least four to six hours . For a tough hard water ring, leaving it overnight is even better. For Citric Acid: A paste needs at least one to two hours to start working, but for really set-in stains, an overnight soak will give you the best shot. For Commercial Cleaners: Always check the manufacturer's label, but most need at least 15-30 minutes to be effective. Remember, the key is keeping the cleaner right on the stain. That’s why taking the time to empty the water out of the bowl first makes such a huge difference. Why Do the Stains Come Back So Quickly? It’s incredibly frustrating to spend all that time scrubbing, only to see that familiar ring start to creep back in a week. If this is happening to you, the problem isn’t how you clean-it’s your water. Here in Madison, our hard water is almost always the culprit. Every single flush introduces a new batch of water full of dissolved calcium and magnesium. As that water evaporates, it leaves a tiny, invisible layer of minerals behind. Day after day, those layers build on top of each other, creating the exact same stain you just worked so hard to get rid of. If you feel like you’re in a constant battle with stains that just keep returning, it’s a sign that the problem is bigger than the bowl. The only permanent fix for hard water stains is to treat the water itself, usually with a whole-house water softener. If rust stains are your problem, a quick return might point to corroding pipes or a high iron content in your water. You can keep cleaning the bowl, but the stains won't stop appearing until the source of the iron is addressed. Is It Possible to Scratch My Toilet Bowl? Yes, you can absolutely scratch the porcelain finish of your toilet, and once it’s scratched, the damage is permanent. Scratches don’t just look bad; their rough texture gives stains and bacteria a perfect place to cling to, making your cleaning problems even worse. The most common ways people accidentally scratch their toilets are: Using the wrong tools: Stay away from steel wool, green scouring pads, and any stiff-bristled brush not made specifically for toilets. Using a pumice stone incorrectly: A pumice stone works wonders, but only if you use it right. You must always keep both the stone and the toilet surface wet while you scrub. A dry pumice stone on dry porcelain is a surefire way to leave scratches. Using harsh, abrasive powders: Gentle abrasives like baking soda are usually fine, but avoid gritty scouring powders that can scratch the finish. When in doubt, always test your tool or cleaner on a small, hidden spot first. If a stain feels like it needs a ton of force to remove, it’s much safer to call a professional than to risk damaging your toilet for good. How Can I Keep Stains From Forming in the First Place? An ounce of prevention is worth a pound of cure. While you can't change the water in Madison, you can adopt a few simple habits to keep stains from getting a foothold. A little bit of regular maintenance goes a long way. Here are a few tips to stop stains before they start: Weekly Vinegar Rinse: Once a week, pour a cup of white vinegar into the bowl and let it sit for an hour before you flush. This helps dissolve minor mineral buildup before it becomes a visible ring. Regular Brushing: Just a quick scrub with your toilet brush every couple of days can physically break up the new layers of minerals before they have a chance to harden. Citric Acid Maintenance: Try sprinkling about a teaspoon of citric acid in the bowl and letting it sit for 15 minutes before your weekly clean. It does an amazing job of keeping hard water and rust at bay. Making these small steps part of your routine can dramatically lengthen the time between deep cleanings and keep your toilet looking bright and fresh. If you’ve tried everything and are tired of fighting the same stubborn stains, let Shiny Go Clean Madison take care of it for you. Our deep cleaning service is designed to tackle the toughest grime, saving you time and frustration. Book your professional clean in minutes. Call or text us at 608-292-6848 or get a fast, easy quote online today.
- Top Picks: Floor Cleaners Safe for Dogs
As a dog owner in Madison, you know the drill. Wisconsin's weather brings a constant parade of muddy paw prints, shedding fur, and the occasional accident right onto your floors. It's a never-ending battle. But the real worry isn't the mess itself-it's whether the cleaners we use are safe for our furry family members. This guide is here to cut through the confusion. We'll show you exactly how to pick floor cleaners safe for dogs -products strong enough for stubborn messes but gentle enough for your four-legged friend. A Madison Dog Owner's Guide To Safe And Clean Floors For dog owners here in Madison, every season throws a new challenge at our floors. You've got the muddy thaw of spring, then the salt and slush tracked in during a classic Wisconsin winter. Just keeping the house clean can feel like a full-time job. But our dogs are so much more than pets; they're family. They nap on our floors, lick their paws after a walk, and sniff curiously into every corner of the house. This constant contact means they're far more exposed to chemical residues left behind by cleaning products than we are. A dog's smaller body and different metabolism make them especially vulnerable to the harsh ingredients hiding in many conventional cleaners. Think of this guide as your local handbook for keeping your home spotless and, most importantly, safe for your best friend. We'll walk through: Which chemicals to avoid when you're shopping for floor cleaners. How to spot truly pet-safe ingredients and read product labels with confidence. Simple DIY recipes for effective, non-toxic floor cleaners you can whip up at home. Safe mopping routines that guarantee a lick-safe surface every single time. The goal here isn't just about cleanliness; it's about peace of mind. For many pet owners, managing messes can also mean looking at the root cause. Sometimes, accidents are linked to health issues, and understanding options like dog incontinence natural remedies can be part of a bigger plan for a cleaner, healthier home. At Shiny Go Clean, we get the balance between a sparkling home and a safe pet. Our professional cleaning services in Madison are built on that exact principle. For those times you need an expert hand for a deep cleaning Madison WI , you can trust our team to use effective, pet-friendly methods every time. Give us a call today at 608-292-6848 to learn more about our commitment to a safe clean for every member of your family. The Hidden Dangers In Common Floor Cleaners Why is a standard floor cleaner a potential problem for your dog? Think of your dog like a curious toddler-one who explores the world mostly with their mouth and nose. They lick their paws after a walk, nap right on the floor, and sniff every corner of your home. All of this puts them in direct contact with any chemical residue left behind after you clean. This close contact is exactly where the risk starts. A dog's smaller body, faster metabolism, and unique physiology make them far more vulnerable to the chemicals in many common cleaning products. What might be a mild irritant to a person can cause a much more serious reaction in a dog. Why Common Ingredients Are Risky Many popular floor cleaners contain ingredients that can be genuinely harmful to pets. These aren't just obscure chemicals, either-they're everyday names you'd probably recognize from the label. Ammonia: This is a powerful cleaning agent, but its fumes can irritate your dog’s respiratory system, eyes, and throat. Bleach (Chlorine): While it’s great for disinfecting, bleach can cause chemical burns on sensitive paw pads and in their mouth if licked or touched. Phenols: Often found in pine-scented cleaners, phenols are particularly toxic to cats and can cause liver damage in dogs. Artificial Fragrances: That "clean" smell is often a cocktail of undisclosed chemicals called phthalates, which can trigger allergic reactions, respiratory issues, and even hormonal disruptions. The path from the cleaner bottle to your pet's system is alarmingly simple, as this visual shows. This image really drives home the direct link between what’s on your floor and your dog's well-being. It’s a powerful reminder of why we need to be so careful about the products we choose. To help you get a clearer picture, here’s a quick rundown of some of the riskiest chemicals you might find on an ingredient list. Common Chemicals And Their Risks To Dogs Chemical Ingredient Where It's Found Potential Risk to Dogs Ammonia Glass cleaners, all-purpose cleaners, floor strippers Respiratory irritation, burning sensation in the throat, eyes, and nose. Chlorine (Bleach) Disinfectants, toilet bowl cleaners, mildew removers Vomiting, drooling, skin irritation, chemical burns on paws and in the mouth. Phenols Pine-scented cleaners, disinfectants with "sol" in the name Liver and kidney damage, respiratory issues, nervous system depression. Phthalates Products with "fragrance" listed, scented sprays Endocrine disruption, allergic reactions, respiratory problems. Glycol Ethers Glass cleaners, spot removers, carpet cleaners Lung and kidney damage, anemia. Seeing it all laid out like this makes it easier to spot the red flags when you’re shopping for cleaning supplies. Understanding The Scale Of The Problem The concern over pet safety isn't just a niche worry anymore; it's a massive, growing movement. Pet-safe cleaners are part of a booming $6.5 billion global market that's projected to hit $8.3 billion by 2035 , all driven by owners worried about their pets licking toxic residues off the floor. These concerns are making a real difference. Vets reported a 20% decrease in pet poisoning cases from cleaners since 2020, which shows the positive impact of choosing safer products. With 70% of US homes now having pets, the demand for pH-neutral formulas safe for hardwood and vinyl is surging, especially in North America, which holds a 38% market share . A dog’s sense of smell is estimated to be 10,000 to 100,000 times more powerful than a human’s. What we perceive as a pleasant, clean scent can be an overwhelming chemical assault to a dog's sensitive nose, causing stress and discomfort. This isn't about creating fear. It's about building a clear understanding of the risks so you can feel confident you're protecting your pets. Knowing which ingredients to avoid is the first big step toward a safer, healthier home. And if you're looking for cleaning solutions beyond the floor, check out our guide on whether natural cleaning products actually work for your whole house. Making informed choices empowers every Madison homeowner to keep their floors sparkling and their furry family members safe. How To Spot A Genuinely Dog-Safe Cleaner Walking down the cleaning aisle at a store in Verona or Waunakee can feel a bit much, especially when you’re trying to track down floor cleaners safe for dogs . Labels are loud, shouting words like “natural,” “green,” and “non-toxic.” But those terms often don't mean much, since they aren't regulated. So, how do you cut through all that noise and find a product that’s actually safe for your pup? It all starts with learning to read the ingredient list like a pro, not just the marketing claims splashed across the front. True pet safety isn't about vague promises-it's about the specific stuff used in the formula. Decoding The Label Buzzwords Marketers are experts at making products sound safer than they really are. To protect your pet, you need to understand what those common claims actually mean-or, more often, what they don't. "Natural" : This just means the ingredients came from natural sources, but that doesn't automatically make them safe. Plenty of natural substances, like certain essential oils (think tea tree or pine), are toxic to dogs. "Non-Toxic" : This is another term without any real rules behind it. A product might be non-toxic to a human in small doses but could still be harmful to a smaller animal with a completely different metabolism. "Green" or "Eco-Friendly" : These labels usually have to do with environmental impact, like biodegradability or sustainable packaging. While those are great things, they don't guarantee the product is safe for your pet to be around. Instead of getting swayed by these flashy words, just turn the bottle around and scan the ingredient list. That's where the real story is. The Good Stuff To Look For When you know what safe ingredients look like, spotting a good product gets a whole lot easier. These are the green flags you want to see on a label. Plant-Derived Surfactants Surfactants are the workhorses of any cleaner-they’re what lifts dirt and grime off surfaces. Look for ones that come from plants like coconut or corn (you might see names like decyl glucoside or coco-glucoside). They clean just as well without the harshness of chemical-based agents. Enzymatic Cleaners For homes with pets, enzymes are your best friend. These are basically proteins that target and break down specific organic messes like urine, feces, and vomit. They don't just cover up smells; they get rid of the source completely, which is a huge deal for stopping your dog from re-marking an area. Simple, Recognizable Ingredients Sometimes, the simplest ingredients are the safest. Things like distilled white vinegar, baking soda, and unscented castile soap are powerful cleaners that pose very little risk to pets when they're used the right way. A crucial factor for any floor cleaner is its pH level. Look for pH-neutral formulas (around 7.0) because they are gentle on your dog’s paws and won't irritate their skin. They're also safer for most floor types, from hardwood to tile. The Rise Of Pet-Informed Choices Your search for safer products is part of a massive shift. The demand for pet-safe options is driven by owners who know what to look for, with 82% of pet owners actively seeking non-toxic household products. This consumer power is pushing the global pet floor cleaner market toward a projected value of over $2.3 billion , and dog owners make up 45% of that demand . In response, companies are quickly adopting enzyme-based and plant-derived formulas, which neutralize odors 95% more effectively than traditional cleaners in lab tests. This ensures floors are truly "lick-safe" for curious pups. Knowing what to look for empowers you to make confident choices. For specific recommendations, particularly for sensitive surfaces, you can find great information by exploring top picks for wood floor cleaners safe for pets . And for more detailed advice on protecting your specific flooring, check out our guide on finding a pet-safe non-toxic hardwood floor cleaner . This knowledge ensures you can maintain a sparkling clean home without ever compromising your dog's health. Simple DIY Floor Cleaner Recipes That Actually Work If you'd rather take a natural, budget-friendly route to cleaning, making your own floor cleaners safe for dogs is a fantastic option. You get total control over the ingredients, which means you know for sure there’s nothing harmful for your pets. Plus, these simple recipes are surprisingly good at cutting through grime and keeping your home fresh. Forget complicated formulas-the best DIY cleaners use things you probably already have in your pantry. These practical recipes are perfect for busy families in Dane County looking for a quick, reliable, and safe cleaning fix. The Classic All-Purpose Pet-Safe Floor Cleaner This is the go-to recipe for most sealed hard floors, like vinyl, laminate, and ceramic tile. It’s simple, powerful, and costs almost nothing to make. The distilled white vinegar acts as a natural disinfectant and deodorizer, while the dish soap helps lift away dirt and grease. Here’s how to mix it up: Gather Your Supplies: All you need is a gallon of warm water, one cup of distilled white vinegar, and just a tiny squirt (about a teaspoon) of unscented, dye-free dish soap. Mix the Solution: Pour everything into a bucket and give it a gentle stir. You want to combine the soap without creating a bucket full of suds. Mop and Dry: Use a damp-never soaking wet-mop to clean your floors. There's no need to rinse afterward. Just let the floor air dry completely before letting your dog back into the area. The vinegar smell disappears quickly as it dries, leaving behind a neutral, clean scent. For an even deeper look into making your home sparkle safely, you might be interested in our guide to natural floor cleaners for a maid service deep clean . Variations For Different Floor Types Not all floors are created equal, and a few small tweaks can make your DIY cleaner even more effective for specific surfaces. A Quick Word of Caution: Always test any new cleaning solution on a small, hidden spot first to make sure it agrees with your flooring. This is especially important for natural stone and hardwood. For Streak-Free Tile or Linoleum: Add about a half-cup of rubbing alcohol to the classic recipe. The alcohol helps the solution evaporate faster, which is the secret to preventing streaks and water spots. For Sealed Hardwood Floors: Go easy on the vinegar with wood. A better mix is a gallon of warm water with just a few drops of pH-neutral, unscented castile soap. Mop with a barely damp mop and dry it right away with a clean microfiber cloth to protect the finish. What To Avoid In Your DIY Mix Just because an ingredient is "natural" doesn't automatically mean it's safe for your dog. When you're making your own cleaners, it's critical to leave out certain items that are known to be toxic to pets. Never add these to your pet-safe cleaner: Tea Tree Oil: This one is a big no. It's highly toxic to both dogs and cats and can cause serious nervous system issues. Pine Oil: This can lead to liver damage and skin irritation. Citrus Oils (in high concentrations): While tiny, diluted amounts are in some commercial products, concentrated lemon, orange, or grapefruit oils can be very irritating. Wintergreen, Birch, and Ylang-Ylang Oils: These contain compounds that are harmful if ingested or even absorbed through the skin. Sticking with simple, proven recipes is the smartest way to make sure your DIY efforts give you a floor that's both sparkling clean and completely safe for every member of your furry family. The Four Rules Of Pet-Safe Mopping Picking out the right floor cleaners safe for dogs is a great start, but it’s only half the job. How you clean is just as important as what you clean with. Adopting a safe, consistent mopping routine makes sure even the best products are used in a way that protects your dog’s well-being. Think of it as a simple safety net-a few easy habits that take away any guesswork. Following these practices gives you the ultimate peace of mind, which is what every dog owner in Madison wants. Whether you're dealing with muddy paw prints from a walk in Madison or just everyday dust, this method keeps your home sparkling and your pet safe. Start With A Clean Slate Before a single drop of cleaner hits the floor, grab the vacuum. Pet hair, dander, and tracked-in dirt can turn into a frustrating, grimy sludge the moment they mix with a wet mop. Vacuuming first gets rid of all that loose debris, making your mopping far more effective. This first step doesn't just lead to a better clean; it stops you from just pushing around clumps of wet fur. It’s the professional secret to getting a truly spotless finish. Rule 1: Keep Pets Out Of The Room The simplest rule is also the most critical-keep your dog in another room or a secure area while you clean. This stops them from walking on wet, slippery surfaces, licking up cleaning solution before it’s dry, or getting under your feet and causing an accident. A baby gate or a closed door works perfectly. Rule 2: Ensure Great Ventilation Next, open a few windows or turn on a fan. Good airflow helps any fumes or scents from the cleaner-even natural ones-dissipate quickly. A dog’s sense of smell is incredibly powerful, and what seems mild to us can be overwhelming for them. A dog's sense of smell is approximately 10,000 to 100,000 times more sensitive than a human's. Proper ventilation is less about toxic fumes and more about your dog’s comfort, preventing their sensitive nose from getting overwhelmed by strong scents. This easy step ensures the air stays fresh and comfortable for everyone once the cleaning is done. Rule 3: Rinse If Required Some floor cleaners, especially the more concentrated formulas, can leave behind a slight residue. Always check the product label for rinsing instructions. If the bottle recommends a rinse, go over the floor a second time with a mop dampened with plain water. This extra step is your guarantee that no sticky or soapy film is left behind for your dog's paws to pick up later. Rule 4: Let It Dry Completely Finally, patience is key. The floor must be 100% dry before you let your dog back into the room. A completely dry surface means there's no lingering moisture for them to lick or absorb through their paw pads. This is the finish line, confirming the space is officially clean, fresh, and safe for your furry family member to enjoy. Professional Pet-Safe Cleaning For Madison Homes Sometimes, life just gets too busy for the deep, detailed cleaning your floors really need-especially when you're dealing with stubborn pet messes. From the Wisconsin winter slush and salt tracked into your entryway to the constant battle against shedding, keeping your home spotless can feel like a never-ending chore. This is where calling in a professional can be your best friend. A professional service goes beyond a quick mop. We tackle the tough stuff that builds up over time, like embedded pet hair in rug fibers, lingering odors you've gone nose-blind to, and the grime that settles into baseboards and corners. For dog owners in Madison, this isn't a luxury; it's a way to reclaim your time and get peace of mind. The Shiny Go Clean Difference For Pet Owners At Shiny Go Clean, we get it. A pet-friendly clean is about more than just using the right products. It’s a complete approach built on trust and a deep understanding of what pet owners need. Our cleaning professionals are thoroughly trained in pet-safe protocols, making sure every step we take prioritizes your dog's health and comfort. We use carefully vetted, pet-friendly products that are powerful enough to disinfect and knock out allergens without leaving behind harmful residues. This means your home isn't just visually clean-it's a healthier environment for every family member, furry or not. We focus on the details that matter to Madison pet owners, from meticulous pet hair removal cleaning Madison to using fragrance-free options upon request. A Data-Driven Approach To Pet Safety The shift toward pet safety isn't just a feeling; the numbers back it up. Dogs are a huge driver in the pet floor cleaner market, accounting for 45% of its projected $500 million value in 2025. That segment is growing at a 7% CAGR , especially as owners of larger breeds-which can shed 20-30% more hair annually -look for real solutions. It’s about more than just hair. Pet dander is a serious concern, triggering allergies in 25% of families . Using a professional service that relies on fragrance-free, antimicrobial formulas compatible with 95% of floor types guarantees these allergens are removed with a 99.9% germ-kill rate , all without toxic chemicals. This focus on safety is making a real impact, with vets reporting a 35% reduction in pet ingestion risks since 2020 as safer products become the norm. For a deeper dive into this trend, you can explore the full pet floor cleaner report . "Hiring a professional service trained in pet-safe cleaning isn't just about convenience. It's an investment in your pet's long-term health, ensuring that the environment they live in is free from the hidden dangers of harsh chemical residues." Your Effortless Path To A Pristine Home Imagine coming home to floors that are not only spotless but also completely safe for your dog to nap on and play on. That's the confidence we provide. We remove the stress and guesswork, offering a reliable, high-quality solution for busy pet owners in Dane County. Understanding the investment is also important; check out our guide on professional house cleaning costs i n Madison to see how our services fit your budget. Ready for a truly worry-free clean where every family member can thrive? Call or text us today at 608-292-6848 or book your pet-safe house cleaning online. Common Questions About Dog-Safe Cleaners Even with the best intentions, it's easy to have lingering questions about cleaning products when you have a dog at home. Here are some quick answers to the things Madison pet owners ask us most often. Is Vinegar Really Safe For My Dog? Yes, a simple mix of white vinegar and water is one of the safest DIY floor cleaners safe for dogs you can use. Its natural acidity is fantastic for cutting through everyday grime and disinfecting surfaces without harsh chemicals. The trick is getting the dilution right-a one-to-one ratio with water is perfect for most floors. Just mop, let it dry completely before your dog comes back in the room, and you're good to go. The vinegar smell disappears quickly as it dries. Just be sure to keep it away from natural stone like marble or granite, since the acid can damage the finish. What Are The Signs My Dog Reacted To A Toxic Cleaner? Knowing the warning signs of a bad reaction to a cleaning product is incredibly important. Symptoms can show up in different ways, from mild to severe, so it helps to know what to look for. Keep an eye out for these potential red flags: Excessive drooling, vomiting, or diarrhea. Acting unusually tired, sluggish, or lethargic. Redness or irritation on their skin, especially on their belly or paw pads. Coughing, wheezing, or any other trouble breathing. In more serious situations, you might see stumbling, disorientation, or even seizures. If you think your dog has been exposed to something toxic, get them into a well-ventilated space immediately. Then, call your vet or the ASPCA Animal Poison Control Center right away. Having the product label nearby will be a huge help when you talk to them. Can I Use A Steam Mop If I Have Dogs? Absolutely. Steam mops are a fantastic, chemical-free choice for homes with pets. They clean and sanitize using just superheated water, which means there’s zero risk of your dog encountering toxic residue on the floors. They're surprisingly effective at killing germs and lifting stuck-on dirt with nothing but steam. The main safety tip is a simple one: keep your dog in another room while you’re actively mopping. This prevents any chance of an accidental burn from the hot steam or the mop head itself. Once you’re done, just let the floor cool down and dry completely before letting your pet back into the nice, clean space. How Does Shiny Go Clean Keep Pets Safe in Madison? At Shiny Go Clean, we get it-your pets are family. Their safety is always our top priority. Our cleaning teams in Madison are trained in pet-safe cleaning methods, so every visit is completely worry-free for you and your furry friends. We bring our own vetted, pet-friendly cleaning supplies that are tough on dirt but gentle enough for your home. Of course, we’re always happy to use a specific product you provide if you have a preference. We also focus on the little details that matter to pet owners, like getting all the stray fur from baseboards and corners. When you book your house cleaning Madison WI , just give us a heads-up about your pets. We’ll take care of the rest, leaving you with a home that’s both sparkling and safe. Ready for a home that's spotless and safe for every member of your family? Trust the local experts who care. Shiny Go Clean provides reliable, pet-friendly cleaning services across the Madison and surrounding areas. Book your cleaning in 60 seconds .
- Top Tips: Your Madison Cleaning Checklist for Apartment Move Out
Moving out of your Madison apartment is exciting, but the final hurdle-the move-out clean-can feel daunting. One missed spot could be the difference between getting your full security deposit back and facing frustrating deductions from your landlord. Property managers, especially in busy family neighborhoods in Madison or new-build areas in Waunakee, have high standards, and a simple wipe-down just won't cut it. From scrubbing away slush tracked in during an Wisconsin winter to removing a season's worth of pollen from windowsills, the details truly matter. This guide provides the ultimate cleaning checklist for apartment move out , breaking down the 10 critical areas property managers inspect most closely. Following a structured plan is the key to a successful clean that leaves a great final impression. To secure your full security deposit, a comprehensive apartment move-out cleaning guide can be an invaluable resource, ensuring no spot is missed. We’ll cover everything from deep cleaning kitchen appliances to documenting your work with photos for the final walkthrough. Follow these steps to leave your old place looking immaculate, satisfy your lease requirements, and learn when to call us for a professional move out cleaning in Madison . 1. Deep Clean All Flooring (Vacuuming, Sweeping, and Mopping) The condition of your floors is one of the first things a landlord or property manager notices during a move-out inspection. Neglecting them is a costly mistake, as inadequate floor cleaning is a primary reason for security deposit deductions. This foundational task involves a multi-step process to ensure every surface-from carpet to tile to hardwood-is free of dirt, scuffs, and residue. This process is a key part of any professional cleaning checklist for apartment move out . In Madison, landlords commonly deduct $200-$400 for poorly cleaned floors, a standard seen in strict inspections at properties across Madison. Actionable Tips for Pristine Floors To get your floors turnover-ready, follow a specific order of operations for the best results. Start Dry, Finish Wet: Always vacuum or sweep before mopping. This removes loose debris like hair, crumbs, and dust, preventing you from just pushing around a gritty slurry with a wet mop. Choose the Right Cleaner: Use a pH-neutral cleaner on hardwood or laminate to avoid damaging the finish. For tile and vinyl, a manufacturer-recommended solution works best. If you're struggling with residue, you can find out why floors get sticky after mopping and how to fix it . Mop Strategically: Work in small, manageable sections, starting from the corner farthest from the door. Change your mop water frequently-once it looks dirty, you're just re-depositing grime onto the floor. Don't Forget the Details: Pay extra attention to corners, along baseboards, and under cabinet overhangs where dust bunnies collect. High-traffic areas like entryways and kitchen work zones will likely need a second pass. Allow for Drying Time: Let floors dry completely for at least 2-4 hours before the final walkthrough to prevent new footprints or marks. 2. Kitchen Deep Clean (Appliances, Cabinets, and Countertops) The kitchen is the heart of the home, but during a move-out inspection, it's the #1 area for scrutiny. Landlords meticulously check for grease, food residue, and grime inside appliances and cabinets. A poorly cleaned kitchen is a guaranteed way to lose a significant portion of your security deposit, as it requires intensive professional labor to correct. This task is a non-negotiable part of a cleaning checklist for apartment move out . In the Madison metro, kitchen deductions average $150-$300, and landlords in Madison are known to prioritize appliance cleanliness in their final walkthroughs. Some property managers even require photographic proof that appliances are spotless. Actionable Tips for a Flawless Kitchen A systematic approach is essential to tackle every surface and leave the kitchen inspection-ready. Tackle the Oven First: Use a quality oven cleaner at least 24 hours before your final wipe-down. This gives the formula time to break down tough, baked-on grease. Remove racks and soak them separately for easier scrubbing. Wipe Cabinets and Drawers: Empty all cabinets and drawers, then wipe the interior shelves and surfaces with a damp microfiber cloth to remove dust and crumbs without leaving streaks. Don't forget to wipe down the exterior cabinet faces and hardware. Degrease and Sanitize: Clean countertops, backsplashes, and the stovetop using an appropriate degreasing agent that won't damage the finish. Pay special attention to the area around the stove burners where grease accumulates. Sometimes grime can get stuck in hard-to-reach places, and you might need to learn how to clean between the oven glass for a truly thorough job. Inspect with a Flashlight: Before you finish, use your phone's flashlight to inspect the inside of the oven, microwave, and refrigerator. The bright light will reveal any missed spots or lingering residue. Document Your Work: Take clear, well-lit photos of the clean appliances (inside and out), empty cabinets, and countertops. This documentation can be invaluable if a dispute over your security deposit arises. 3. Bathroom Sanitization (Tubs, Toilets, Tiles, and Ventilation) The bathroom is a high-scrutiny area during any move-out inspection. Landlords and property managers look closely for signs of mold, mildew, soap scum, and hard water stains, as these issues suggest neglect and can be costly to fix. A thoroughly sanitized bathroom not only passes inspection but also demonstrates that you've cared for the property. This step is a non-negotiable part of any complete cleaning checklist for apartment move out . In areas like Verona and Belleville, landlords frequently cite mildew-a common issue due to Wisconsin's humidity-as a reason for deductions. Similarly, Madisons' water quality often leads to stubborn hard water stains that require more than a simple wipe-down. Actionable Tips for a Spotless Bathroom Follow these steps to ensure every surface shines, leaving no reason for a landlord to withhold your deposit. Tackle the Toilet First: Apply a quality toilet bowl cleaner and let it sit for at least 10-15 minutes before scrubbing with a stiff brush. Don't forget to wipe down the exterior, including the tank, base, and behind the seat. If you're dealing with stubborn rings, you can learn expert techniques for removing tough toilet stains . Dissolve Soap Scum and Mildew: For tubs, showers, and tile, use a commercial cleaner specifically designed for soap scum and mildew. A paste of baking soda and water is a great alternative for scrubbing grout lines. Clear the Air: Dust and wipe down the bathroom ventilation fan cover. A clean vent not only looks better but is essential for preventing the moisture buildup that leads to mold. Make Surfaces Gleam: Clean the sink, vanity, and countertops thoroughly. Finish by cleaning the mirror with a streak-free glass cleaner for a polished look. Test Cleaners Cautiously: If using a strong or acidic cleaner for hard water stains, always test it on a small, inconspicuous area of tile first to ensure it doesn't cause discoloration or damage. 4. Walls, Baseboards, Trim, and Door Frames Cleaning Often overlooked during routine cleaning, walls, baseboards, and trim are meticulously inspected during a move-out. These surfaces accumulate dust, scuffs, fingerprints, and smudges over time, and leaving them dirty is a common reason for deposit deductions. A thorough wipe-down is a non-negotiable step to present a truly clean and well-maintained apartment. This task is a critical part of a professional cleaning checklist for apartment move out . In Madison, property managers frequently cite dirty trim in deduction disputes, and wall marks from scuffs or crayon in family-heavy neighborhoods can easily lead to a $100-$300 charge if not addressed properly before the final walkthrough. Actionable Tips for Spotless Walls and Trim To restore these vertical surfaces to their original condition, follow these detailed steps. Work Top-to-Bottom: Always dust and wipe trim and walls from the top down. This ensures any dislodged dust or debris falls onto uncleaned surfaces below, preventing you from having to re-clean areas. Use a Damp Microfiber Cloth First: Before resorting to stronger cleaners, wipe baseboards, door frames, and window sills with a slightly damp microfiber cloth. This simple step removes the majority of dust and grime without damaging the paint. Tackle Scuffs with Caution: For stubborn scuff marks, a magic eraser can be effective. However, always test it on an inconspicuous area first , like inside a closet. It can sometimes damage flat or matte paint finishes, leaving a noticeable patch. Inspect with a Flashlight: Shine a flashlight parallel to the walls and along the trim. This low-angle light makes dust, fingerprints, and scuffs highly visible, helping you catch spots you might otherwise miss. Don't Forget Nail Holes: If permitted by your lease, fill small nail holes with a speck of spackle, sand it smooth once dry, and touch it up with paint if you have the matching color. 5. Window and Mirror Cleaning (Interior and Exterior) Streaky windows, dusty mirrors, and hard water spots on glass surfaces can make an otherwise clean apartment look neglected. A landlord's inspection often focuses on these details because they directly impact how bright and well-maintained the unit appears. Failing to properly clean all glass is a common reason for deposit deductions, as it signals a lack of thoroughness. This task is a non-negotiable part of any cleaning checklist for apartment move out . In Madison, where hard water is common, landlords will specifically check for mineral buildup on shower doors and windows. A professional cleaning can cost $150-$250 to fix, so getting it right yourself is crucial for protecting your deposit. Actionable Tips for Sparkling Glass Achieve a professional, streak-free shine by following a specific process for windows and mirrors. Use the Right Solution: A simple 50/50 mix of white vinegar and water in a spray bottle is highly effective and budget-friendly. For tough grime, a quality commercial glass cleaner works well. Master the Squeegee: For larger windows, spray the surface, then pull a squeegee down in slightly overlapping vertical strokes. Wipe the squeegee blade with a clean microfiber cloth after each pass to prevent redepositing dirt. Tackle Hard Water Stains: Madisons' hard water leaves mineral deposits. To remove them, apply a paste of baking soda and vinegar, let it sit for 15-20 minutes, then scrub gently with a non-abrasive sponge before rinsing and cleaning as usual. Prioritize Microfiber: Ditch paper towels, which can leave behind lint. Use one microfiber cloth for cleaning and a separate dry one for buffing edges and catching any drips. You can learn more about how to clean windows without streaks for a perfect finish. Clean in the Right Order: Clean windows after dusting and vacuuming to prevent new dust from settling on your clean glass. If you have accessible exterior windows, like on a balcony in an Ankeny apartment, clean the interior first to avoid smudging your work. 6. Closet and Storage Space Organization/Cleaning Often overlooked, closets, pantries, and storage areas are meticulously checked by landlords to ensure a unit is truly empty and clean. Leaving behind even a single forgotten item or a layer of dust on a shelf can lead to frustrating and easily avoidable security deposit deductions. This task is a critical final step in any comprehensive cleaning checklist for apartment move out . This task is a key part of any professional cleaning checklist for apartment move out . In Madison, property managers frequently cite the condition of closets in move-out reports, especially in Madison apartments where built-in pantries and extensive storage are common features that require special attention. Actionable Tips for Spotless Closets To ensure your storage spaces pass inspection, follow this systematic approach. Empty Everything First: Remove every single item from the closet or pantry. This is the only way to ensure you haven't left anything behind and can access every surface. Clean from Top to Bottom: Start by wiping down the top shelves and the clothing rod, as dust and debris will fall downward. Finish by vacuuming or sweeping the floor last. Use a Flashlight for Inspection: Corners, shelf edges, and high-up areas can hide dust and cobwebs. A quick scan with your phone's flashlight reveals anything you might have missed in the dim lighting. Address Sticky Residue: If you used shelf liners, peel them up carefully and use a gentle adhesive remover or a solution of warm water and dish soap to scrub away any sticky residue left behind. Document Your Work: Once a closet is perfectly clean, take a quick, well-lit photo. This can be invaluable evidence if a dispute arises over the unit's condition during the final walkthrough. 7. Light Fixture and Switch Plate Cleaning Often overlooked, light fixtures, ceiling fans, and switch plates are magnets for dust, grime, and fingerprints. A landlord or property manager will notice these details during the final inspection, as clean fixtures suggest a thorough and well-maintained property. This task involves more than a quick wipe-down; it means addressing every fixture, bulb, and plate to restore the apartment’s bright and cared-for appearance. This step is a non-negotiable part of a professional cleaning checklist for apartment move out . In older Madison apartments with decorative fixtures, or newer units in Waukee with ceiling fans in every room, these areas are scrutinized for dust and grime buildup, which can lead to unnecessary deductions from your security deposit. Actionable Tips for Bright and Clean Fixtures To ensure your fixtures and switches pass inspection, a systematic, top-to-bottom approach is essential. Prioritize Safety: Always turn off the power at the circuit breaker before cleaning any light fixture. Use a sturdy step ladder and never overreach-move the ladder as needed. Contain the Dust: When cleaning ceiling fan blades, slide an old pillowcase over each blade and pull it back. This clever trick traps all the dust inside the case instead of letting it fall onto your clean floors below. Clean Glass and Metal Carefully: Use a microfiber cloth lightly dampened with glass cleaner or a gentle all-purpose solution to wipe down glass globes, shades, and metal components. Dry them immediately to prevent streaks. Detail Switch Plates: Magic erasers or a cloth with a bit of all-purpose cleaner work wonders on grimy switch plates and outlet covers, removing fingerprints and smudges instantly. Replace Burned-Out Bulbs: It is almost always the tenant's responsibility to ensure all light bulbs are working. Replace any that are burned out or dim to present the apartment in the best possible light. 8. Carpet Stain Treatment and Spot Cleaning Carpet stains are a leading cause of security deposit deductions, making spot treatment an essential step in your move-out process. Overlooking even small spots, pet accidents, or discoloration can result in hefty fees. This task involves carefully identifying, treating, and neutralizing stains and odors to restore the carpet to its original condition. This is a critical part of any comprehensive cleaning checklist for apartment move out . In the Madison metro area, where humidity can worsen pet odors, landlords in Dane County frequently charge $300-$600 for stain remediation. For pet-friendly rentals, urine contamination is the most common and costly carpet issue landlords face. Actionable Tips for Spotless Carpets To effectively treat stains and avoid costly deductions, follow these proven steps. Blot, Don't Rub: When a spill happens, immediately blot the area with a clean, white cloth, working from the outside in. Rubbing grinds the stain deeper into the carpet fibers and can make it permanent. Test Your Cleaner: Before applying any cleaning solution to a visible stain, test it on an inconspicuous area, like inside a closet, to ensure it doesn't cause discoloration. Use an Enzymatic Cleaner for Pet Stains: For pet urine or other organic stains, a standard carpet cleaner won't work. Use an enzymatic cleaner specifically designed to break down the proteins and eliminate the odor at its source. Deodorize with Baking Soda: To tackle lingering odors, sprinkle baking soda liberally over the affected area. Let it sit for at least 30 minutes before vacuuming it up thoroughly. Document Everything: Take clear before-and-after photos of the stains you treat. This documentation can be invaluable if there's a dispute over your security deposit. 9. Final Walkthrough Documentation (Photos and Inspection) Your job isn't finished once the last surface is wiped down. The final walkthrough and documentation phase is your insurance policy, providing undeniable proof that you left the apartment in excellent condition. This crucial step involves systematically photographing the cleaned unit to create a visual record that can protect you from unwarranted security deposit deductions. Without this evidence, it's your word against your landlord's. This final step is an essential part of any thorough cleaning checklist for apartment move out . Tenant protection advocates in Wisconsin strongly recommend photo documentation, as it can significantly strengthen a renter's position in a deposit dispute. In fact, Madison renters who comprehensively document the condition of their unit at move-out often recover a much higher percentage of their deposit compared to those who have no proof. Actionable Tips for Bulletproof Documentation To create a record that will stand up to scrutiny, follow these specific documentation steps. Timestamp Everything: Use a smartphone app that overlays the date and time directly onto your photos. This proves when the images were taken, confirming they represent the apartment's condition after you finished cleaning and moved out. Be Thorough and Methodical: Take wide-angle shots of every room from multiple corners to show the overall cleanliness. Follow up with close-up shots of commonly disputed areas: inside ovens, refrigerators, bathtubs, under sinks, and along baseboards. Create a Digital Trail: Once you've taken all the photos, send them to your landlord or property manager via email or text immediately. This creates a time-stamped digital receipt showing that you provided them with the documentation on your move-out day. Keep Your Own Copies: Save a copy of all photos and your written communication to a secure cloud drive. Hold onto this evidence until your full security deposit has been returned. 10. Odor Elimination and Air Freshening Lingering odors from cooking, pets, or moisture are immediate red flags during a move-out inspection, often signaling neglect to landlords. Simply masking smells is not enough; true odor elimination requires identifying and neutralizing the source, a critical step to ensure you get your full security deposit back. A fresh, neutral-smelling apartment feels genuinely clean and well-maintained. This task is a non-negotiable part of a thorough cleaning checklist for apartment move out . In Madison, where humidity can trap cooking and pet odors, landlords frequently deduct fees for unresolved smells. Pet-related odors are a common move-out complaint in Midwest rentals, and failing to address them can result in significant charges for professional deodorization services. Actionable Tips for a Fresh, Neutral Scent To permanently remove odors instead of just covering them up, follow these targeted steps. Ventilate Aggressively: Before you start any cleaning, open all windows and doors for at least an hour. This initial airing out helps dissipate surface-level smells and provides fresh air while you work. Use Baking Soda on Soft Surfaces: Sprinkle a generous amount of baking soda on all carpets, rugs, and upholstered furniture. Let it sit for at least a few hours-or ideally overnight-before vacuuming it up thoroughly. Baking soda is excellent at absorbing and neutralizing common household odors. Target Pet Odors with Enzymes: If you had pets, standard cleaners won't work on urine spots. You must use an enzymatic cleaner, which contains special bacteria that break down and "eat" the organic matter causing the smell. This is the only way to fully eliminate pet odors. Don't Forget the HVAC Filter: A dirty furnace or air conditioner filter can trap dust, dander, and odor-causing particles, continuously circulating them throughout the apartment. Replacing it with a fresh one is an inexpensive and highly effective final step. Avoid Scented Sprays: Do not use plug-in air fresheners, candles, or scented sprays before the final walkthrough. Property managers can easily smell the difference between a clean space and one that is just masking an underlying odor, which can make them more suspicious during the inspection. 10-Point Apartment Move-Out Cleaning Comparison Service 🔄 Implementation Complexity ⚡ Resource Requirements ⭐ Expected Outcomes 📊 Ideal Use Cases 💡 Key Advantages / Tips Deep Clean All Flooring (Vacuuming, Sweeping, Mopping) Medium–High — multi-stage, floor-type specific Vacuum, mop, pH-neutral cleaners, microfiber, possible steam cleaner; 1–3+ hrs High — removes visible and embedded dirt; inspection-ready Move-outs with mixed flooring; high-traffic areas Start with vacuuming; use pH‑neutral on hardwood; allow 2–4 hr drying Kitchen Deep Clean (Appliances, Cabinets, Countertops) High — appliance interiors and heavy degreasing Degreasers, oven cleaner, microfiber, scrubbing tools; 2–3+ hrs Very High — strongest ROI for deposit recovery Greasy kitchens; appliances inspected during walkthroughs Soak ovens ahead of time; photograph appliance interiors for proof Bathroom Sanitization (Tubs, Toilets, Tiles, Ventilation) High — grout, mold, ventilation require specialized methods Grout cleaners/steam, disinfectants, brushes, ventilation tools; time-intensive High — removes mold/mildew and hard-water stains; health-safe Units with hard water or mold risk; bathrooms heavily inspected Use grout-specific cleaners or steam; ventilate and test acidic cleaners Walls, Baseboards, Trim, and Door Frames Cleaning Medium — detail work, spot-test paints to avoid damage Microfiber, magic eraser, extension poles; low-cost but time-consuming High — high visual impact; prevents mark-related deductions Units with scuffs, white trim, family or long-term tenants Work top-to-bottom; test magic eraser on hidden spot first Window and Mirror Cleaning (Interior and Exterior) Low–Medium — technique-sensitive; exterior safety concerns Squeegee, vinegar solution/professional glass cleaner, microfiber, ladder as needed High — immediate brightness and perceived cleanliness boost Units where light and curb appeal matter; shower glass/large windows Squeegee in overlapping passes; clean mirrors last; treat mineral deposits Closet and Storage Space Organization/Cleaning Low — simple tasks but often overlooked Vacuum/sweep, microfiber cloth, flashlight; minimal supplies Medium–High — signals thoroughness; reduces pest risk Move-outs with many closets, pantries, or storage rooms Use checklist; vacuum then wipe; photograph cleaned spaces Light Fixture and Switch Plate Cleaning Low–Medium — safety for ceiling fixtures; careful handling Ladder, microfiber, bulb replacements; low material cost Medium–High — improves lighting and perceived care Units with dusty fans, dim fixtures, or decorative lights Dust fan blades with a pillowcase; replace burned-out bulbs safely Carpet Stain Treatment and Spot Cleaning Medium–High — stain-specific methods; risk of setting stains Spot cleaners, enzymatic cleaners, extractor/steam cleaning if needed High (if correct treatment) — reduces common deposit deductions Pet-occupied rentals; visible stains before inspection Blot don't rub; test cleaner on hidden area; use enzymatic products for urine Final Walkthrough Documentation (Photos and Inspection) Medium — systematic, time-consuming documentation Camera/phone with timestamps, checklist, notes; minimal physical tools Very High — critical evidence to contest deductions All move-outs, especially dispute-prone situations Take timestamped photos from multiple angles and send to landlord immediately Odor Elimination and Air Freshening Medium–High — must identify and treat root causes Enzymatic cleaners, baking soda, activated charcoal, ventilation, possible professional ozone High when source addressed; variable if structural issues exist Pet, smoke, or moisture-affected units; basement apartments Use enzymatic cleaners for pet odors; avoid masking sprays; replace HVAC filter Make Your Madison Move-Out Stress-Free Moving out of an apartment is a significant undertaking, often filled with the excitement of a new beginning overshadowed by the stress of logistics and final obligations. The comprehensive cleaning checklist for apartment move out we've detailed isn't just a list of chores- it's your strategic roadmap to securing your full security deposit and leaving your old space in impeccable condition. By systematically tackling everything from the kitchen appliances and bathroom grout to the often-overlooked baseboards and light fixtures, you are demonstrating respect for the property and fulfilling your lease agreement to the letter. Key Takeaways for a Flawless Move-Out Remember, a successful move-out clean is about more than just surface-level tidying. It requires a deep, methodical approach. Here are the most critical points to carry forward: Documentation is Your Best Defense: Before you even begin cleaning, take "before" photos of any existing damage. Once you're finished, conduct your own final walkthrough and take extensive "after" photos and videos. This evidence is invaluable in case of any security deposit disputes. Focus on the "Big Three": Landlords and property managers in Madison almost always scrutinize the kitchen, bathrooms, and floors most closely. Dedicate the majority of your time and effort to degreasing ovens, descaling faucets, and ensuring every inch of flooring is free of dirt, scuffs, and stains. Don't Forget the Details: It's the small things that elevate a good clean to a great one. Wiping down switch plates, dusting ceiling fan blades, and cleaning inside window tracks shows a level of care that leaves a lasting positive impression. Ultimately, mastering your move-out clean is about reclaiming control over a hectic process and maximizing your financial return. That security deposit is your hard-earned money, and a thorough cleaning is the final step to ensuring it comes back to you. The sense of accomplishment that comes from handing over keys to a spotless apartment allows you to close one chapter and start the next on a positive, stress-free note. However, we understand that between packing, moving, and starting a new chapter, time and energy are precious commodities. Juggling these tasks, especially for busy professionals or families in Madison neighborhoods, can feel overwhelming. If the thought of scrubbing an oven or deep-cleaning carpets feels like one task too many, there is a professional, reliable solution. Don't let the final clean stand between you and a smooth move. Shiny Go Clean offers expert move out cleaning services across the Madison metro, ensuring every item on your checklist is handled with professional precision. Visit us at Shiny Go Clean or call 608-292-6848 to book your service and make your move-out clean a guaranteed success.