How To Get Rust Off Stainless Steel Fridge With Easy DIY Tips
- Team Shiny Go Clean
- 5 days ago
- 13 min read

For most surface rust, a simple paste of baking soda and water is a safe and effective starting point. Mix three parts baking soda to one part water, apply it to the rust spots, and let it sit for about 30 minutes before gently scrubbing with a soft cloth in the direction of the steel's grain.
Why Your Stainless Steel Fridge is Rusting

It’s one of those head-scratching moments in the kitchen. You spot a tiny orange or brown speck on your stainless steel fridge and think, "Wait a minute, isn't this stuff supposed to be stainless?"
The name itself is a little bit of a misnomer. Stainless steel isn’t completely immune to rust- it’s just highly resistant to it.
That resistance comes from a microscopic, invisible layer of chromium oxide that forms on the surface when the metal hits the air. This "passive layer" acts like a shield, protecting the iron in the steel from moisture and stopping oxidation- the chemical reaction we see as rust.
But that protective shield isn't indestructible. When it gets scratched, worn down, or hit with the wrong chemicals, the iron underneath is exposed to air and moisture. And that’s when rust starts to creep in.
Common Culprits Behind Fridge Rust in Des Moines
So, what’s breaking down that all-important shield in your kitchen? Usually, it boils down to a few common household culprits you might not even realize are causing the damage.
Abrasive Cleaning Tools: Using steel wool, scouring pads, or stiff-bristled brushes creates tiny scratches that break the protective seal and trap moisture.
Harsh Chemical Cleaners: Cleaners that contain bleach, chlorine, or ammonia are far too aggressive for stainless steel. They can chemically eat away at the chromium-oxide layer.
Local Environmental Factors: Here in Des Moines, we see it all the time. Tracked-in Iowa winter slush and salt can be surprisingly corrosive if they splash onto your appliances. High humidity, especially in a busy kitchen, also gives rust a helping hand.
Your stainless steel fridge is a significant investment, often costing between $1,200 to $3,500. Understanding that most rust issues- roughly 60-70%- stem from improper cleaning methods rather than defects can help protect that investment. You can find more details on appliance care over at Consumer Reports.
Ultimately, knowing how to get rust off a stainless steel fridge starts with figuring out why it showed up in the first place. Once you identify and eliminate these common causes, you can treat the existing spots and keep new ones from ever appearing. It’s all about protecting that invisible shield.
Essential Supplies For Safe Rust Removal
Before you start scrubbing away at those frustrating rust spots, let's talk about setting yourself up for success. Using the right tools is the single most important step in getting rust off a stainless steel fridge without causing more damage. The goal is to be tough on the rust but gentle on the finish.
You probably have most of what you need right in your pantry or under the sink. Forget the harsh chemicals and abrasive pads- they’re the reason many stainless steel surfaces get damaged in the first place.
Instead, pull together these simple but powerful items:
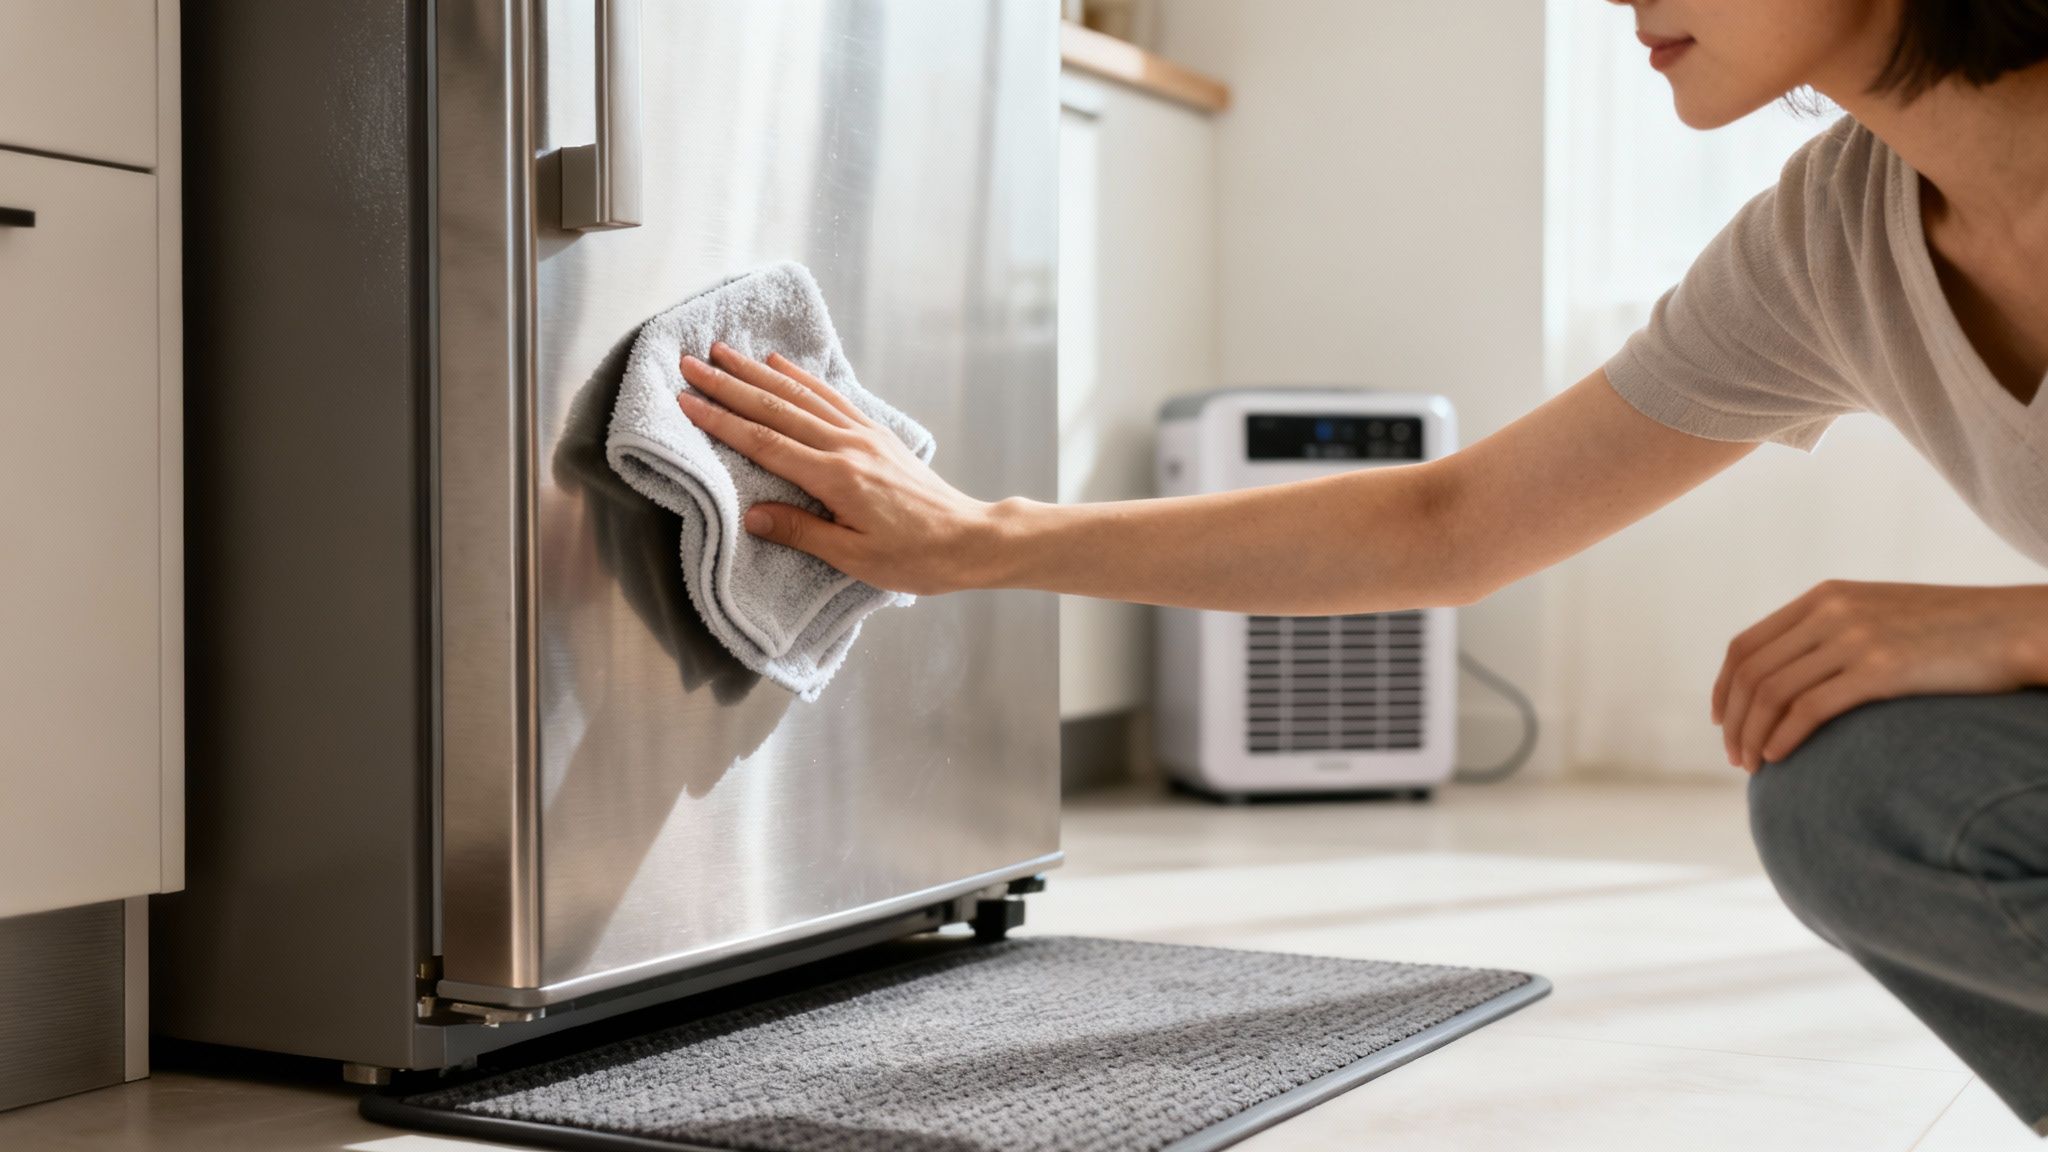
Microfiber Cloths: Grab at least two. You'll need one for applying your cleaning solution and another clean, dry one for wiping and buffing. They’re soft and won’t leave lint or scratches behind.
Soft Sponges: A non-scratch sponge is perfect for applying a bit more pressure without harming the steel's surface. Never use the green, abrasive side of a standard kitchen sponge.
A Small Bowl: This is just for mixing up your DIY cleaning pastes.
Distilled Water: Using distilled water to mix pastes or for the final rinse helps prevent mineral deposits and water spots, which can be a real headache with tap water.
Choosing Your Cleaning Agent
You've got a couple of great options here, depending on how stubborn the rust is. For most minor specks, a homemade solution is all you'll need.
Pro Tip: Always test any cleaner, homemade or store-bought, on a small, hidden spot first- like the side of the fridge door that faces a wall. This quick test ensures it won’t discolor or dull your appliance's finish.
Let's break down your best bets.
Rust Removal Toolkit Comparison
Here's a quick look at your DIY and commercial options to help you decide which solution fits your needs, budget, and the severity of the rust.
Solution | Best For | Application Method | Caution |
|---|---|---|---|
DIY Paste (Baking Soda & Water) | Light, fresh surface rust specks | Mix to a toothpaste-like consistency, apply with a cloth, let sit for 15-30 mins | Extremely safe and non-abrasive, but may require a second application for tougher spots. |
Commercial Cleaner (Bar Keepers Friend) | Stubborn or widespread rust spots | Apply the liquid or soft cleanser version with a damp sponge and rub gently | Avoid the powdered version, which can be too abrasive. Wear gloves and ensure good ventilation. |
Ultimately, starting with the right gear is half the battle. These gentle supplies are just as important when cleaning other stainless steel surfaces in your home.
For more tips, check out our guide on how to remove rust from a stainless steel sink, which uses many of the same principles. By choosing the right tools from the get-go, you're already on your way to a beautifully restored, rust-free fridge.
Gentle DIY Methods For Light Rust Spots
When you first notice those little specks of rust, your first instinct might be to reach for a heavy-duty cleaner. But for light jobs, your pantry probably holds everything you need. Aggressive chemicals and harsh scrubbers often do more harm than good on a stainless steel finish. Instead, a couple of simple, gentle methods can restore your fridge's shine using items you already have.
The single most important rule for any DIY rust removal is to always work with the grain of the stainless steel, never against it. Think of it like sanding wood- going against the grain leaves obvious scratches. Look closely at your fridge; you'll see faint lines running either vertically or horizontally. Follow that direction for every wipe and scrub.
This chart can help you decide which supplies to grab based on how serious the rust is.
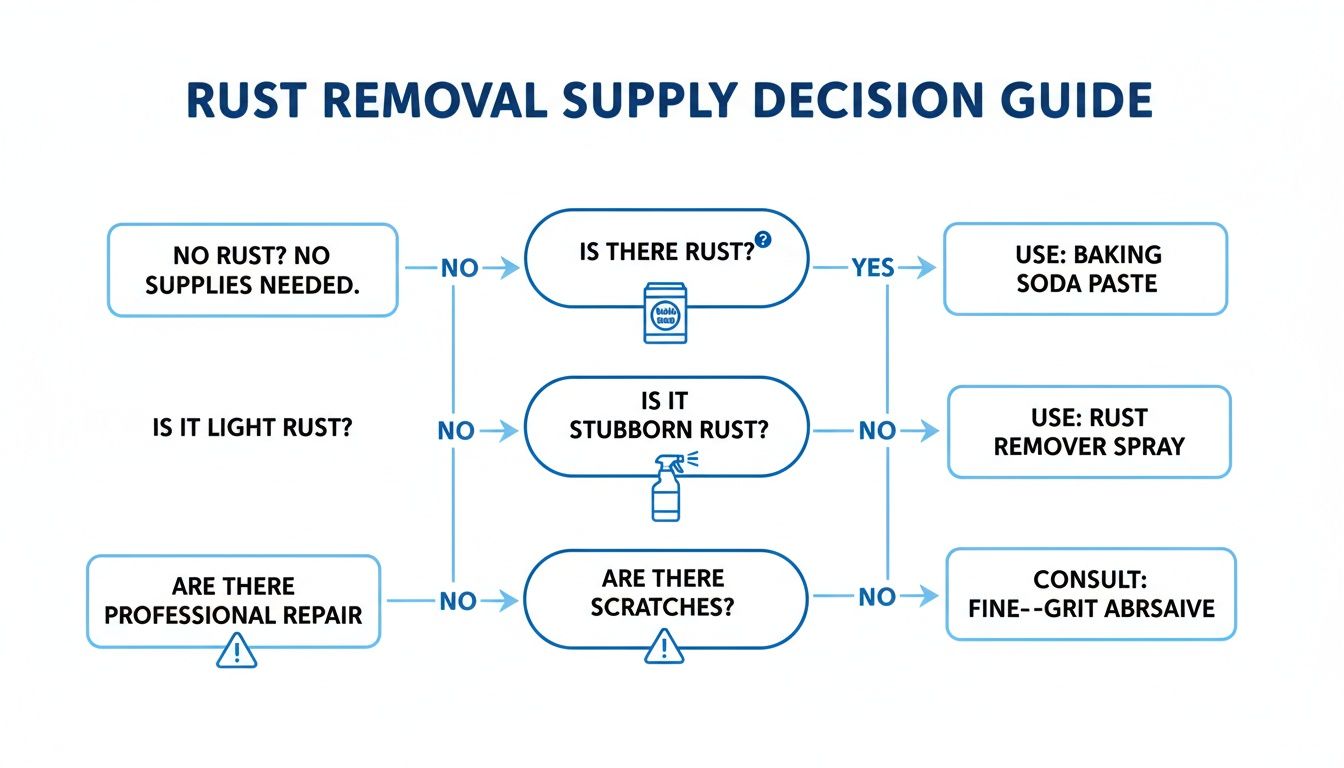
As the guide shows, starting with the least aggressive method is always the safest bet. For light rust, that means starting with something simple like baking soda.
The Baking Soda Paste Method
Baking soda is a fantastic mild abrasive. It has just enough grit to lift surface rust without scratching the delicate finish of your appliance, making it the perfect first move for almost any minor rust issue.
Here’s the right way to do it:
Create the Paste: In a small bowl, mix about three parts baking soda with one part distilled water. You're looking for a thick paste consistency, almost like toothpaste.
Apply Gently: Using a soft microfiber cloth, dab a small amount of the paste directly onto the rust spots. Remember to move in the direction of the steel's grain.
Let It Sit: Allow the paste to rest on the rust for about 15-30 minutes. This gives the baking soda time to work on breaking down the oxidation.
Wipe and Rinse: With a clean, damp microfiber cloth, gently wipe the paste away. Finish by rinsing the area with another cloth dampened with distilled water and dry it completely.
The Vinegar or Lemon Juice Solution
For spots that are a little more stubborn, the mild acidity of white vinegar or lemon juice can be incredibly effective. The acid helps dissolve the rust, making it much easier to wipe away without heavy scrubbing.
Important Tip: Never leave vinegar or lemon juice on your stainless steel for too long. While it works well, prolonged contact with acid can dull the finish. A quick application followed by a thorough rinse is all you need.
Here’s the process:
Apply the Acid: Dampen a microfiber cloth with a small amount of white vinegar or fresh lemon juice.
Gently Rub: Wipe the rust spot, again, always following the grain. Use gentle pressure and let the acid do the work, not your elbow grease.
Rinse Immediately: Use a clean cloth dampened with distilled water to thoroughly wipe the area and neutralize any remaining acid.
Dry Completely: Finish by drying the surface with a fresh, dry microfiber cloth. This prevents water spots and stops new rust from forming.
If you want to learn more about using acidic cleaners safely, take a look at our guide on cleaning your refrigerator with vinegar.
These simple pantry solutions are surprisingly effective. In fact, a baking soda paste can often remove 75-90% of light surface rust. The key is acting quickly- rust left for more than 48 hours becomes significantly harder to remove.
Using Commercial Products For Stubborn Rust
Sometimes, a homemade paste just doesn't have the oomph to cut through rust that’s been sitting for a while. When you’ve tried the gentler methods and those stubborn orange specks refuse to budge, it's time to reach for a specialized commercial cleaner. These products are formulated to dissolve rust far more effectively, but they do require a bit more caution.
One of the most trusted names for this exact job is Bar Keepers Friend. Its active ingredient, oxalic acid, is a powerhouse at breaking down rust chemically. Just be sure to grab the pre-mixed liquid or soft cleanser version. The powder can be a little too abrasive and might create micro-scratches on your fridge’s delicate finish.
Safe Application Is The Key
Working with a stronger, acid-based product means you need to take a few extra precautions. The goal is to get rid of the rust, not damage your appliance or irritate your skin. Before you even start, crack open a window or flip on the kitchen vent fan to get some air moving.
Next, gather your supplies:
Sturdy rubber gloves to protect your hands.
A non-abrasive sponge or soft microfiber cloth for application.
Two clean microfiber cloths- one for rinsing and one for drying.
With your gear ready, you can get started. Squeeze a small amount of the cleaner directly onto your damp sponge, not onto the fridge itself. This simple trick gives you way more control and stops the product from dripping down the surface.
The Right Technique For A Flawless Finish
Just like with the DIY methods, the direction you wipe in matters a lot. Gently rub the product onto the rusted area, always moving with the grain of the stainless steel. Use light, even pressure in a back-and-forth motion. Whatever you do, avoid scrubbing in circles- that's a surefire way to leave swirl marks behind.
Let the cleaner sit for no more than one minute. These products work fast, and leaving them on any longer can risk discoloring the finish.
The rinse is the most critical step. As soon as that minute is up, immediately wipe the spot with a clean cloth dampened with distilled water. Go over it a couple of times to make sure every last trace of the acidic cleaner is gone. Finally, buff the area completely dry with your last clean cloth to prevent water spots and bring back that beautiful shine.
This method is incredibly effective for tougher rust, but what if the problem feels too big to handle on your own? If you’re dealing with widespread corrosion across the door or just don’t have the time, it might be time for professional help. For complex jobs like this, our oven cleaning Des Moines service often includes deep appliance care, and we can apply the same expertise to your fridge. Our team at Shiny Go Clean has the right professional-grade products and techniques to safely restore your appliance without the guesswork.
Protecting Your Fridge To Prevent Future Rust
It feels great to get that rust off your stainless steel fridge, but the job isn't quite finished. Now it's all about prevention. Keeping rust from coming back is much easier than removing it, and it really comes down to a few simple, consistent habits that protect that all-important chromium-oxide layer.
The single most important thing you can do is wipe up spills and splatters the moment they happen. Don't let acidic things like tomato sauce, coffee, or citrus juice sit on the surface. A soft microfiber cloth with a bit of water or a gentle, pH-neutral cleaner is all you need. This one habit alone stops the chemical reactions that give rust a place to start.
Building a Simple Maintenance Routine
Consistency is your best defense against rust. You don’t need to spend hours on it- just a few thoughtful minutes each month can make a massive difference. The goal is to keep a strong barrier between the steel and the elements that cause corrosion.
A good place to start is with your everyday cleaning supplies. Never use cleaners containing bleach, ammonia, or chlorine on your stainless steel. These chemicals are way too harsh and will quickly strip away the protective finish, basically rolling out the welcome mat for rust.
Here are a few proactive steps to work into your cleaning schedule:
Monthly Polish: Grab a dedicated stainless steel polish or protector and apply it once a month. This adds an extra layer of defense, helps repel moisture, and even makes it harder for fingerprints to stick.
Wipe With The Grain: Whenever you clean the surface, always move your cloth in the direction of the steel's grain. This simple trick prevents tiny scratches that can trap dirt and moisture.
Keep It Dry: Moisture is rust’s best friend. After wiping your fridge down, always follow up with a dry microfiber cloth to buff away any leftover dampness.
Think of stainless steel polish as wax for your car. It creates an invisible shield that repels the things that cause damage. A quick polish every few weeks takes less than five minutes but provides long-lasting protection against moisture and corrosive elements.
Adjusting for Des Moines Conditions
Living here in Iowa comes with its own set of environmental challenges that can take a toll on our appliances. In the winter, the salt and slush we track into our homes from neighborhoods in West Des Moines can splash onto kitchen appliances and become highly corrosive. Simply placing a durable mat at your entryway can cut down on this dramatically.
Then there's the summer humidity, which can raise the moisture levels inside your home. If your kitchen feels particularly damp- especially if it’s near a laundry area- running a small dehumidifier can help keep the air dry and make your stainless steel much less susceptible to rust.
By turning these small actions into habits, you're not just cleaning- you're actively protecting your investment. And if you're looking for more ways to keep your kitchen looking its best, check out our professional tips for cleaning your stainless steel stovetop.
When To Call A Professional In Des Moines
DIY methods are fantastic for handling minor rust specks, but sometimes a job calls for more than just elbow grease and pantry staples. Knowing when to step back and call in a professional isn't admitting defeat- it's the smartest way to protect your expensive appliance from accidental damage.
If you're looking at a situation that feels overwhelming, it's probably time to let an expert take over. A few scattered spots are one thing; widespread corrosion covering a large area of the door is another beast entirely. Trying to treat a huge surface yourself often leads to an uneven, blotchy finish that can look even worse than the original rust.
Another red flag is when the rust has moved beyond a simple surface stain and started to cause pitting- those tiny indentations in the steel itself. Household cleaners just can't fix that kind of physical damage. It takes a professional touch to smooth and restore the finish without making the pitting more obvious.
Signs It's Time To Call For Help
Not sure if your rust situation is a job for a pro? Here are a few clear indicators that it's time to pick up the phone. If you're facing any of these issues, attempting a DIY fix could easily lead to permanent scratches or discoloration.
Extensive Rust Coverage: If more than 10-15% of a single surface (like a door panel) is affected, a professional can ensure a consistent, factory-fresh finish.
Deep Pitting or Corrosion: When you can feel the rust with your fingernail, it means the damage has gone beneath the surface and needs a more delicate approach.
Delicate or Specialty Finishes: Black stainless steel, fingerprint-resistant coatings, or custom-paneled fridges require specific products and techniques to avoid stripping the special finish.
You're Simply Too Busy: Let's be honest, life gets hectic. If you don't have the time to carefully tackle the job, calling a pro is a great way to get it done right without the stress.
A professional cleaning service isn't just about muscle; it's about expertise. We use pro-grade, pH-balanced products that are tough on rust but formulated specifically to be safe for high-end appliance finishes, ensuring no collateral damage.
The Shiny Go Clean Advantage
When you call Shiny Go Clean at (515) 446-9726, you're getting more than just rust removal. We can easily integrate this specialized task into a full deep cleaning Des Moines IA service.
This means while we're restoring your fridge, we can also be deep cleaning your oven, scrubbing your baseboards, and making your entire kitchen shine. It’s an efficient way to check a major task off your list and refresh your whole home at once.
Our team is trained to handle delicate surfaces and has the right tools for even the most stubborn rust. We know how to restore the gleam to your appliances safely, saving you time and the potential cost of a much bigger repair. For a complete overview of how we can help your home, explore our house cleaning services in Des Moines, IA.
A Few Lingering Questions
Even with a solid plan, a couple of questions usually pop up when you’re standing in front of your fridge, sponge in hand. Learning how to get rust off a stainless steel appliance is mostly straightforward, but sometimes a tricky situation comes up. Here are some of the most common questions we hear from homeowners around Des Moines.
Can Vinegar Actually Damage Stainless Steel?
Yes, it can, but only if you use it the wrong way. A quick wipe-down with a diluted vinegar solution is perfectly safe for getting rid of a rust spot. The trouble starts when you let pure vinegar sit on the surface for too long.
Because it's acidic, it can eventually start to wear down the protective chromium-oxide layer. That’s what leads to a cloudy, etched look. The key is to always rinse the area thoroughly with plain water right after you’re done to neutralize the acid.
How Often Should I Polish My Stainless Steel Fridge?
For the average household, a light polish every 3 to 4 months is more than enough to keep the protective layer strong and help it repel moisture.
However, if your kitchen is the hub of the home or during those humid Iowa summers, bumping that up to a monthly touch-up is a smart move. Honestly, this simple habit is one of the best ways to keep rust from ever showing up in the first place.
What if the Rust Has Caused Pitting on the Fridge?
Pitting- those tiny, indented marks- is a sign that the rust has actually eaten into the metal itself. If the pits are very shallow, a cleaner like Bar Keepers Friend followed by a good polish might make them less noticeable.
But deep pitting is permanent damage. DIY methods won’t fix it, and trying to scrub it away can easily make the area look much worse. This is usually when professional restoration is the only safe option.
Are DIY Methods Safe for Large Patches of Rust?
Things like baking soda paste are perfect for small, scattered rust spots. But if you're looking at a large area of rust covering a big part of the door, it’s better to call a professional.
When you try to tackle a large area yourself, it’s incredibly difficult to get an even, consistent finish. You often end up with a blotchy look that’s more distracting than the original rust ever was.
Dealing with stubborn rust or just don't have the time? The team at Shiny Go Clean has the professional-grade products and expertise to restore your appliances safely. Book your Des Moines house cleaning service and let us handle the details.
Comments