Your Ultimate Moving In Cleaning Checklist For A Fresh Madison Home
- Dec 16, 2025
- 14 min read
Moving into a new place in Madison is one of life’s great excitements! Whether it's a downtown apartment with lake views, a new build in Verona, or a family home in Fitchburg, the dream is always a truly fresh start. But before you unpack a single box, there’s one crucial step that makes all the difference: a thorough move-in clean. You simply don't know what dust, grime, or allergens the previous occupants might have left behind.
This comprehensive moving in cleaning checklist is designed specifically for Madison life, addressing everything from tracked-in winter slush residue to the high-dust potential near the lakes. Our goal is to provide a clear, neighborly plan that takes the guesswork out of the process, so you can focus on settling in, not scrubbing.
While you're preparing your new home, don't forget the importance of leaving your previous residence immaculate. A thorough move-out clean is just as crucial for getting your security deposit back and being a considerate former tenant or owner. For a complete guide on that process, you can find detailed guidance in this ultimate move-out cleaning checklist. Following both checklists ensures a smooth, clean transition from start to finish. Let's get started on making your new Madison house feel like home.
1. Kitchen Appliance Deep Clean
Tackling the kitchen appliances first is a non-negotiable part of any thorough moving in cleaning checklist. Previous occupants inevitably leave behind a history of spills, grease, and crumbs. A deep clean ensures you’re starting with a fresh, hygienic slate, eliminating lingering odors from the moment you unpack your first plate. This is especially important for renters in Madison, where appliance turnover can be high.
Why It's a Top Priority
Neglected appliances don't just look grimy; they can be inefficient and unsanitary. Built-up grease on a stovetop is a fire hazard, clogged dishwasher filters lead to poor performance and bad smells, and dusty refrigerator coils force the unit to work harder- increasing your energy bill. Cleaning them before your food and cookware arrive makes the job much easier.
How to Deep Clean Your Appliances
Start by unplugging the refrigerator and gently cleaning the coils with a coil brush to remove dust. Inside, wipe down all shelves and drawers with a food-safe cleaner. For the oven, a tough degreaser is your best friend- especially for those baked-on messes.
Here are a few more targeted tips:
Dishwasher: Check and clean the filter at the bottom. Run an empty cycle with a cup of white vinegar on the top rack to sanitize and descale the interior.
Microwave: Heat a bowl of water and lemon slices for a few minutes to steam the interior, making it easy to wipe down caked-on food.
Stovetop: Remove grates and burner caps to soak in hot, soapy water. Use a non-abrasive scrub brush to tackle grease without scratching the surface.
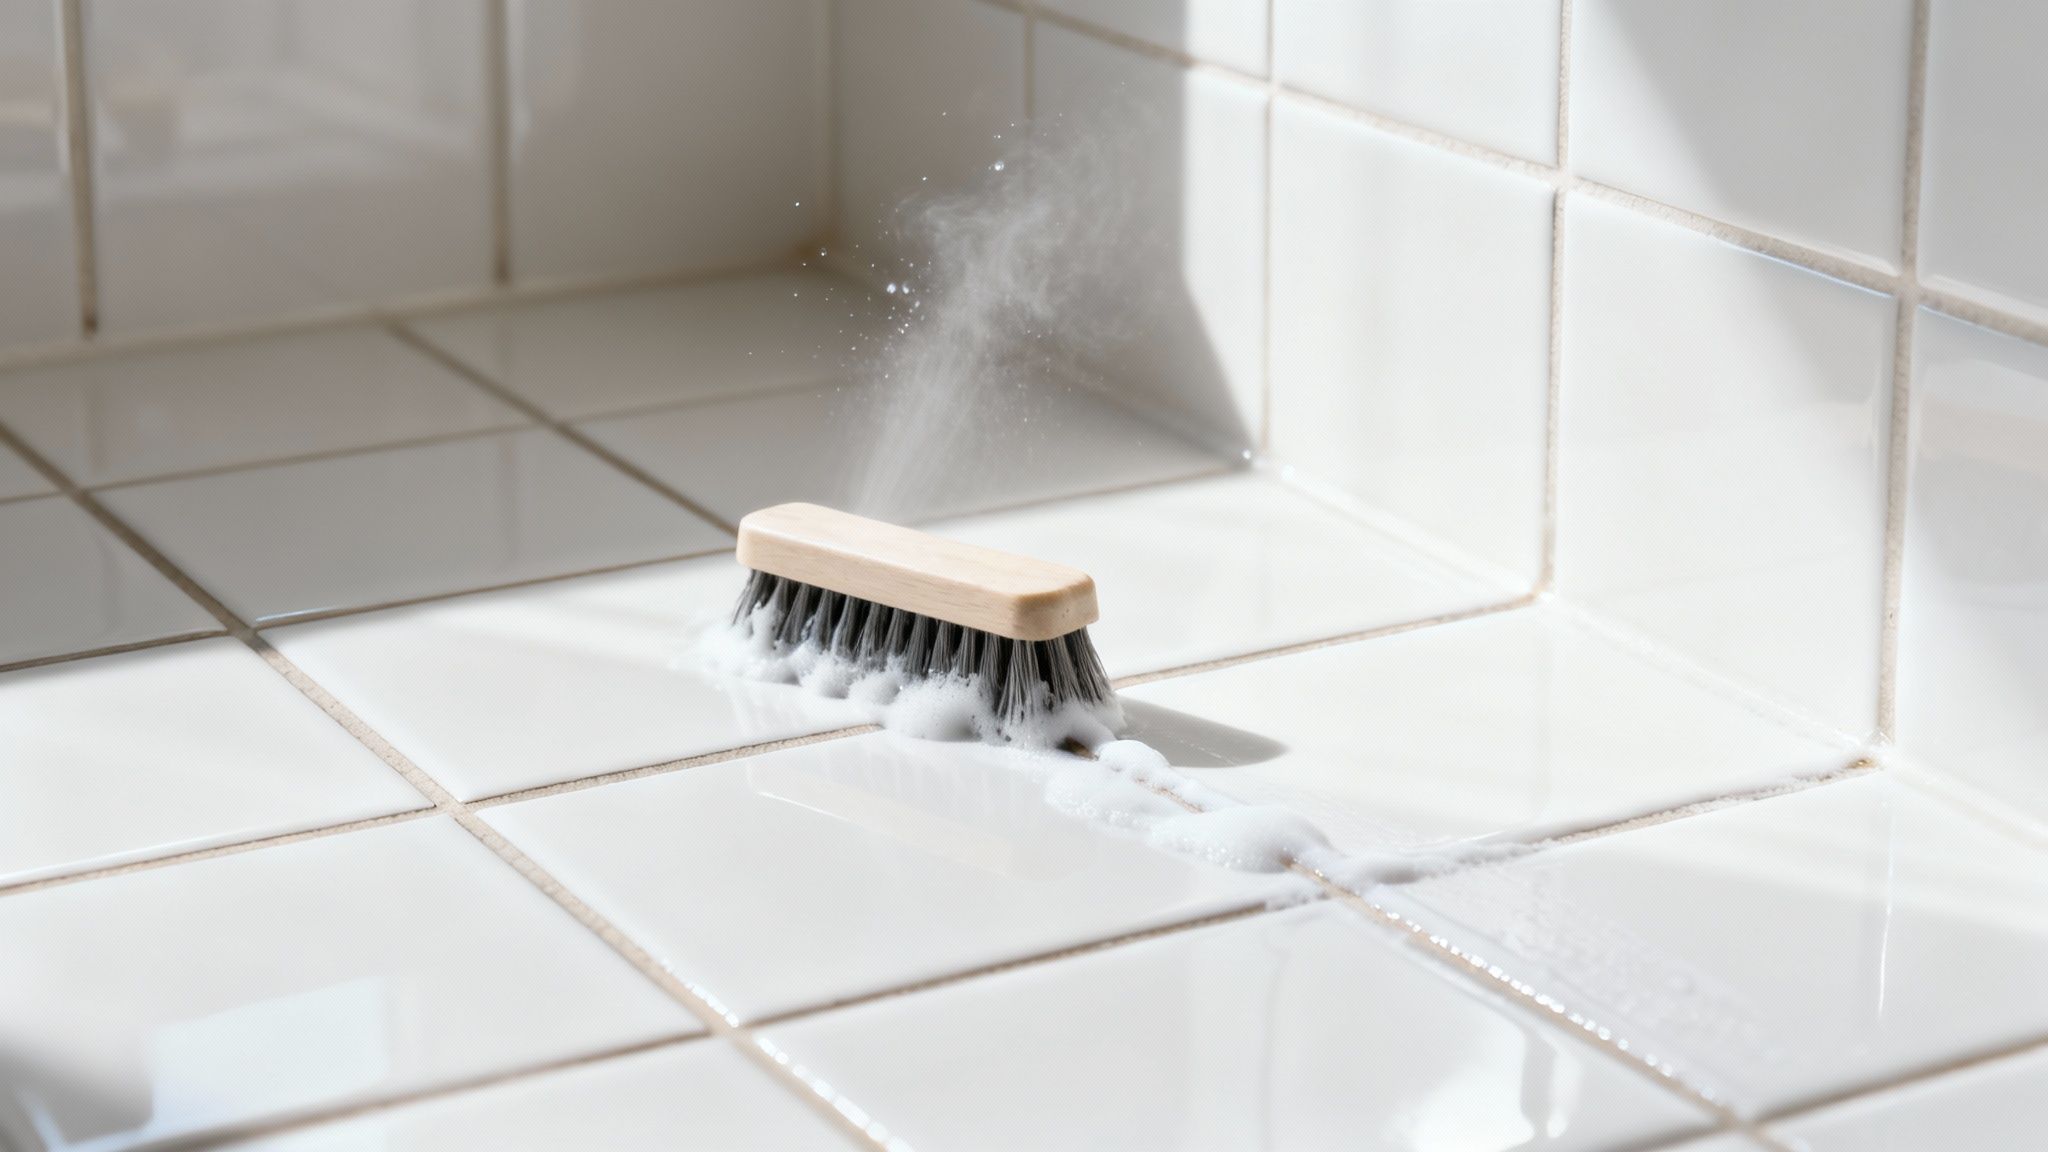
2. Bathroom Tile and Grout Sanitization
Tackling the bathroom tile and grout is a crucial step on any moving in cleaning checklist. Bathrooms are high-moisture areas where soap scum, hard water stains, and mildew can build up in the grout lines, creating an unsanitary environment. Sanitizing these surfaces ensures you’re starting with a truly clean and hygienic space, free from the previous resident's grime. This is especially important in Madison's humid summers, which can encourage mildew growth.
Why It's a Top Priority
Dirty tile and grout aren't just an eyesore- they can harbor bacteria and allergens. Porous grout absorbs moisture, making it a prime breeding ground for mold and mildew, which can affect air quality. Addressing this before you move in your towels and toiletries makes the job easier and prevents you from spreading contaminants.
How to Sanitize Your Tile and Grout
For stained grout, an oxygen-based bleach cleaner is highly effective at whitening without damaging the tile. Apply your cleaner to the grout lines and let it sit for about 10 minutes. Then, use a stiff-bristled grout brush- or even an old toothbrush- to scrub the lines vigorously before rinsing thoroughly with water.
Here are a few more targeted tips:
Ventilation is Key: Always open a window or turn on the bathroom fan when using cleaning agents to ensure proper air circulation.
Test First: Before applying any cleaner to the entire surface, test it on a small, inconspicuous area to make sure it doesn't cause discoloration.
Protect Your Work: After cleaning and thoroughly drying the grout, consider applying a grout sealer. This will create a barrier against future moisture and stains, making upkeep much simpler.
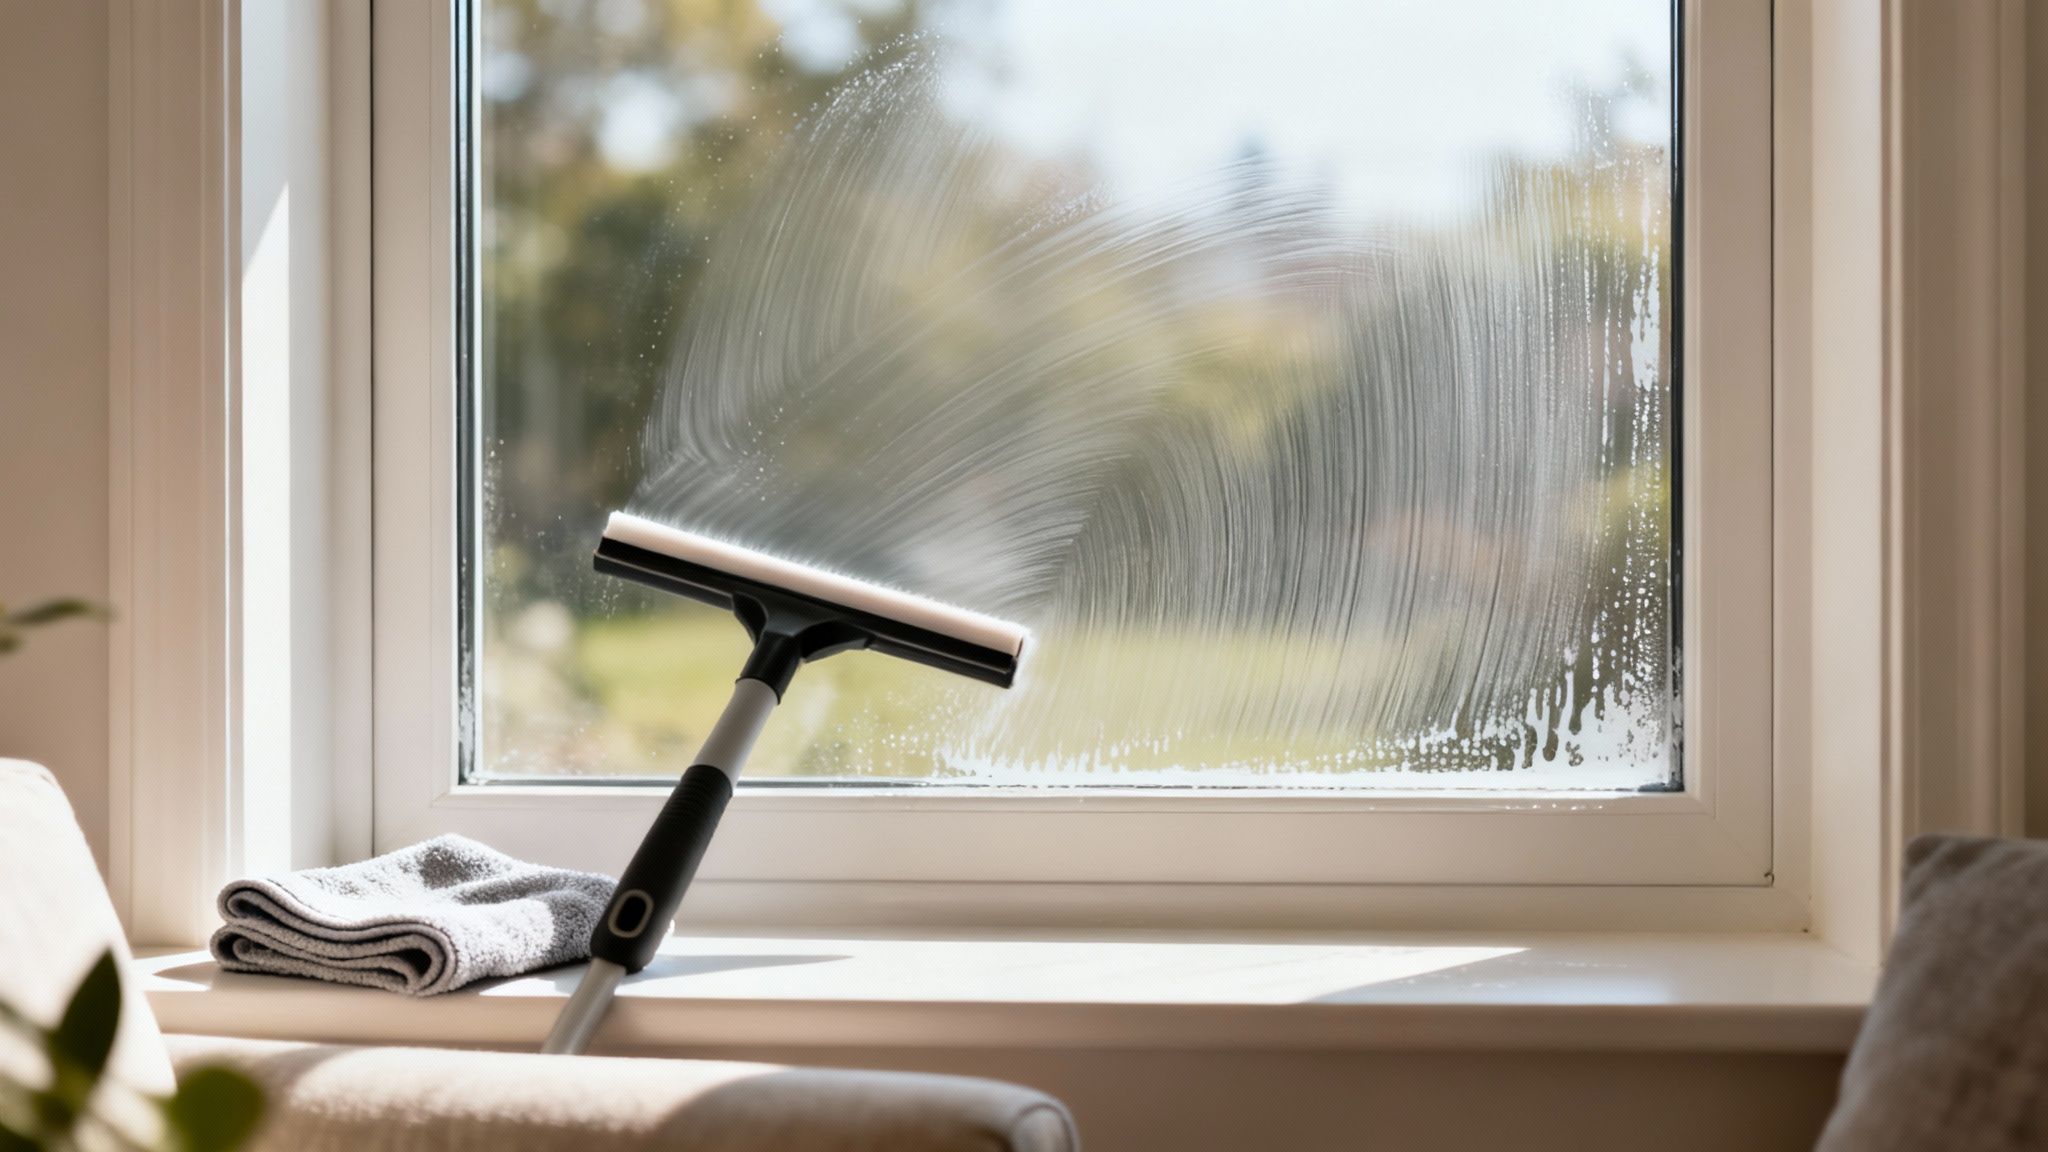
3. Window and Glass Surface Cleaning
Bright, clean windows make a new house feel like a home, which is why tackling all glass surfaces is a crucial step in your moving in cleaning checklist. Previous occupants often leave behind fingerprints, smudges, and a layer of dust that can make a space feel dull. Cleaning windows, mirrors, and glass doors before you fully unpack allows natural light to flood in, instantly making every room feel more welcoming.
Why It's a Top Priority
Dirty windows don't just obstruct the view; they can harbor dust and allergens. This is especially true in Madison, where seasonal changes can leave a film of pollen on exterior glass. Clean glass surfaces reflect light better, making your new home feel larger and cleaner from day one. Addressing this before furniture is in place means you won't have to awkwardly reach over sofas or tables.
How to Deep Clean Your Windows and Glass
For a simple and effective solution, mix equal parts white vinegar and water in a spray bottle. For achieving that perfect, streak-free sparkle on the inside, learning how to clean inside windows for a streak-free shine is essential. It’s also best to clean on a cloudy day, as direct sunlight can cause your cleaning solution to dry too quickly, leaving behind streaks.
Follow these targeted tips for a flawless finish:
Mirrors & Shower Doors: Use a microfiber cloth to apply your cleaning solution in a circular motion, then wipe clean with a dry, lint-free cloth for a streak-free shine.
Large Windows: A professional-style squeegee is your best tool. Start at the top and pull down in one smooth motion, overlapping each stroke by an inch.
Hard Water Stains: For tough mineral buildup on shower doors, apply a paste of baking soda and vinegar, let it sit for 15 minutes, and then scrub with a non-abrasive sponge.
For more local tips, explore our Madison-specific guide on how to clean windows without streaks.
4. Baseboards and Trim Dusting/Cleaning
Often overlooked, the baseboards, door frames, and window trim are critical components of a comprehensive moving in cleaning checklist. These surfaces act as magnets for dust, grime, and scuffs left behind by previous occupants. Giving them a thorough cleaning transforms the entire feel of a room, making it look brighter and feel fresher. This is especially true in older Madison homes with detailed trim that can hide years of buildup.
Why It's a Top Priority
Dirty baseboards and trim can make even a freshly painted room look dingy. Dust collected here is easily kicked back into the air as you move around, impacting your home's air quality. Cleaning these areas before you unpack is a strategic move, saving you the hassle of moving heavy items later.
How to Deep Clean Your Baseboards and Trim
Always work from top to bottom- clean crown molding and door frames first, then finish with the baseboards. Start by using a vacuum with a soft brush attachment to remove all the loose dust and debris. This prevents you from just turning the dust into a muddy mess.
Here are a few more targeted tips:
Painted Trim: For scuffs on white-painted baseboards, a Magic Eraser can work wonders. For general cleaning, a microfiber cloth dipped in warm, soapy water is usually all you need.
Detailed Corners: Use an old toothbrush or a cotton swab to get into tight corners and crevices where dust loves to hide.
Tough Grime: A steam cleaner can be a powerful, chemical-free option to lift stubborn grime in kitchens or high-traffic areas without damaging the paint.
Wood Trim: For stained wood trim, use a cleaner specifically designed for wood to avoid stripping the finish.
5. Ceiling and Light Fixture Dusting
Looking up is a step many people miss on their moving in cleaning checklist, but it's essential for truly clean air quality. Ceilings, fans, and light fixtures are magnets for dust and cobwebs that have been sitting undisturbed for years. Tackling these high-up areas prevents all that accumulated grime from falling onto your freshly cleaned floors and furniture. Especially around the high-pollen lake areas in Madison, this step can make a huge difference for allergy sufferers.
Why It's a Top Priority
Dust and cobwebs aren't just unsightly; they contribute to poor indoor air quality. When you turn on a ceiling fan for the first time, you can send months of settled dust and pollen circulating throughout your new home. Cleaning these fixtures from the start ensures you are breathing cleaner air from day one.
How to Dust Ceilings and Fixtures
Always work from the top down. Start by laying a drop cloth on the floor to catch any falling debris. Use a duster with an extendable handle to reach high corners and ceiling surfaces, working systematically across the room.
Here are a few more targeted tips:
Ceiling Fans: An old pillowcase is the perfect tool here. Slide it over each blade and pull it back, trapping all the dust inside.
Light Fixtures: Turn off the power at the breaker before cleaning. If possible, carefully remove glass covers or globes and wash them in warm, soapy water.
Safety First: Always wear a dust mask to avoid inhaling airborne particles. When using a ladder, ensure it is stable and have someone spot you if possible.
6. Oven and Stovetop Deep Cleaning
An oven cleaning is an essential- if often dreaded- item on any comprehensive moving in cleaning checklist. You don’t want the ghosts of meals past flavoring your first dinner in the new place. Tackling this before you move your pots and pans in ensures a truly fresh start and eliminates any potential fire hazards from built-up grease.
Why It's a Top Priority
A dirty oven isn't just an eyesore; it can be a health and safety issue. Caked-on food residue can smoke and burn, affecting the taste of your food and even setting off smoke alarms. Heavy grease buildup is also a significant fire risk. Ensuring your oven and stovetop are pristine means your cooking environment is safe and ready for your first home-cooked meal. This is particularly crucial in many Madison rentals.
How to Deep Clean Your Oven and Stovetop
First, ensure the area is well-ventilated by opening a window. Always wear gloves to protect your skin from harsh cleaners. For tough, baked-on grime, a commercial cleaner is highly effective.
Here are a few targeted tips:
Oven Racks: Remove the racks and soak them overnight in a bathtub with hot water and a cup of vinegar. The grime should scrub off easily in the morning.
Natural Cleaning Paste: For a gentler approach, create a thick paste of baking soda and water. Coat the oven's interior, let it sit overnight, and then scrub and wipe clean.
Stovetop Surfaces: Remove electric coils or gas grates and soak them in hot, soapy water. Use a non-abrasive cleaner to scrub the stovetop, paying close attention to the area around the burners.
Oven Glass: Don't forget the glass door! Learn more about how to clean between the oven glass with our Madison guide for a crystal-clear finish.
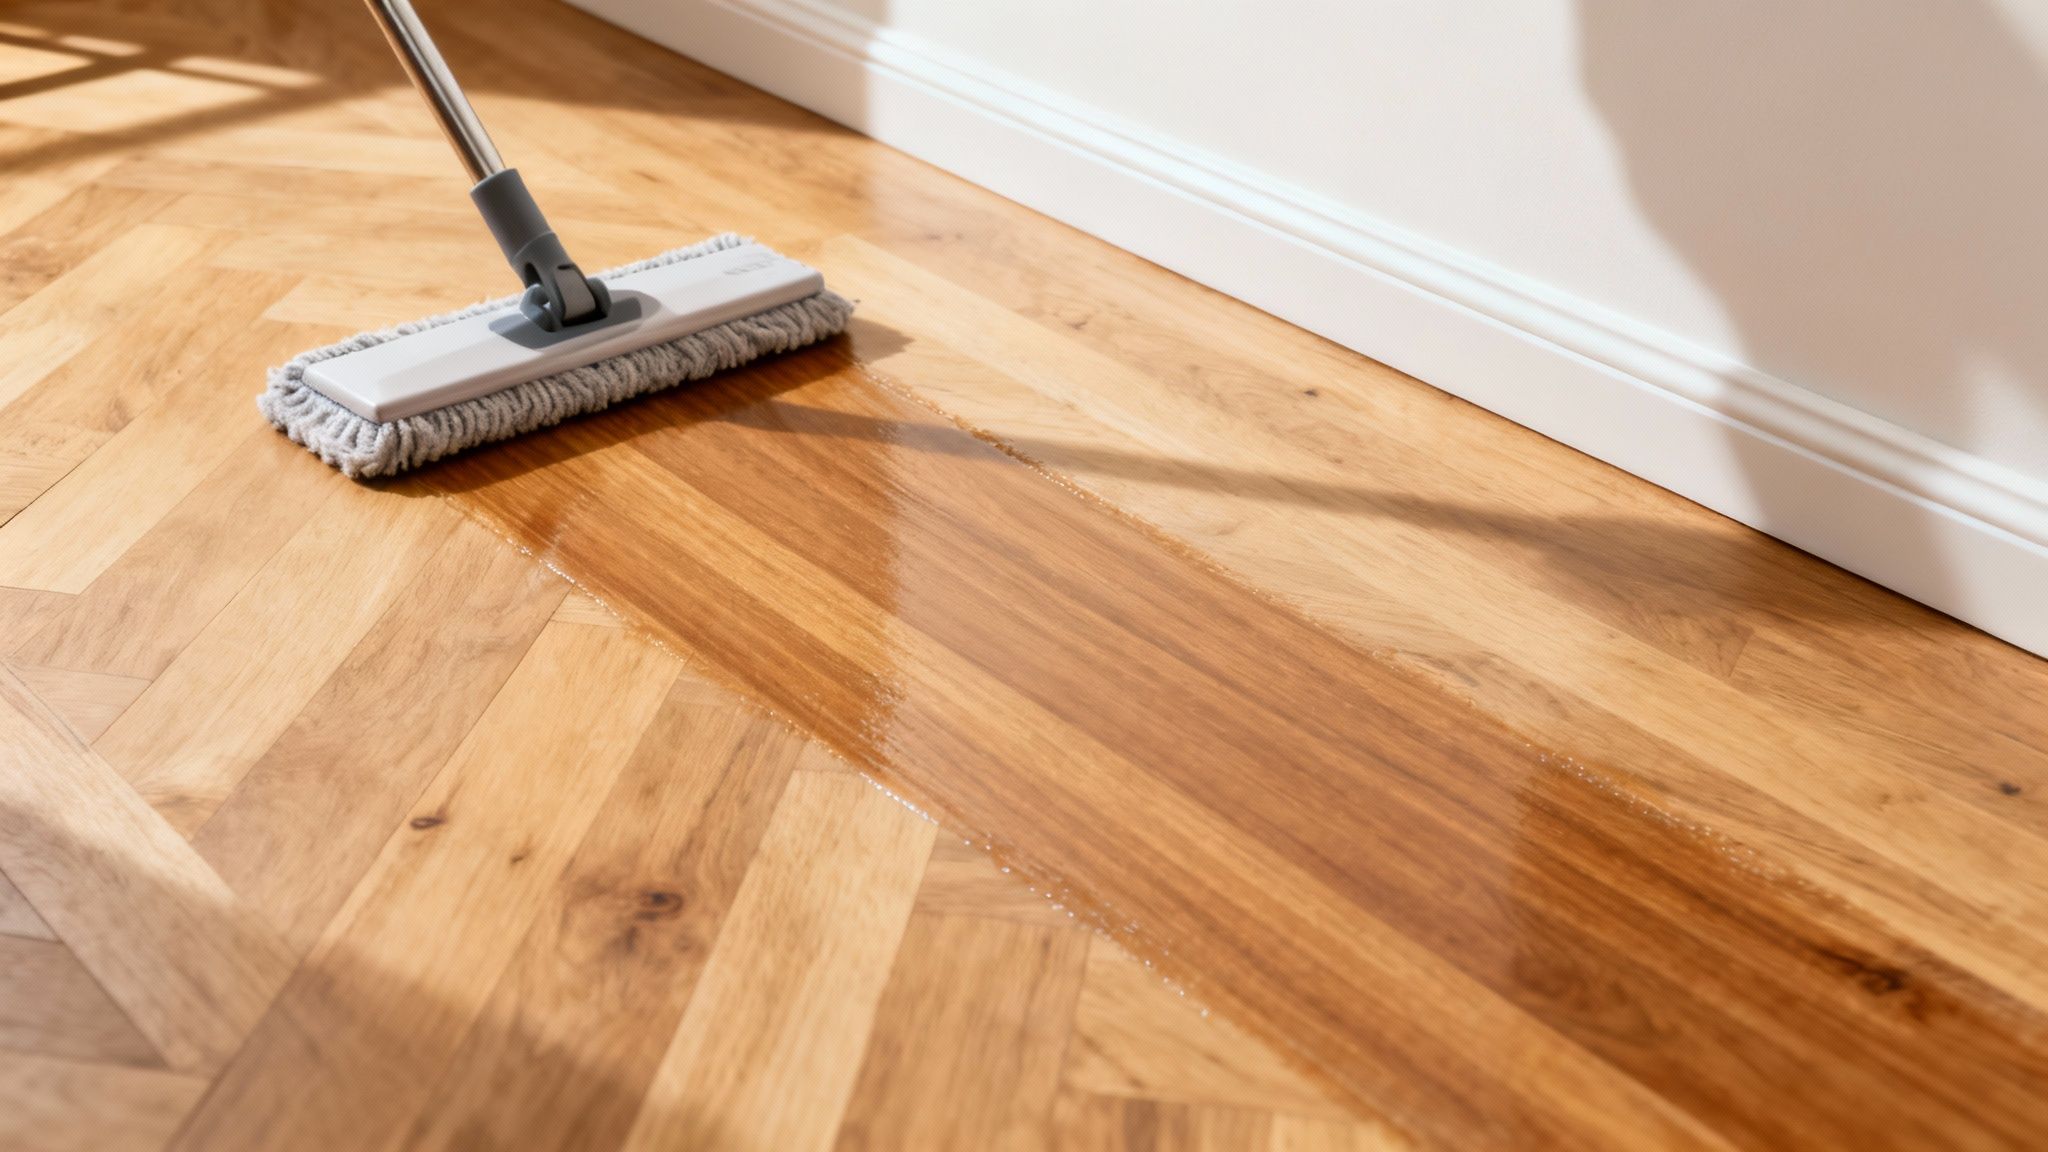
7. Flooring Thorough Cleaning (Per Room Type)
Tackling the floors is a crucial step in any moving in cleaning checklist, as they harbor everything from construction dust to the previous occupant's daily life. A comprehensive cleaning ensures you remove unseen allergens, dirt, and grime, creating a genuinely clean foundation for your furniture. This is especially true in Madison, where cold winters mean tracked-in slush and salt can leave a lasting residue.
Why It's a Top Priority
Floors are the largest surface in any home, and they take the most abuse. A quick sweep won't address the ground-in dirt in tile grout, the sticky residue on hardwood, or the dust mites hiding in carpets. Cleaning floors thoroughly before moving in furniture makes the job exponentially easier and more effective. It’s about health, hygiene, and starting fresh from the ground up.
How to Clean Your Floors by Type
Always start by vacuuming or sweeping thoroughly to remove loose debris, working from the farthest corner of the room toward the exit. Before using any new product, test it on a small, inconspicuous area.
Here are a few targeted tips for common flooring types:
Hardwood: Use a pH-neutral hardwood cleaner with a microfiber mop. Avoid excessive water, which can damage the wood.
Tile: Focus on the grout lines, which trap the most dirt. A dedicated grout cleaner and a stiff brush are essential for restoring their original color.
Carpet: For a true deep clean, nothing beats professional service. If you are a Madison resident considering this option, you can find out more about the ideal timing for professional carpet steam cleaning here.
Laminate: This material is sensitive to moisture. Use a damp- not wet- microfiber mop and a cleaner specifically designed for laminate floors to prevent swelling.
8. Closet and Cabinet Interior Organization and Sanitization
Often overlooked, the interiors of closets and cabinets are a crucial step in a moving in cleaning checklist. These enclosed spaces can harbor dust, allergens, and even pests left behind by previous residents. Thoroughly cleaning them before you unpack ensures your clothes, linens, and pantry items are placed into a truly clean and hygienic environment from day one.
Why It's a Top Priority
Starting fresh means not transferring your belongings into someone else's leftover grime. Dust mites, spider webs, and crumbs can accumulate in dark corners. In Madison, where seasonal changes mean storing different types of clothing, ensuring your closets are pristine prevents musty smells and protects your items. Cleaning these spaces while they're empty is infinitely easier.
How to Deep Clean Your Closets and Cabinets
Begin by vacuuming all interior surfaces, using a hose attachment to reach every corner. For a deeper clean, wipe down all shelves, rods, and walls with a multipurpose cleaner and a microfiber cloth. This process removes fine dust and any sticky residue.
Here are a few more targeted tips:
Protect and Freshen: Install new shelf liners on clean surfaces. This not only protects the shelves but also makes future cleanups much simpler.
Combat Moisture: For cabinets under sinks or in damp-prone areas, consider placing a small moisture absorber to prevent mildew and musty odors.
Final Wipe-Down: Before you start organizing, give hanging rods and the tops of shelves one last wipe to catch any settled dust.
9. Bathroom Fixtures and Hardware Polishing
Polishing bathroom fixtures and hardware is a crucial step in a moving in cleaning checklist that often gets overlooked. After months or years of use, faucets, showerheads, and towel bars accumulate a dulling layer of soap scum and hard water spots. A thorough polish not only restores a brilliant shine but also ensures everything functions properly, giving your new bathroom a truly clean and cared-for feel.
Why It's a Top Priority
Dull, grimy fixtures can make an otherwise clean bathroom look neglected. More importantly, mineral deposits from Madison's hard water can clog faucet aerators and showerheads, leading to weak water pressure. Tackling this before you've settled in means you start with a fully functional and sparkling bathroom from day one.
How to Polish Your Fixtures and Hardware
The key is using the right cleaner for the specific type of metal to avoid damage. Always test any new product in an inconspicuous spot first. Make sure to dry every surface completely with a soft microfiber cloth to prevent new water spots from forming.
Here are a few targeted tips for common issues:
Faucets & Showerheads: Unscrew the faucet aerators and showerhead. Soak them in a bowl of white vinegar for an hour to dissolve mineral buildup, then gently scrub with an old toothbrush and rinse before reattaching.
Stainless Steel: For towel bars and faucets, a product like Bar Keeper's Friend works wonders to remove grime and restore a brilliant shine without scratching.
Tough Deposits: For severe calcium or rust stains that vinegar can't handle, a dedicated CLR (Calcium, Lime & Rust) remover can break down the toughest deposits. Follow the product instructions carefully.
10. Walls, Doors, and Door Handles Comprehensive Cleaning
Often overlooked, a comprehensive cleaning of walls, doors, and door handles is a critical step on any moving in cleaning checklist. These surfaces act as a canvas for the home's history, accumulating everything from fingerprints and scuffs to unseen germs. Addressing them ensures your new space isn't just visually clean but also hygienic, which is especially important for families moving into Madison-area homes.
Why It's a Top Priority
High-touch surfaces like doorknobs and light switches are hotspots for bacteria and viruses. Wiping them down is a basic health measure to protect your family. Walls, especially around doorways, collect scuffs and dirt that can contribute to a dusty feeling in the home. A thorough cleaning brightens the entire space, making it feel truly new.
How to Clean Your Walls and Doors
Start by dusting the walls from top to bottom with a long-handled microfiber duster to remove loose debris. For scuffs on painted walls, a Magic Eraser can work wonders, but always use it gently to avoid damaging the paint finish. Always test your cleaning solution on a small, hidden area first.
Here are a few more targeted tips:
General Wall Cleaning: Mix a few drops of mild dish soap with warm water. Use a soft sponge or microfiber cloth, wring it out well, and gently wipe the walls.
High-Touch Points: Use a reliable disinfectant wipe or spray on all doorknobs, light switches, and door frames. This is a quick but high-impact task.
Stubborn Grime: For greasy fingerprints near entryways, a solution of one part white vinegar to one part water can effectively cut through the grime without harsh chemicals.
Moving-In Cleaning Checklist: 10-Point Comparison
Task | 🔄 Implementation Complexity | ⚡ Resources & Safety | 📊 Expected Outcomes | 💡 Ideal Use Cases | ⭐ Key Advantages |
|---|---|---|---|---|---|
Kitchen Appliance Deep Clean | High 🔄🔄🔄 — disassembly & multi-step cleaning | Specialized cleaners, brushes, gloves, ventilation; risk of surface damage | Sanitized appliances, odor removal, improved efficiency | Move-in, rental turnover, appliances with grease/odors | Ensures food safety; extends appliance life; energy savings |
Bathroom Tile and Grout Sanitization | High 🔄🔄 — careful chemistry for grout/stone | Antimicrobials or steam equipment, PPE; pH-neutral for stone | Mold/mildew removal, brighter grout, reduced health risk | Bathrooms with mold, heavy staining, high humidity | Prevents mold; restores appearance; extends tile life |
Window and Glass Surface Cleaning | Low–Medium 🔄 — technique- and height-sensitive | Squeegee, microfiber, ladders for exterior; non-toxic options | Streak-free clarity, increased natural light, allergen removal | Move-in cosmetic cleanup, post-construction dust | Rapid visual improvement; eco solutions available |
Baseboards and Trim Dusting/Cleaning | Medium 🔄 — detailed, physical work | Microfiber, Magic Eraser, extension tools; kneepads | Dust-free trim, reduced allergens, reveals paint issues | Pre-staging, allergy-sensitive homes, detailed cleans | Improves overall appearance; reduces airborne dust |
Ceiling and Light Fixture Dusting | Low–Medium 🔄 — ladder work and overhead access | Extendable dusters, drop cloths, turn-off power; safety gear | Better air quality, brighter fixtures, detection of damage | Homes with dusty fans/fixtures, long-neglected ceilings | Enhances air quality and illumination; safer environment |
Oven and Stovetop Deep Cleaning | High 🔄🔄🔄 — strong chemicals & long dwell times | Commercial degreasers, ventilation, gloves; possible pro service | Removes baked-on grease, restores cooking performance | Heavily used or neglected ovens/stovetops | Improves food safety; removes odors; extends appliance life |
Flooring Thorough Cleaning (Per Room Type) | High 🔄🔄 — material-specific protocols | Vacuum, steam/extractor, pH‑appropriate cleaners; heavy equipment | Sanitary floors, allergen removal, preserved finish | Entire move-in cleaning, post-construction debris | Dramatic aesthetic improvement; prolongs floor lifespan |
Closet and Cabinet Interior Organization & Sanitization | Medium 🔄 — many small/enclosed spaces | Microfiber, vacuum attachments, liners, odor absorbers | Hygienic storage, pest/odor reduction, organized spaces | Preparing storage for belongings, multiple closets | Protects items; prevents pests; ready-to-use storage |
Bathroom Fixtures & Hardware Polishing | Medium 🔄 — precision, metal-specific care | Metal-specific polishes, soft cloths, aerator tools; ventilation | Restored shine, improved flow, reduced mineral buildup | Show-ready bathrooms, hard-water areas | Aesthetic boost; improved fixture performance |
Walls, Doors, and Door Handles Comprehensive Cleaning | Medium 🔄 — large areas with care for finishes | Mild cleaners, Magic Eraser, disinfectants; test first | Sanitized high-touch surfaces, scuff removal, paint assessment | Health-focused cleaning, pre-move-in sanitization | Reduces germs; fresh appearance; identifies touch-ups |
Too Much To Handle? Let Your Madison Neighbors Help!
Stepping into a new home should be an exciting milestone, not a stressful marathon of scrubbing and sanitizing. We've walked through a comprehensive moving in cleaning checklist designed to give you a truly fresh start. From deep cleaning kitchen appliances to dusting those often-overlooked baseboards, each task is a crucial step toward making a new house feel like your own.
This isn't just about appearances- it's about health, comfort, and peace of mind. A thorough move-in clean removes allergens left by previous occupants and ensures every surface your family touches is hygienic from day one.
From Checklist to "Clean" - Your Next Steps
Feeling motivated? The next step is to translate this checklist into action. Begin by assessing your new space, gather your supplies, and schedule a dedicated cleaning day before the moving trucks arrive.
But what if your schedule is already packed? Moving is one of life’s most demanding events, and adding a deep clean to the mix can feel overwhelming. Imagine bypassing the hours of labor and walking into a home that is already sparkling clean.
At Shiny Go Clean, we specialize in transforming empty houses in Madison, Verona, and Fitchburg into move-in-ready sanctuaries. Our professional, background-checked teams are equipped to handle every single item on this moving in cleaning checklist and more. We know what it takes to get Madison homes, from downtown apartments to Middleton family houses, pristine and welcoming for new owners. Instead of spending your first weekend on your hands and knees scrubbing floors, you could be meeting your new neighbors and actually enjoying your new home. Let us give you the fresh start you deserve.
Ready to skip the stress and start fresh? The team at Shiny Go Clean uses this exact type of detailed checklist to ensure your new Madison home is spotless and welcoming from the moment you get the keys. Visit us at Shiny Go Clean or call (608) 292-6848 for a free, no-obligation quote and let us handle the dirty work for you.
Comments