Search Results
280 results found with an empty search
- Your Guide to Professional House Cleaning Costs in Madison
Let's get straight to the point-you're wondering what professional house cleaning costs in Madison. For a standard, routine clean, most homeowners can expect to pay somewhere between $150 and $250 . If you need a more intensive deep clean or a move-out service, that range typically shifts to $250 to $450+ , depending on the size and condition of your home. These numbers give you a solid starting point for figuring out your budget. Your Guide to House Cleaning Prices in Madison Figuring out the cost of professional house cleaning can feel a bit like guesswork. Prices can vary, and you want to be sure you're getting great value without any surprises at the end. Whether you live in a new build out in Waukee or a cozy apartment in the East Village, understanding the typical price ranges helps you make a confident decision. Our goal here is to give you a clear, upfront look at what to expect. Instead of vague estimates, we'll provide realistic price ranges for the most common cleaning services requested by your Madison neighbors. This way, you can easily find the information that applies to your home and your needs. Quick Cost Estimates for Madison Homes To make things even simpler, we've put together a quick overview of what you might expect to pay. Keep in mind that every home is unique, but this table offers a reliable snapshot of typical costs based on home size and the type of cleaning you're looking for. From a routine refresh to a complete reset, there’s a service that fits. At Shiny Go Clean, we believe in complete transparency. The price you see is the price you pay, ensuring there are no hidden fees or awkward upsells-just a sparkling clean home and peace of mind. To get a better sense of how professional services are priced, you might find a guide to professional window cleaning prices helpful. While it's a different service, the principles of pricing based on scope and detail are often quite similar. Consider this guide your go-to resource for understanding the investment in a professionally cleaned home. We're committed to providing exceptional service to the entire Madison metro, from busy family neighborhoods in Madison to the growing communities in Verona. If you’re ready to see pricing specific to your needs, call or text us at 608-292-6848 for a fast quote. Understanding Different Cleaning Pricing Models When you start looking into the professional house cleaning cost in Madisons, you'll quickly notice that companies don't all charge the same way. Some will give you an hourly rate, while others offer a single, flat fee for the whole job. Understanding how these models work is the key to knowing exactly what you’re paying for-and avoiding any nasty surprises on your bill. Think of it like this: each pricing model is a different way to buy a service. Some are predictable and straightforward, while others can feel like a bit of a gamble. Let's break down the three most common structures you'll run into. The Hourly Rate Model Paying by the hour is a popular approach. It feels a lot like hiring a handyman-you pay for the total time the cleaner spends working in your home. The appeal here is that it seems simple enough; you only pay for the work that gets done. But this model has a major downside: it's unpredictable. If a cleaning takes longer than you thought it would, your final bill will be higher. A cleaner might work a bit slower one day, or a specific task might be more time-consuming, and that difference comes straight out of your pocket. This can leave you feeling anxious about the final cost, especially if you're trying to stick to a budget. The Per-Square-Foot Model Another way companies charge is per square foot. This is a bit like buying new carpet-the cost is tied directly to the size of the space being cleaned. This model offers more predictability than an hourly rate because the price is based on a fixed measurement of your home. While it’s definitely more stable, this model doesn't always account for the actual condition of your home. A 1,500-square-foot apartment in East Village that’s well-maintained might take far less effort to clean than a 1,500-square-foot house in Waukee with pets and kids. The per-square-foot model can sometimes miss the real-world cleaning needs, potentially overcharging you for a tidy space or underestimating a tougher job. The Flat-Rate Pricing Model Finally, there’s flat-rate pricing, which is the model we use here at Shiny Go Clean. Think of this as an all-inclusive package deal. We gather a few key details about your home-like the number of bedrooms and bathrooms-and give you a single, upfront price for the entire job. The price we quote is the price you pay, period. There are no surprise charges if a room takes a little longer or if we have to tackle some stubborn Winter winter slush tracked into the entryway. This transparency removes all the guesswork and financial stress. With a flat rate, you know the exact professional house cleaning cost before our team even shows up. This approach lets us focus completely on quality, not the clock. Our cleaners are motivated to deliver exceptional results based on a clear checklist, making sure every corner meets our high standards. This consistency is why busy families in Madison trust us to get the job done right, every single time. This model is built on trust and predictability, ensuring you get consistent, high-quality results without ever having to worry about a ticking clock. To see how our different service tiers are priced, you can easily compare our cleaning packages on our website. It’s the simplest way to see the value and choose the perfect fit for your home. What Factors Influence Your Final Cleaning Price Beyond the pricing model, a few key variables come together to determine your final professional house cleaning cost . Think of it like ordering a custom pizza-the base price is just the starting point. The size, the number of toppings, and any special requests all play a part in the final tally. Your home’s unique character and specific cleaning needs will shape your quote in the same way. When you understand these factors, you can see exactly where your money is going. It also gives you control over the final price, so you can prioritize what matters most to you. Let's break down the main things that influence your estimate. This visual guide shows how different pricing models are built, from time-based hourly rates to predictable flat-rate fees. As the chart suggests, flat-rate pricing provides the most certainty, which is a big relief for homeowners who want to avoid surprise costs. Your Home's Size and Layout The single biggest factor in your cleaning price is the size of your home, specifically its bedroom and bathroom count. More rooms and bathrooms simply mean more surface area to clean, dust, and sanitize. A sprawling 4-bedroom home in Madison will naturally take more time and effort than a 2-bedroom apartment in the Madison. Bathrooms, in particular, are labor-intensive, requiring detailed work on showers, tubs, toilets, and floors. Because of this, the bed/bath count gives us a reliable baseline for the scope of the job. The Current Condition of Your Home The starting condition of your home plays a huge role in the initial cost. If your home has been regularly maintained and just needs a refresh, it will be quicker and easier to clean than a space that hasn't had a professional touch in a while. A home battling tracked-in Winter winter slush and salt stains will require more intensive work than one dealing with everyday dust. The same goes for buildup on kitchen surfaces or soap scum in the shower. We often recommend a first-time deep clean to "reset" the home's cleanliness, which might cost more upfront but makes later standard cleanings far more efficient and affordable. The Frequency of Your Cleanings How often you schedule cleanings directly impacts the price per visit. Most cleaning companies, Shiny Go Clean included, offer lower rates for recurring services-weekly, bi-weekly, or monthly-compared to a one-off clean. Think of it as a subscription discount. The more frequently we visit, the less buildup there is to tackle each time. This lets our teams work more efficiently, and we pass those savings right on to you. For busy families in Madison, a recurring service is about more than just cost savings. It's about maintaining a consistently clean home without the hassle. This predictable schedule ensures your space is always ready for guests or just for your own peace of mind. Industry data shows that recurring plans can lower costs by 20-30% over time, proving that consistent service delivers a real return. You can discover more about cleaning industry trends that highlight this value. Specific Add-Ons and Special Requests Your standard cleaning covers all the essentials, but sometimes you need a little extra attention on specific areas. These "add-on" services let you customize your clean and are priced separately. Common add-ons include: Inside the Oven: Tackling baked-on grease and grime is a tough job that needs special products and extra time. Inside the Refrigerator: A thorough cleaning and organization of your fridge shelves and drawers. Pet Hair Removal: While we always handle pet hair, homes with heavy shedders might need extra vacuuming and detail work. Inside Cabinets: Wiping down the interior of your kitchen or bathroom cabinets. These extras give you full control. You only pay for the specific deep-cleaning tasks you need, ensuring your final price perfectly matches the service you actually receive. This flexibility is key to getting the best value for your home. Standard vs. Deep vs. Move-Out Cleaning Costs Not all cleaning is the same, and the price tag should reflect that. Think of it like getting your car serviced: a quick oil change is one thing, but a full engine tune-up is something else entirely. Both are necessary, but they solve different problems. Understanding the differences helps you pick the right service for your home in Madison, so you get exactly what you need without overpaying. Here, we'll break down our three main cleaning services: Standard, Deep, and Move-Out. We’ll show you what's included and what to expect from each, making it easy to choose the perfect fit for your home and budget. Standard Cleaning: The Maintenance Plan A Standard Cleaning is your home’s maintenance plan. It’s designed to keep things consistently fresh and tidy, week after week. This is the go-to choice for busy households in Madison that need a hand staying on top of the essentials. It stops dust, grime, and clutter from ever getting out of control. During a standard clean, our team hits the high-traffic areas and handles the routine tasks that make the biggest difference. Here’s what’s usually included: Wiping down kitchen countertops and appliance exteriors Cleaning and sanitizing all bathroom surfaces, including toilets, sinks, and showers Dusting furniture, shelves, and other accessible surfaces Vacuuming carpets and mopping hard floors Wiping down mirrors and glass This service works best on a recurring schedule-weekly, bi-weekly, or monthly. It’s an affordable way to maintain a baseline of clean and reclaim a few precious hours of your time. Deep Cleaning: The Seasonal Reset Button A Deep Cleaning is the reset button for your home. It covers everything in a standard clean but goes much, much further, tackling the built-up grime in all those neglected corners. It's the perfect service for a first-time clean, a spring refresh to clear out pollen, or an annual spruce-up to make your home sparkle again. Think of it as the ultimate top-to-bottom scrub. And it’s not just us-homeowners everywhere are seeing the value. The global deep house cleaning market hit $11,230 million in 2024, with residential services making up 68% of that. People want their bathrooms, kitchens, and baseboards thoroughly sanitized, and this is the service that delivers. What sets a deep clean apart: Detailed Baseboard Wiping: We get down on our hands and knees to remove scuffs and dust from every baseboard. Light Fixtures and Ceiling Fans: Dusting and wiping down those often-overlooked fixtures. Door Frames and Window Sills: Clearing away the grime that builds up in these forgotten spots. Intensive Kitchen and Bathroom Scrubbing: We focus on cutting through grout stains, soap scum, and appliance buildup. A good deep clean sets the stage for easier upkeep, making your regular standard cleanings faster and more effective. To see what a true deep clean involves, check out our guide on the true deep cleaning meaning for your Madison home . Move-Out Cleaning: The Fresh Start Service Our Move-Out Cleaning is the most thorough service we offer. It’s designed to restore a home to like-new condition, making it essential for renters trying to get their full security deposit back or homeowners prepping a property for the next family. This clean is all about the details, leaving no nook or cranny untouched. A move-out clean is a wall-to-wall, floor-to-ceiling service. We clean inside cabinets, drawers, and closets-all the places normally hidden by furniture and belongings. The goal is simple: make the home feel brand new for the next person who walks through the door. This service includes everything in a deep clean, plus a few other critical tasks. Key move-out tasks include: Cleaning Inside All Cabinets and Drawers: We ensure they are empty, wiped clean, and ready for the next person's dishes and silverware. Cleaning Inside the Oven and Refrigerator: These are standard tasks for any proper move-out service. Detailed Closet Cleaning: Wiping down all shelves and rods so they’re ready for clothes. Comprehensive Baseboard and Wall Spot Cleaning: Addressing any marks or scuffs left behind after all the furniture is gone. This service brings serious peace of mind during the chaos of moving, guaranteeing the property is in pristine condition for the final walkthrough. Why Transparent Pricing Matters Most Have you ever gotten a quote for a service, only to find the final bill was way higher than you expected? Hidden fees, confusing charges, and last-minute upsells can turn a helpful service into a frustrating mess. At Shiny Go Clean, we think getting your house cleaned should be simple and stress-free, from the moment you book to the second you see your sparkling home. That’s why we built our entire service around transparent, flat-rate pricing . We believe honesty is the only way to build a great relationship with our Dane County neighbors. When you know the exact professional house cleaning cost upfront, you can book with confidence. No awkward surprises, no confusing invoices later on. Our promise is simple: the price we quote is the price you pay. No exceptions. Building Trust Through Honesty For us, being upfront about costs isn't just a business model-it's how we build lasting trust. We want you to feel comfortable and secure, knowing our focus is on delivering an incredible clean, not on watching the clock or looking for ways to add extra charges. This lets our professional cleaners focus on what they do best: making your home sparkle. This straightforward approach is more important than ever. The global house cleaning market is set to grow to an incredible $616.98 billion by 2033, driven by busy families who need a little help. With over 875,000 cleaning companies in the U.S. alone, homeowners are choosing providers who offer clear, flat-rate pricing and satisfaction guarantees, saving them the 7+ hours many still spend cleaning each week. The best way to find a reliable partner is to look for companies offering transparent quotes for cleaning services that detail exactly what’s included. The Shiny Go Clean Promise Our focus on open communication goes beyond just our pricing. It’s woven into everything we do, from our easy online booking to our solid satisfaction guarantee. We stand by our work, and if you’re ever not completely happy with the results, we’ll come back and make it right. We believe that great service starts with honesty. By providing a clear, upfront cost, we eliminate the guesswork and create a stress-free experience for homeowners across Dane County. Every member of our team is background-checked and professionally trained, so you can have peace of mind knowing your home is in reliable hands. Our goal is to build real relationships with our clients through consistent quality and open communication. It’s how we prove that a trustworthy partnership is the key to a beautifully clean home. Ready for a cleaning service you can depend on? Just call or text us at (515) 446-9726 to get started. Get Your Instant Cleaning Quote Today Now that you have a better handle on what goes into professional house cleaning costs , the next step is the easiest one. This is your direct path to getting your time back and enjoying a sparkling home without the work. We've made our process as simple and transparent as our pricing. Getting a personalized quote for your Madison area home takes just a few moments. Our fast and free online booking tool gives you an exact price in minutes, with absolutely no obligation. See for yourself how straightforward it is. Your Path to a Cleaner Home We're proud to serve our neighbors across the entire Madison metro. From the busy family neighborhoods in Verona and Waunakee to the new construction communities in Dane County, our goal is to make professional cleaning accessible and stress-free for everyone. Let us show you how reliable and refreshing professional cleaning can be. We’re here to deliver consistent, high-quality results you can count on, every single time. If you'd rather chat with a friendly local expert first, we'd love to hear from you. Just give us a call or text at 608-292-6848 . We can answer any questions, confirm the details for your home, and get you on the schedule right away. Ready to see your personalized price? You can learn more about what we offer or get started by visiting our contact page to book your cleaning. Questions We Hear a Lot We get it-booking a cleaning service for the first time brings up a few questions. Here are some of the things our Madison neighbors often ask, with straightforward answers to help you know exactly what to expect. Do I have to be home for the cleaning? Not at all. In fact, many of our clients in the Madison metro enjoy coming home to a freshly cleaned house after a long day. Just leave us a key, a garage code, or lockbox info, and we'll handle the rest. Our teams are fully vetted and background-checked, so you can trust your home is in good hands. It’s all about what’s most convenient for you. Is it customary to tip the cleaner? While a tip is never expected, it's always appreciated. It’s a simple way to thank your cleaner for their hard work and let them know you’re happy with the results. If you’d like, you can add a tip when you pay online or give cash directly to the team. Do you bring your own cleaning supplies? Yes, we bring everything! Our cleaners show up with high-quality, effective cleaning products and professional-grade equipment to get the job done right. You don’t have to worry about stocking a single thing. If you have specific products you'd rather we use-maybe for allergies or just a personal preference-just give us a heads-up. We're happy to accommodate special requests to make sure your home is cleaned just the way you like it. What if I’m not happy with the cleaning? Your satisfaction is our top priority, and we stand by our work with the Shiny Go Clean promise. If something isn't quite right, just let us know by phone or email within 24 hours of your service. We'll come back right away to re-clean any missed spots at no extra charge. We want you to love the results every single time, and our guarantee ensures you can feel confident and trust in our service. Ready to see how easy it is to get a sparkling clean home? Shiny Go Clean offers transparent, flat-rate pricing online in just a few minutes. Book your Madison house cleaning today!
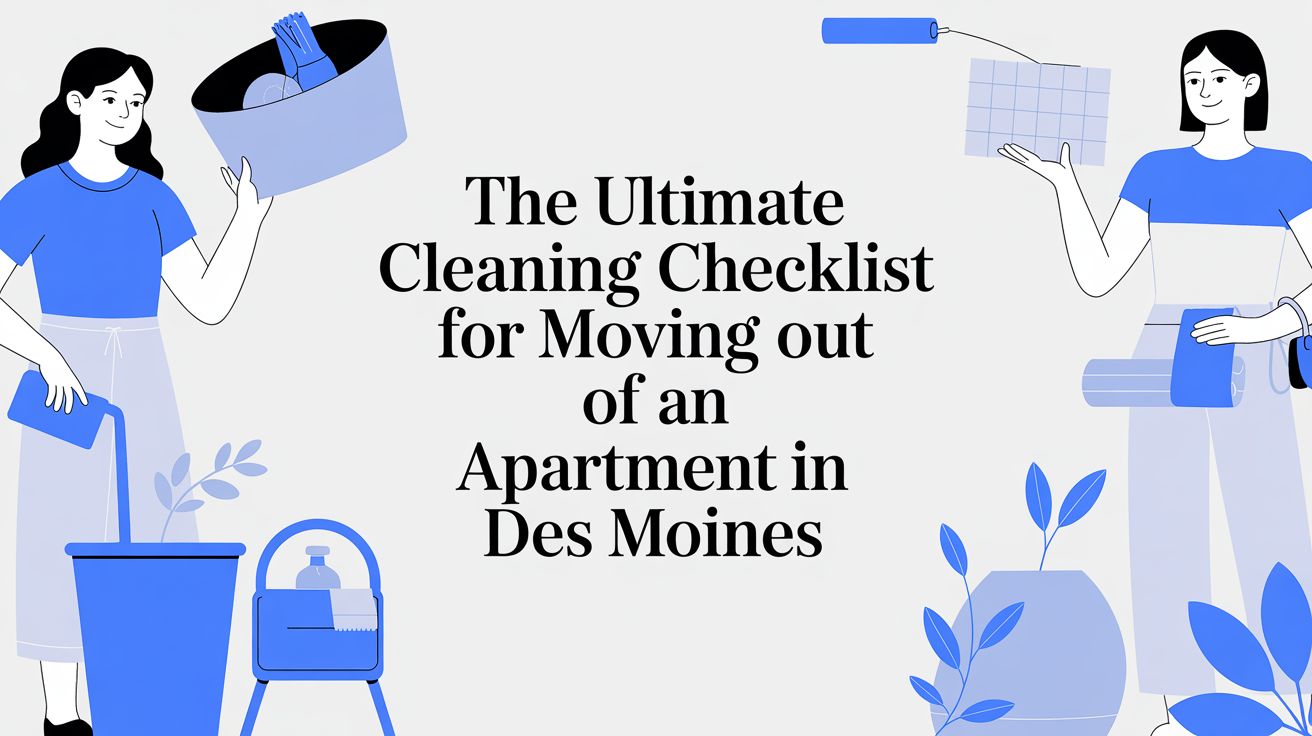
- The Ultimate Professional Deep Cleaning Checklist for Madison Homes
You've searched for a "professional deep cleaning checklist," and for a good reason. The term gets thrown around often, but what does it actually include? A true deep clean isn't just a more thorough version of your weekly tidy-up-it’s a detailed, top-to-bottom reset for your entire home. It tackles the accumulated dust, grime, and allergens that regular cleaning can't reach, from the Wisconsin winter slush tracked into your entryway to the spring pollen buildup on your windowsills. For homeowners in Madison and suburbs like Verona and Waunakee, a deep clean is the perfect solution for seasonal resets, preparing for a move, or simply getting your home back to a baseline of pristine. It’s about restoring that "new home" feeling and ensuring every corner is sanitized and spotless. This comprehensive guide breaks down the essential components of what a professional service delivers, room-by-room, so you know exactly what to expect when you book a deep cleaning Madison WI service. We will cover the specific tasks that make the biggest difference, transforming your space from just 'clean' to truly revitalized. From baseboards and inside appliances to allergy-focused bedroom sanitation, this checklist details what a professional service like Shiny Go Clean provides. You'll learn what a high-quality deep clean involves, how to prepare your home, and what questions to ask, ensuring you get the exact results you're looking for. Let’s dive into what makes a deep clean so transformative for your Madison home. 1. Baseboards and Trim Deep Cleaning Often overlooked in weekly tidying, baseboards, door frames, and window trim are dust magnets that trap allergens, pet hair, and dirt. A professional deep cleaning checklist prioritizes these areas because clean trim instantly makes an entire room feel brighter and more polished. This task goes beyond a quick dusting, involving a multi-step process to remove stubborn, embedded grime. For homes in the Madison area, this is especially crucial. Wisconsin's spring pollen can coat every surface, while winter slush and salt get kicked up onto baseboards in entryways. A thorough cleaning here significantly improves indoor air quality and removes accumulated seasonal buildup. Why It's a Deep-Cleaning Essential This task is a non-negotiable for anyone seeking a truly comprehensive clean. For realtors and property managers in Madison, perfectly detailed baseboards are a hallmark of a turnover-ready property that passes inspection every time. For busy families in Madison neighborhoods, especially those with allergy sufferers, eliminating these dust reservoirs can lead to a noticeable reduction in sniffles and sneezes. Key Insight: Professionals understand that dust and debris fall downward. By cleaning from the top down and finishing with baseboards, they ensure no surface is re-contaminated. This methodical approach is a core part of an effective professional deep cleaning checklist . The Professional Process Professionals don't just wipe-they restore. The process typically involves a few key steps: Dry Removal First: A powerful vacuum with a brush attachment is used to lift all loose dust, pet hair, and debris. This prevents turning fine dust into a muddy mess when a cleaning solution is applied. Targeted Wet Cleaning: Using microfiber cloths and a pH-neutral cleaner safe for painted or wood surfaces, technicians meticulously wipe down every inch of the trim. This removes scuffs, sticky spots, and settled grime. Detailing Corners: Special attention is paid to corners and crevices where dust bunnies love to hide, ensuring a crisp, clean finish throughout the home. For a homeowner in Johnston with a busy family or a renter in Madison preparing for a move-out inspection, this level of detail is difficult to achieve without the right tools and techniques. It's a small task that makes a massive impact, signifying the difference between a standard tidy-up and a professional deep clean. 2. Inside Cabinet and Pantry Organization Deep Clean A standard cleaning service might wipe down cabinet exteriors, but a professional deep clean tackles the often-neglected interiors. Deep cleaning cabinets and pantries involves removing every item, vacuuming crumbs, wiping away sticky spills, and eliminating dust buildup. This comprehensive task is critical for maintaining hygiene, identifying expired goods, and preventing pest activity before it starts. For busy families in Madison or new homeowners in one of Waunakee's new builds, this service transforms a cluttered, chaotic space into an organized and sanitary one. It’s an essential step in a move-in or move-out clean, ensuring a property is truly ready for its next occupant. Why It's a Deep-Cleaning Essential This task is a game-changer for kitchen and bathroom functionality and cleanliness. Property managers in Johnston and Urbandale rely on this service to guarantee their properties meet strict inspection standards for turnover. For homeowners, a deep-cleaned pantry reveals what you actually have, reducing food waste and making meal prep far more efficient. It also uncovers hidden issues like minor leaks or pest evidence. Key Insight: Professionals approach this task with a system-first mindset. By creating "zones" for different categories-like baking supplies, canned goods, or cleaning products-they not only clean but also improve the long-term usability of the space. This methodical organization is a key component of a professional deep cleaning checklist . The Professional Process Professionals bring order to chaos with a structured and efficient approach that goes beyond simple tidying. Empty and Assess: Technicians carefully remove all contents from cabinets and pantries, grouping similar items together. During this process, they check for expired products, damaged containers, or signs of pests, which are then noted for the client. Thorough Interior Cleaning: Once empty, every interior surface-shelves, walls, and doors-is vacuumed to remove crumbs and loose debris. A food-safe cleaner and microfiber cloths are then used to wipe away spills, grease, and grime. For wood cabinets, understanding expert tips on how to clean wood cabinets properly is crucial to prevent damage while achieving a thorough deep clean. Strategic Reorganization: Items are put back in a logical, accessible way, often based on client preferences discussed beforehand. This might involve placing frequently used items at eye level and creating a clean, streamlined look that is easy to maintain. For a busy professional in Madison preparing for a dinner party or a renter in Altoona aiming to secure their full security deposit, this level of detail is invaluable. It’s a task that restores order and sanitation to the most-used areas of a home. 3. Inside Oven and Appliance Deep Cleaning The inside of an oven is one of the most dreaded cleaning tasks, notorious for baked-on grease, stubborn food spills, and harsh chemical fumes. A professional deep clean tackles this head-on, restoring not just the oven but other hard-working appliances like microwaves and dishwashers. This isn't a simple wipe-down; it's a degreasing and sanitizing process that eliminates odors and improves appliance efficiency. For property managers handling turnovers in Madison, a spotless kitchen is non-negotiable for attracting new tenants. Similarly, homeowners staging properties for sale in desirable Madison neighborhoods know that pristine appliances signal a well-maintained home, making this intensive cleaning a crucial investment. Why It's a Deep-Cleaning Essential This task is a cornerstone of any true deep clean, especially for move-out cleaning in Madison where securing a full security deposit is paramount. A greasy, smelly oven can be an instant red flag during a final walkthrough. For busy families, this service removes a significant, time-consuming chore, restoring the kitchen to a hygienic and pleasant state without the homeowner having to handle harsh chemicals or back-breaking scrubbing. Key Insight: Professionals know that store-bought oven cleaners often have intense fumes. They come equipped with proper ventilation techniques, protective gear, and powerful-yet-safer products to get the job done efficiently and safely-a key part of a professional deep cleaning checklist . The Professional Process Professionals employ a systematic approach to degrease and sanitize appliances from the inside out. This detailed process ensures every component is addressed: Disassembly and Soaking: Oven racks, turntable plates, and other removable parts are taken out and soaked in a potent degreasing solution. This allows the product to break down burnt-on residue while the main appliance is being cleaned. Interior Scrubbing: Technicians apply a professional-grade oven cleaner, allowing it to dwell and dissolve hardened grime. They then use non-abrasive tools to scrub away every last bit of carbon and grease without scratching the interior surfaces. Detailing and Reassembly: The oven door, including the often-neglected glass panels, is meticulously cleaned for a crystal-clear view. For more information, you can learn more about how professionals clean between oven glass . Finally, the sparkling clean racks are put back, leaving the appliance looking and smelling fresh. This level of detail is a defining feature of a deep cleaning in Madison WI , transforming a challenging task into a seamless part of a comprehensive home refresh. 4. Bedroom and Allergy-Focused Deep Cleaning Since we spend roughly a third of our lives in the bedroom, this space is a critical target for any true deep clean. An allergy-focused approach goes far beyond standard dusting and vacuuming, targeting the microscopic allergens like dust mites, pet dander, and pollen that accumulate in fabrics, carpets, and hidden corners. For families with respiratory sensitivities, this specialized cleaning is not a luxury-it's essential for healthy living. In the Madison WI area, where seasonal pollen counts can soar, these allergens easily find their way indoors, settling deep into mattresses, curtains, and carpets. A professional deep clean in the bedroom can drastically reduce allergen loads, providing immediate relief for residents in Madison WI who suffer from seasonal allergies or asthma. Why It's a Deep-Cleaning Essential This task is non-negotiable for anyone prioritizing health and well-being. For new parents in Waunakee's preparing a nursery, an allergen-free environment is paramount for their baby's safety. Likewise, allergy-sensitive renters moving into a new apartment in Madison need assurance that the previous tenant's dander and dust have been thoroughly eradicated before they settle in. Key Insight: Professionals understand that allergens are airborne and settle everywhere. They methodically clean from the ceiling down-tackling fans and light fixtures first-to capture dust and dander before it can re-settle on freshly cleaned floors and surfaces, a key component of a professional deep cleaning checklist . The Professional Process A health-focused bedroom deep clean requires specialized tools and a meticulous strategy to truly eliminate irritants rather than just relocate them. HEPA-Filter Vacuuming: The process begins with vacuuming all surfaces-including upholstered headboards, mattresses, curtains, and closet shelving-using a vacuum equipped with a HEPA filter. This is crucial as it traps over 99.9% of allergens, preventing them from being blown back into the air. Microfiber Dusting: Technicians use damp microfiber cloths to wipe down all hard surfaces, including ceiling fan blades, light fixtures, window sills, and furniture. Unlike dry dusting, this method traps and removes dust particles effectively. Under-Furniture Focus: A significant amount of dust and allergens collects under beds and dressers. Professionals move furniture when possible to clean these often-neglected areas, ensuring a comprehensive removal of buildup. For a senior resident in Urbandale needing a respiratory-safe home or a family in Johnston with pets, this level of detailed, allergy-focused cleaning provides peace of mind and a healthier, more restful sleeping environment. 5. Bathroom Deep Cleaning and Sanitization A standard bathroom wipe-down is no match for the persistent grime, soap scum, and bacteria that thrive in high-moisture environments. A professional deep clean goes far beyond the surface, targeting hidden areas like tile grout, behind the toilet, and inside ventilation fans. This process is designed to eliminate mold, mildew, hard water deposits, and harmful germs that accumulate over time. For residents in Madison and surrounding areas, this service is essential. The humidity can contribute to faster mildew growth, while hard water leaves stubborn mineral stains on fixtures and glass. A thorough sanitization makes the space healthier and restores its original sparkle, crucial for both family well-being and maintaining property value. Why It's a Deep-Cleaning Essential This is a non-negotiable task for ensuring a hygienic home. For a property manager in Waukee preparing for a new tenant, a fully sanitized bathroom is a key part of meeting inspection standards. For a family in Urbandale with young children or immunocompromised members, eliminating unseen bacteria and mold spores provides critical peace of mind and a healthier living space. This level of cleaning is also vital after a household illness to prevent the spread of germs. Key Insight: Professionals know that sanitization requires more than just scrubbing. It involves using EPA-approved disinfectants and allowing for proper "dwell time" - the period a product must sit on a surface to effectively kill germs. This scientific approach is a cornerstone of any legitimate professional deep cleaning checklist . The Professional Process Professionals systematically decontaminate and restore every surface in the bathroom. The method is meticulous and thorough: De-scaling and Grout Treatment: Specialized, non-abrasive cleaners are used to dissolve hard water stains and soap scum from glass, tile, and fixtures. Technicians use high-quality grout brushes to scrub away mildew and discoloration from grout lines. Complete Toilet Sanitization: The entire toilet-including the base, behind the unit, and the tank exterior-is cleaned and disinfected. This removes bacteria and odors that a quick clean misses. Ventilation and Fixture Detailing: The exhaust fan cover is removed and cleaned to improve air circulation and prevent dust buildup. Faucets, showerheads, and drains are detailed to remove grime and mineral deposits, ensuring they function properly and look their best. For a homeowner in Johnston who has struggled with recurring mildew, understanding the root cause is key. You can find more information on dealing with bathroom mold and mildew on shinygoclean.com . This professional approach doesn't just clean; it creates a healthier, more pleasant environment. 6. Carpet, Upholstery, and Floor Deep Cleaning Floors, carpets, and upholstered furniture endure the most daily wear and tear, trapping embedded dirt, pet dander, allergens, and odors that routine vacuuming simply cannot reach. A professional deep cleaning checklist elevates floor care from a simple surface wipe to a restorative process. This involves specialized treatments like carpet steam cleaning, detailed upholstery sanitation, and meticulous care for specific floor types like hardwood, tile, and laminate. For homeowners with pets in Madison, WI this service is transformative, effectively neutralizing stubborn pet odors and removing deep-seated hair. Similarly, for families with young children or allergy sufferers in the Madison area, a thorough carpet and upholstery cleaning is a critical step in improving indoor air quality and creating a healthier living environment, especially after the muddy thaw season. Why It's a Deep-Cleaning Essential This task is fundamental to a truly deep clean because floors and fabrics act as the largest filters in your home. For property managers in Waukee preparing for a turnover, sanitized carpets free of stains are a non-negotiable part of making a rental unit move-in ready. For realtors staging a home, professionally cleaned floors communicate a high level of care and maintenance to potential buyers, significantly boosting a property's appeal. Key Insight: Professionals know that different materials require different treatments. Using the wrong solution on hardwood or a harsh chemical on delicate upholstery can cause irreversible damage. A true professional deep cleaning checklist includes assessing each surface to apply the safest and most effective cleaning method. The Professional Process Professionals employ powerful equipment and industry-grade solutions to achieve results that are impossible with consumer-grade products. The process is systematic and thorough: Pre-Treatment and Spot Removal: Technicians first identify and pre-treat high-traffic areas and specific stains-like wine, coffee, or pet accidents. Using targeted enzymatic cleaners for pet spots ensures that both the stain and the odor-causing bacteria are fully eliminated. Deep Extraction: For carpets and upholstery, hot water extraction (steam cleaning) is used to inject a cleaning solution deep into the fibers and then powerfully extract the dislodged dirt, allergens, and moisture. Specialized Floor Care: For hard surfaces, professionals go beyond simple mopping. They use appropriate cleaners for hardwood, tile, or laminate and focus on cleaning grout lines, corners, and the areas beneath furniture that are often missed. You can also explore natural solutions for stain and odor removal. Find out more about baking soda carpet cleaning on shinygoclean.com . Optional Protectant Application: After cleaning, an optional fabric or carpet protectant can be applied. This creates a barrier that helps repel future stains, making routine maintenance easier and extending the life of your floors and furniture. 7. Window and Glass Deep Cleaning (Interior and Exterior) Smudges on glass and dirty window tracks can make an otherwise clean home feel dingy and uncared for. Professional window and glass deep cleaning goes far beyond a quick spray-and-wipe of mirrors. It’s an intensive process that addresses every component-including frames, sills, tracks, and screens-to remove accumulated dust, pollen, and grime for crystal-clear results. In the Madison area, this is a vital seasonal task. Wisconsin's heavy spring pollen can leave a yellow film on every pane of glass, while winter storms leave behind water spots and dirt. A thorough window cleaning not only boosts curb appeal but also maximizes natural light, making your entire home feel brighter and more inviting. Why It's a Deep-Cleaning Essential This is a critical item on any professional deep cleaning checklist because clean windows dramatically impact a property's overall impression. For realtors staging homes in Madison, streak-free windows are non-negotiable for creating a welcoming atmosphere during showings. For renters in Madison completing a move-out cleaning, professionally cleaned window tracks and sills are often checked during landlord inspections. Key Insight: Professionals understand that true clarity involves more than just the glass. Debris in window tracks and dust on screens will quickly re-soil clean panes. A comprehensive approach ensures a longer-lasting, truly professional finish. The Professional Process Professionals use specialized tools and techniques to achieve a flawless, streak-free shine that’s difficult to replicate with household products. Track and Sill Detailing: The process begins by vacuuming out all loose dirt, dead insects, and debris from window tracks and sills. A detail brush and specialized cleaner are then used to scrub away caked-on grime. Screen Cleaning: Screens are carefully removed and washed separately to eliminate trapped pollen, dust, and dirt, ensuring fresh air can enter without bringing contaminants inside. Streak-Free Glass Cleaning: Using professional-grade squeegees, microfiber cloths, and a high-quality cleaning solution, technicians expertly clean both interior and exterior glass from top to bottom, preventing drips and ensuring a perfect finish. For a detailed guide on achieving this flawless finish, you can explore resources on how to professionally deep clean windows . Whether you're a new homeowner in Madison wanting to enjoy your view or a family in Johnston with allergy sufferers, this service is a game-changer. It’s a detailed task that elevates the look and feel of your entire property. 8. Move-In/Move-Out Deep Cleaning for Property Transitions Move-in/move-out cleaning is the most intensive and comprehensive service on any professional checklist, combining all specialized tasks into a complete property reset. This service prepares a home for its next chapter, addressing every surface, crevice, and corner to erase signs of previous tenancy. For those moving out, it’s a critical step to ensure a full security deposit return and satisfy landlord requirements. In the dynamic Madison real estate market, this service is essential. New homeowners in rapidly growing suburbs like Madison and Waunakee want a sanitized, fresh start, while renters in Madison rely on a professional clean to meet strict lease-end obligations. It’s the ultimate test of a cleaning company's reliability and attention to detail. Why It's a Deep-Cleaning Essential This is the gold standard of deep cleaning, required for any major property transition. For property managers across the Madison metro, a professional move-out clean is a non-negotiable part of the turnover process, ensuring the unit is pristine for the next tenant. For real estate agents in Johnston preparing a home for showings, it creates an immaculate first impression that can directly impact sale price and time on the market. Key Insight: A move-out clean is a top-to-bottom, inside-and-out process that leaves no surface untouched. Professionals follow a strict professional deep cleaning checklist that often includes tasks not found in standard services, like cleaning inside all cabinets, drawers, and major appliances. The Professional Process A professional move-out clean is a systematic restoration of a home to its best possible condition. The process is meticulous and documented: Empty Space Advantage: Technicians work in a completely empty property, allowing them to access every inch without obstruction. This includes cleaning inside closets, pantries, and all cabinetry. Appliance Detailing: The oven is degreased, the refrigerator is scrubbed and sanitized inside and out, and the dishwasher is cleaned to remove residue and buildup. Fixture and Surface Restoration: All light fixtures, ceiling fans, blinds, and window tracks are deep cleaned. Walls may be spot-cleaned, and all trim, doors, and switch plates are wiped down. Final Verification: A detailed walkthrough and before-and-after photos are often used to document the work, providing clear proof for landlords, property managers, or new buyers. For a family relocating to the Madisones area or a renter coordinating a tight move, this level of detailed cleaning is nearly impossible to manage alone. It provides peace of mind and ensures a smooth, stress-free property transition. To prepare for this extensive service, you can learn more from this ultimate moving cleaning checklist to ensure nothing is missed. Professional Deep Cleaning: 8-Item Comparison Service Implementation Complexity 🔄 Resource Requirements ⚡ Expected Outcomes ⭐ Ideal Use Cases 📊 Key Tips / Advantages 💡 Baseboards and Trim Deep Cleaning Moderate — detail-oriented, time-intensive perimeter work 🔄 Low–Medium — microfiber, vacuum attachments, cleaners; labor-heavy ⚡ ⭐⭐⭐ — Removes dust/allergens, improves appearance and air quality 📊 Allergy-sensitive homes, pet owners, pre-listing or move-in/move-out touch-ups 📊 💡 Vacuum first, use microfiber, work top→bottom; schedule seasonally Inside Cabinet & Pantry Organization Deep Clean High — item removal, sorting, pest inspection; requires client coordination 🔄 Medium — cleaning supplies, shelf liners, storage bins; 2–4 hrs/kitchen ⚡ ⭐⭐⭐ — Improves food hygiene, reveals pests/expired items, increases usable storage 📊 Busy professionals, move-ins/outs, property turnovers, real estate prep 📊 💡 Photograph before, confirm client preferences, group like items, provide inventory Inside Oven & Appliance Deep Cleaning High — specialized techniques, protective gear, possible disassembly 🔄 High — professional-grade cleaners, PPE, tools; time-consuming; avoid for self-clean ovens ⚡ ⭐⭐⭐⭐ — Removes grease/odors, improves efficiency and safety, extends appliance life 📊 Move-ins/outs, busy families, properties with heavy cooking or staging needs 📊 💡 Use eco-friendly options for sensitivities, allow dwell time, clean racks separately, photo results Bedroom & Allergy-Focused Deep Cleaning Moderate — systematic allergen-focused steps, attention to hidden areas 🔄 Medium — HEPA vacuum, microfiber, hypoallergenic products; specialized equipment ⚡ ⭐⭐⭐⭐ — Reduces allergens, improves sleep and respiratory health 📊 Allergy-sensitive families, infants, seniors, health-focused clients, recurring maintenance 📊 💡 Use HEPA vacs, clean fans first, control humidity, schedule during low-pollen periods Bathroom Deep Cleaning & Sanitization High — grout, vents, behind fixtures, and disinfection tasks 🔄 High — disinfectants, grout brushes, PPE, good ventilation; multiple products ⚡ ⭐⭐⭐⭐ — Eliminates mold/mildew/bacteria, improves hygiene and reduces health risks 📊 Shared bathrooms, move-ins/outs, post-illness cleans, senior or immunocompromised households 📊 💡 Address ventilation, color-code cloths, allow dwell time, document before/after Carpet, Upholstery & Floor Deep Cleaning High — heavy equipment, furniture moving, material-specific methods 🔄 High — steam/extraction machines, enzymatic treatments, drying time and manpower ⚡ ⭐⭐⭐⭐ — Removes embedded dirt/allergens, restores appearance; may need long drying 📊 Pet-owner homes, allergy-sensitive clients, move-ins/outs, staging and high-traffic properties 📊 💡 Pre-treat stains, test materials, recommend quarterly service, explain drying times Window & Glass Deep Cleaning (Int/Ext) Moderate — technique-sensitive; exterior safety/ladders for multi-story 🔄 Medium — squeegees, microfiber, ladders/lifts for high windows, cleaning solutions ⚡ ⭐⭐⭐ — Clear, streak-free glass; improved light and curb appeal; removes allergen buildup 📊 Seasonal refreshes, real estate showings, pollen-prone homes, move-ins/outs 📊 💡 Clean top→bottom, wash screens separately, plan for weather, use squeegee + microfiber Move-In / Move-Out Deep Cleaning Very High — combines all deep tasks; requires QC, documentation and coordination 🔄 Very High — full team, all specialized tools/products, long service windows (6–10+ hrs) ⚡ ⭐⭐⭐⭐⭐ — Comprehensive property reset; maximizes deposit return and move-in readiness 📊 Tenant turnovers, relocations, property management, real estate listings and staging 📊 💡 Do pre-walkthroughs with photos, use detailed checklists, document before/after, coordinate logistics Ready for a Truly Deep Clean? Let's Make It Happen. You've made it through the ultimate professional deep cleaning checklist , moving from the often-neglected baseboards and trim to the grime-prone interior of your oven, and all the way to crystal-clear windows. This isn't just a list; it's a roadmap to transforming your living space into a sanctuary of cleanliness, health, and order. We've covered the nitty-gritty details that separate a standard tidy-up from a truly restorative deep clean that you can see, feel, and even smell. The value of this comprehensive approach goes far beyond simple aesthetics. For families in busy Madison neighborhoods, it means reclaiming precious weekend time. For those with allergies, a targeted bedroom and bathroom sanitization provides genuine relief from dust, dander, and that notorious spring pollen buildup on our windowsills. For anyone navigating a move-in or move-out, a meticulous deep clean ensures a smooth, stress-free transition, satisfying landlords and creating a welcoming environment for the next chapter. Your Key Takeaways and Next Steps Let's distill this extensive guide into actionable insights you can use today: Preparation is Paramount: Before any professional cleaner arrives, decluttering is your most powerful first step. Clearing surfaces, organizing personal items, and ensuring easy access to all rooms allows cleaning pros to focus their time and energy on what they do best: deep cleaning. Don't Sweat the Add-Ons: Tasks like cleaning inside cabinets, tackling a greasy oven, or washing interior blinds are high-impact but often require specialized techniques and products. These are perfect "add-on" services to request from a professional service, saving you time and ensuring a flawless result. Communication is a Two-Way Street: The most successful deep cleans happen when there’s clear communication. Discuss your priority areas, point out specific concerns like pet hair or Wisconsin's winter slush and salt tracked into entryways, and confirm what's included in your service. A great cleaning company will welcome your input. From Checklist to Reality: The True Impact Mastering this professional deep cleaning checklist empowers you to either tackle the job yourself with a clear plan or, more importantly, to hire a professional service with confidence. You now know what to look for, what to ask, and what a five-star result should look like. A deep clean is an investment in your home's longevity, your family's health, and your personal well-being. It resets your environment, reduces stress, and gives you a fresh slate. Whether you're in a new build in Waunakee or a cozy downtown apartment in the East Village, the principles remain the same. A truly clean home is a happy home. You now have the knowledge and the tools to make that happen. You don't have to face this mountain of tasks alone-let this checklist be your guide to a sparkling, rejuvenated home. Ready to skip the work and jump straight to the sparkling results? The team at Shiny Go Clean uses this exact level of detail to deliver exceptional deep cleaning services across the Madison area. Book your 'deep cleaning Madison WI' service in 60 seconds online at Shiny Go Clean or call us at 608-292-6848 to get your free, no-obligation quote today.
- How to Organize Cleaning Supplies Like a Madison Pro
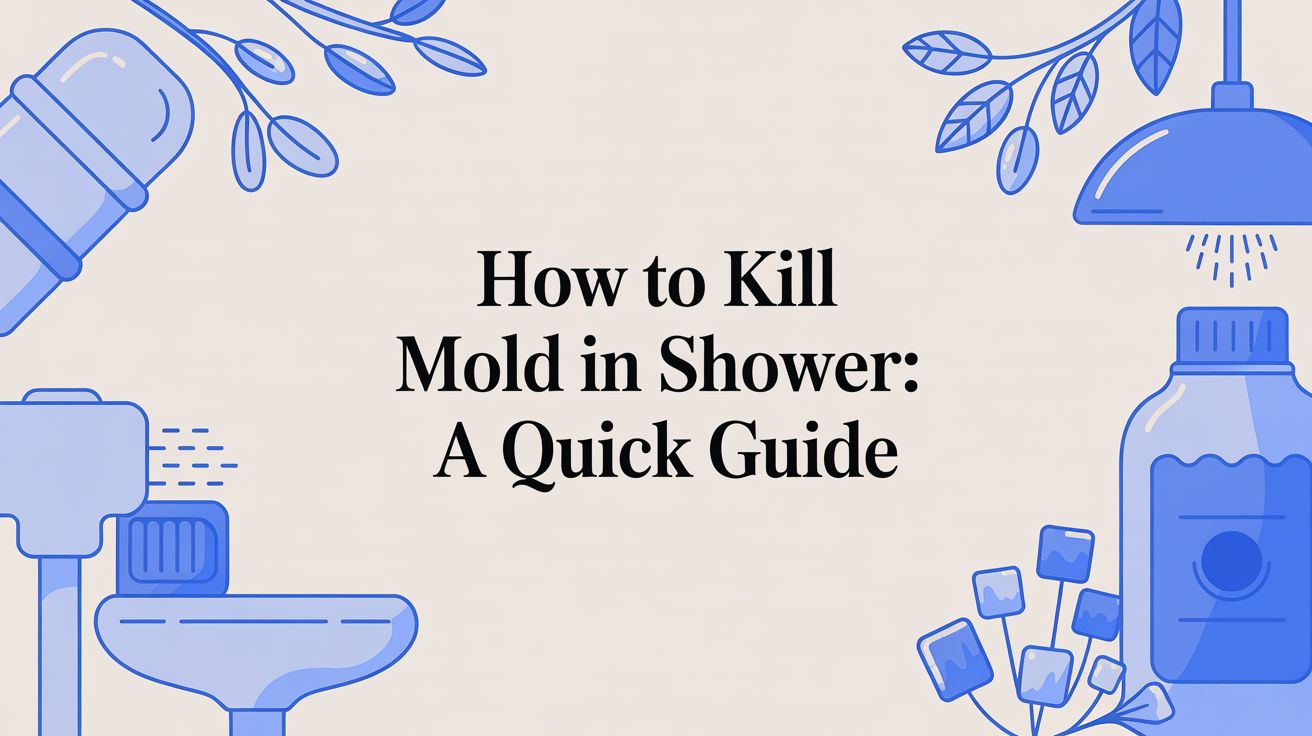
That chaotic jumble of bottles, sponges, and rags under the sink is more than just an eyesore-it’s a major roadblock to a clean home. When you can’t find the right cleaner or realize you have three half-empty bottles of the same product, a simple task becomes a frustrating chore. The goal isn't just to tidy up; it's to build a practical, long-lasting system that saves you time and stress. This all starts with a clear plan before you even think about buying a single bin or caddy. You need to know exactly what you're working with, what you actually use, and the specific dimensions of your storage spaces. Start with a Full Inventory First things first: pull everything out. Gather every single cleaning product from under the kitchen sink, the bathroom cabinets, the laundry room, and any other hiding spots. Lay it all out on a protected surface where you can see it all at once. Once everything is visible, sort items into broad categories. This isn't about perfection; it's about seeing what you have so you can spot the overlaps immediately. Common groupings include: Surface Cleaners: All-purpose sprays, glass cleaners, wood polish. Heavy-Duty Cleaners: Oven cleaners, grout scrubs, drain openers. Floor Care: Vacuums, mops, floor-specific cleaning solutions. Tools & Accessories: Microfiber cloths, sponges, scrub brushes, gloves. This process gives you a complete, honest picture of your cleaning arsenal and makes the next step-decluttering-much simpler. Declutter Ruthlessly but Safely Now it's time to decide what stays and what goes. Be honest with yourself. If you haven't touched a product in over a year, it’s probably not essential. Check for expired products, nearly empty bottles that are just taking up space, and items you bought but never really liked. Remember to dispose of chemicals safely according to local guidelines. Never pour harsh chemicals down the drain or mix products, especially bleach and ammonia. An organized home is an efficient one. A 2023 survey found that 68% of households with organized cleaning storage reported spending 25% less time searching for supplies during weekly chores. That's a real time-saver for busy families in Madison. The global household cleaning supplies market is massive-projected to hit USD 57.9 billion by 2035 . That means companies are constantly creating new "must-have" products. A good decluttering session keeps you from falling into the trap of over-purchasing. The diagram below breaks down this simple three-step flow to get you started. This straightforward approach-auditing, decluttering, and measuring-creates a solid foundation before you spend a dime on storage containers. Before you jump into organizing, taking a moment to assess the situation sets you up for success. This quick audit prevents you from just shifting clutter from one spot to another. Quick-Start Cleaning Supply Audit Action Step Why It Matters Pro Tip for Madison Homes Gather Everything Creates a complete visual inventory, so you know exactly what you own. No more surprises. Pull supplies from the garage and basement, too. Wisconsin's humid seasons can affect product consistency. Group by Type Instantly reveals duplicates. You'll see you don't need five different glass cleaners. Group seasonal items like grill cleaner or deck wash separately so they can be stored out of the way. Check Expiration Dates Expired cleaners lose their effectiveness and can even damage surfaces. Toss old, hardened powders or separated liquids. They're no longer safe or effective to use. Dispose of Unwanted Items Safely Protects your plumbing and the local environment from harmful chemicals. Check the Metro Waste Authority guidelines for hazardous material drop-off sites in the Madison area. This initial clear-out is the most crucial part of the process. It ensures you're only organizing the items you actually need and use. Measure Your Space Before you buy a single organizer, grab a tape measure. Seriously. Measure the height, width, and depth of your primary storage areas, whether it's a tight under-sink cabinet in an East Village apartment or a spacious laundry room in a new Waukee build. Don’t forget to account for any pipes or a garbage disposal that might get in the way. Having precise measurements ensures you buy storage solutions that actually fit the first time around. For more ideas, check out our guide on the essential tools for deep cleaning your home . Choosing the Right Storage for Your Home and Habits Once you’ve sorted through your supplies, the next move is to give everything a smart, accessible home. The best storage solutions aren't just about hiding clutter-they’re about matching your tools to your space and your actual cleaning routines. After all, what works for a sprawling family home in Madison might not be practical for a sleek apartment in the Verona. The real key is to think in terms of accessibility and frequency. Stuff you grab daily should be right at your fingertips. Those heavy-duty or seasonal cleaners? They can live a little further away. This simple shift in mindset is what makes a system you’ll actually stick with. Finding Your Perfect Storage Match Every home has its own storage opportunities and challenges. A portable caddy might be a game-changer for one person, while a wall-mounted system is the only thing that works for another. Let's break down some of the most effective options. Portable Caddies: These are the absolute workhorses of any good cleaning system. A simple caddy lets you haul all your essential bathroom or kitchen cleaners from one room to the next, saving you countless trips back to the supply closet. They're cheap, versatile, and perfect for everyday tasks. Over-the-Door Organizers: When you’re tight on closet or cabinet space, vertical storage is a lifesaver. An over-the-door rack with pockets or wire baskets can hold a surprising number of bottles and tools without taking up a single inch of floor space. It's an ideal fix for pantry doors or small laundry rooms. Wall-Mounted Systems: If you have wall space in a garage or basement, use it. A pegboard or track system with hooks and baskets gets bulky items like mops, brooms, and buckets off the floor. This keeps them dry, helps them last longer, and frees up valuable closet real estate. Figuring out the right mix of these solutions helps you build the physical framework for an efficient system. To really get your home functioning well, it helps to see how these principles apply elsewhere. Exploring practical ideas for smart kitchen storage solutions can inspire ways to manage not just your cleaners, but your entire living space more effectively. Under-Sink and Pantry Solutions Let's be honest: the area under the sink is often the most chaotic spot in the house. With all that plumbing to navigate, it becomes a forgotten zone where half-empty bottles go to expire. But with the right tools, it can become an organizational powerhouse. Try a two-tiered pull-out organizer designed to fit around pipes. The top shelf can hold sponges and scrub brushes, while the bottom can store your most-used spray bottles. Another great trick is to install a tension rod near the top of the cabinet-it’s perfect for hanging spray bottles by their triggers to free up the cabinet floor. For pantries, clear stackable bins are your best friend. By using clear containers, you eliminate the guesswork. You can see exactly what you have at a glance, which stops you from buying duplicates and helps you find what you need in seconds. Group similar items together in these bins-one for microfiber cloths, one for dusting supplies, another for specialty wood or stone cleaners. Make sure you label each bin. This simple step transforms a cluttered shelf into a tidy, grab-and-go station that anyone in the family can use and-more importantly-put things back correctly. Tailoring Storage to Your Madison Home Your lifestyle and where you live should absolutely shape your storage strategy. A busy family in Johnston with kids and pets might do well with multiple, smaller cleaning stations. A small caddy with pet-safe carpet cleaner and paper towels in the living room can handle spills instantly, while the main supply stash stays in the laundry room. Contrast that with someone in a new-build townhome in Waunakee. With more vertical space but maybe fewer closets, a garage wall system or a tall, narrow rolling cart that slides next to the washer and dryer makes the most sense. The whole point is to make cleaning less of a chore by removing the friction between seeing a mess and cleaning it up. When you strategically place your supplies where you actually use them, you’re not just organizing-you’re building a smarter, more efficient home. Building Room-Specific Cleaning Kits That Save Time Ever found yourself in the middle of cleaning the bathroom, only to realize the grout brush is still in the laundry room? Or that the good glass cleaner is under the kitchen sink? We've all been there. This is exactly why room-specific cleaning kits are a game-changer. It's a simple but incredibly effective idea: grab one caddy, and everything you need is right there. This strategy turns a huge chore into a series of smaller, more manageable tasks. Instead of one massive, disorganized collection of supplies, you create dedicated kits for the high-traffic areas of your home. It’s the same method our Shiny Go Clean teams use to get homes in Johnston and Urbandale clean and shiny, fast-because it just plain works. The Essential Bathroom Caddy The bathroom is the perfect place to start because its cleaning needs are so unique. You're dealing with soap scum, mildew, and water spots, all of which demand a specific set of tools. Creating a dedicated caddy also helps you avoid cross-contamination-you’ll never accidentally grab the toilet brush sponge to wipe down the kitchen counter. Here’s a great starting point for your bathroom kit: A Non-Abrasive Scrubber: Perfect for tackling soap scum on tubs and tiles without scratching anything. Grout Brush: A small, stiff-bristled brush is non-negotiable for getting into those tough grout lines. For tips on handling the really stubborn stuff, check out our Madison guide on how to kill mold in your shower . Toilet Bowl Cleaner and Brush: These should live in the bathroom and only be used for the toilet. Glass Cleaner: A must-have for constantly splattered mirrors and shower doors. Disinfecting All-Purpose Spray: For wiping down countertops, sinks, and faucets. Microfiber Cloths: Keep at least two on hand-one for general wiping and another for polishing mirrors to a streak-free shine. With this simple setup, anyone in the family can grab the caddy and clean the entire bathroom in one efficient go. No more excuses. Your Go-To Kitchen Kit The kitchen is another workhorse, but its messes are completely different. Here, you're up against grease, food splatters, and crumbs, which means you need degreasers and food-safe cleaners within easy reach. Storing this kit under the sink or in a nearby pantry makes daily wipe-downs almost effortless. Your kitchen kit should include: A Quality Degreaser: Your best friend for wiping down the stovetop, backsplash, and vent hood. All-Purpose Surface Cleaner: Make sure to choose one that’s safe for your specific countertop material, whether it's granite, quartz, or something else. Stainless Steel Polish: If you have stainless appliances, a dedicated polish is the secret to keeping them looking new and fingerprint-free. Dish Soap: A small bottle of concentrated dish soap works wonders for spot-cleaning greasy spills on the fly. Scrub Sponges and Microfiber Towels: Have a fresh supply ready for counters, spills, and whatever else the day throws at you. The real magic of room-specific kits is how much time they save. You stop wandering around the house looking for the right product. Everything you need is exactly where you need it, which can easily turn a 30-minute task into a 10-minute one. This isn't just a clever homeowner hack; it's a foundational principle in the professional cleaning world. In fact, with the global cleaning services market projected to hit $425.6 billion by 2025 , efficiency is everything. Studies have shown that 72% of cleaning firms using zoned storage-like dedicated kits for different areas-report 22% higher client satisfaction . It saves time and improves results. When you bring this pro method home, you get that same efficiency at your fingertips. Smart Strategies for a Safe and Sustainable System A well-organized cleaning closet does more than just save you time-it creates a safer, healthier space for everyone in your home. This is especially true for families with curious kids or pets running around. Beyond just safety, a thoughtful approach to organizing your supplies can also support a more sustainable, eco-friendly lifestyle, something a lot of homeowners are passionate about these days. First things first: safety is non-negotiable. Many common household cleaners can be dangerous if they're stored improperly or, even worse, mixed. For instance, never store bleach and ammonia-based products in the same cabinet. When their fumes combine, they create toxic chloramine gas, which is seriously harmful. A good rule of thumb is to always store harsh chemicals like oven cleaners, drain openers, and straight bleach separately from your milder, everyday sprays. Prioritizing a Safe Storage Setup The best spot for stronger chemicals is on a high shelf, ideally inside a locked cabinet or a space with a child-proof latch. A garage or a well-ventilated laundry room is almost always a better choice than under a busy kitchen or bathroom sink where little hands can easily wander. Consider these simple but incredibly effective safety measures: Install Child-Proof Locks: Add magnetic or slide locks to any low cabinets containing cleaning products. They’re cheap, easy to find, and take minutes to install. Ensure Good Ventilation: Try to avoid storing chemicals in tightly sealed, unventilated closets where fumes can build up over time. Keep Original Containers: Always store products in their original, labeled bottles. This way, you have immediate access to ingredient information and usage instructions in case of an emergency. Keeping your family safe is the most important part of home organization. A few deliberate choices-like separating chemicals and adding a simple cabinet lock-provide invaluable peace of mind. Embracing Sustainable Organization Creating a safer system often goes hand-in-hand with building a more sustainable one. As more people switch to eco-friendly products, organizing them properly ensures they last longer and work the way they're supposed to. This shift is pretty significant; eco-products are on track to claim 52.7% of the $207 billion global cleaning market by 2026. Making your system greener can be simple. Designate a specific shelf or bin just for your refillable spray bottles and concentrates. This keeps them from getting lost among single-use products and serves as a visual reminder to refill instead of rebuy. If you're heading down this path, we've put together a guide to green cleaning solutions for your home that offers some practical tips. Properly storing your reusable tools is just as important. Instead of tossing damp microfiber cloths into a dark cabinet where they can get mildewy, hang them on small hooks inside a closet door or store them clean and dry in an open-air basket. This little habit extends their life, saving you money and cutting down on waste. To balance these goals, it helps to see how safety and sustainability can work together. Safe vs. Sustainable Storage Solutions Storage Goal Best Practices Recommended Products Child & Pet Safety Keep all chemicals, even natural ones, out of reach. Use high shelves or locked cabinets for anything potentially hazardous. Magnetic cabinet locks, high-mounted shelving units, lockable storage totes. Eco-Friendly Habits Store reusable items where they can air-dry. Group refills and concentrates for easy access to encourage use. Wall-mounted hooks for cloths/brushes, clear bins for refillables, glass spray bottles. Combining Both Use a locked cabinet for harsh chemicals, but place eco-friendly, refillable daily cleaners in a handy, accessible (but still smart) spot. A two-tiered approach: a high, locked "chemical zone" and a lower, organized "green cleaning" station. By combining smart safety practices with mindful, sustainable habits, your organized system becomes a powerful tool for a healthier home and planet. Maintaining Your System for Lasting Order You’ve done the hard work-you’ve decluttered, sorted, and found the perfect home for every last bottle and brush. But the real secret to keeping your cleaning supplies organized for good isn't that initial setup; it’s the simple, repeatable habits you build afterward. An organization system only works if you stick with it. These small routines are what prevent that dreaded clutter creep from returning and stop chaos from slowly reclaiming your closets and cabinets, especially in a busy Madison household. Adopt the 'One In, One Out' Rule This is one of the easiest and most effective habits you can pick up. Whenever you buy a new cleaning product, an old one has to go. It’s a simple mental checkpoint that forces you to use up what you have before adding something new to the collection. No more accumulating three half-empty bottles of all-purpose cleaner. Before you head to the store, take a quick look at your supplies. If you’re grabbing a new bottle of wood polish, make sure the old one is nearly gone or gets tossed if it's expired. This single rule is your best defense against the slow pile-up of unnecessary products. Keep a Running Inventory List You don't need a complicated spreadsheet for this. A simple list on your phone's notes app or a magnetic notepad stuck to the fridge works perfectly. The moment you use the last of your glass cleaner or notice you’re down to your final roll of paper towels, add it to the list immediately. This takes all the guesswork out of shopping and solves two common problems: Forgetting Essentials: You’ll never have that moment of panic when you realize you’re out of dish soap mid-cleanup. Overbuying Duplicates: You won’t waste money on a fourth bottle of granite cleaner you didn’t realize you already had. A running list keeps you prepared and helps you stick to your budget, making sure you only buy what you actually need. It's a small change that makes a huge impact on both your clutter levels and your wallet. An organized system is only as good as its upkeep. Just 10 minutes of maintenance a week is usually all it takes to keep your cleaning supplies tidy, restocked, and ready for action. It’s a small investment that pays off with a consistently calmer, more functional home. Schedule Quick System Resets Maintenance doesn't have to be a major project. A quick, scheduled check-in can keep your entire system running smoothly. Think of it as a mini-audit that takes just a few minutes but saves you from a much bigger mess down the road. Weekly Tidy-Up (5 Minutes): Once a week, just do a quick visual scan. Did every spray bottle make it back to its caddy? Are the microfiber cloths in their designated basket? This is all about returning stray items to their proper homes before they start to pile up. It’s also a good time to wipe down any drippy bottles to keep your shelves clean. Monthly Restock & Review (15 Minutes): Once a month, take a slightly deeper look. Go through your inventory list and restock whatever you're low on. This is also the perfect time to quickly check expiration dates on less-used products and safely get rid of anything that’s past its prime. Giving your caddies and bins a quick wipe-down during this check-in keeps everything fresh. These simple routines are the guardrails that keep your organization efforts on track. They ensure the time you invested in setting up your system pays off for months and years to come, making cleaning less of a chore and more of a seamless part of managing your home. When Your Home Needs a Professional Reset Even with the best organizational system, sometimes life just gets ahead of you. A perfect setup for your cleaning supplies is fantastic for keeping things in check, but it can’t always undo weeks or months of built-up grime. Some messes just call for a bigger reset. Think about the realities of Wisconsin living-that sticky spring pollen that coats every windowsill or the salt and slush from a long winter tracked across your entryway floors. These situations often need more than a quick wipe-down with your go-to spray. When to Call for a Deep Clean Sometimes, a professional touch is what you need to get back to a manageable baseline. It’s not about giving up; it’s about getting a strategic head start so your own system can work again. Consider bringing in a professional deep cleaning team when you’re facing challenges like: Post-Construction Dust: The fine dust from a new build or renovation in areas like Waukee settles everywhere for weeks. It takes specialized tools and techniques to fully get it out of the air and off every surface. Move-Out Cleaning: Getting a security deposit back often depends on leaving a place spotless. A professional move out cleaning Madison service ensures every last corner is handled, saving you the headache. Seasonal Overhauls: Tackling a whole season’s worth of buildup-like accumulated dust in vents or grime on baseboards-can eat up an entire weekend. It’s a huge job. A one-time deep clean from a professional service isn't a luxury-it's an investment in your time and peace of mind. It restores your home to a state that’s easy to maintain, letting your organizational system truly shine. For many busy professionals and families in the Madison area, our recurring cleaning services provide that consistent "deep-clean" feeling without the effort. If your home needs a more extensive reset, you might be curious about how much a professional organizer charges to help get things back in order first. At Shiny Go Clean, our team arrives with all the organized, professional-grade supplies needed to tackle the tough jobs from the start. If your home needs more than just a tidy-up, we make it easy to get the expert help you deserve. You can even explore the ultimate professional deep cleaning checklist to see what a true reset involves. Answering Your Top Questions About Organizing Cleaning Supplies Getting your cleaning supplies in order always brings up a few practical questions. You're not alone-we hear the same ones from homeowners all over the Madison area. Here are some straightforward answers to the challenges people run into when creating a system that actually sticks. Where Should I Store Cleaning Supplies Without a Dedicated Closet? If you're working with limited space, like many in downtown East Village apartments, the key is to think vertically and use overlooked nooks. Don't underestimate the power of an over-the-door rack on a pantry or laundry room door. It can hold dozens of bottles without taking up any precious floor space. A narrow rolling cart is another fantastic solution. It slides right into that small gap between a washer and dryer or next to a refrigerator. For those awkward under-sink cabinets, a pull-out organizer designed to fit around plumbing can instantly double your usable space. It’s all about making every inch count. How Often Should I Declutter My Cleaning Supplies? A full overhaul isn't necessary very often if you stay on top of it. We recommend a quick 10-minute check-in once a month . This is the perfect time to wipe down any drippy bottles, add items to your shopping list, and toss anything that's empty or expired. A deeper reorganization just once or twice a year is usually enough to keep the entire system from falling apart. This prevents you from slowly accumulating products you tried once and never used again. Is It Safe to Store All My Cleaning Products Together? No, and this is the most critical point for safety. You should never store ammonia-based and bleach-based cleaners together . When they’re in the same enclosed space, their fumes can mix and create toxic chloramine gas, which is dangerous to inhale. As a general rule, always keep harsh chemicals like bleach, drain openers, and oven cleaners separate from your everyday, milder sprays. Store them in a well-ventilated area, away from heat, and-most importantly-safely out of reach of children and pets. Feeling like your home needs a full reset before you can even think about organizing? Let Shiny Go Clean handle the hard work. Our professional deep cleaning services give you the fresh start you need, making it easier to maintain a clean and orderly home. We offer everything from a one time cleaning to recurring maid service in Madison. Book your Madison house cleaning service in just 60 seconds.
- Your Guide to Toilet Bowl Cleaner Safe for Septic Tanks in Madison
If you live in Madison or the surrounding suburbs like Verona and Fitchburg, your septic system is the unsung hero of your home. But using the wrong toilet cleaner can turn that hero into a costly villain in a hurry. So, what actually makes a toilet bowl cleaner safe for septic tanks? It really comes down to one simple thing: avoiding harsh chemicals like chlorine bleach and ammonia. These ingredients are designed to kill germs, and they don't know the difference between the bad stuff in your toilet and the good bacteria your septic system needs to survive. Protecting Your Home's Septic System in Madison, WI A septic system isn't just a tank buried in your yard- it's a living, breathing wastewater treatment plant. It depends on a thriving colony of bacteria to break down solid waste, separating it from the water that eventually filters back into the soil. When harsh chemicals go down the drain, that whole process can grind to a halt. Think of it like a tiny, self-sustaining garden in your backyard. The beneficial bacteria are the hardworking gardeners, diligently turning waste into harmless stuff. A septic-safe cleaner is like gentle, organic compost that helps them do their job. On the other hand, a cleaner with bleach is like pouring weed killer all over your garden- it wipes out the very workers you rely on. The Real Cost of the Wrong Cleaner Protecting this delicate balance isn't just an eco-friendly choice; it's a smart financial move for homeowners across the Madison metro. Nearly one in five American households rely on septic systems, and according to the U.S. EPA, improper use of household cleaners contributes to a shocking 36% of all septic system failures each year. Those failures can lead to repairs averaging between $3,000 and $7,000 - a huge expense for any family. That statistic alone shows why choosing the right toilet bowl cleaner is so important for busy families in Madison, Verona and Waunakee. Learn more about these septic-safe solutions . This guide will walk you through everything you need to know, from deciphering product labels to mixing your own effective DIY solutions. We’ll show you how to keep your toilets sparkling without risking your plumbing, giving you peace of mind. And for those who'd rather leave it to the pros, Shiny Go Clean offers expert house cleaning in Madison, WI using products that protect your home's most vital systems. Understanding Safe vs. Harmful Cleaner Ingredients To pick a toilet bowl cleaner that won’t wreck your septic tank, it helps to think like your system does. Picture your tank as a tiny, bustling city of good bacteria, working around the clock to break down waste. The right ingredients help this city thrive, but the wrong ones can cause a total blackout. Simply put, septic-safe ingredients are the ones that biodegrade easily and don’t mess with this delicate bacterial world. On the other hand, harmful ingredients are harsh, antimicrobial chemicals designed to kill everything they touch- including the good bacteria your system needs to function. For homeowners in Verona, knowing this difference is key to avoiding a septic nightmare down the road. What you pour down the toilet has a direct line to the health of your septic system’s hardworking microorganisms. It’s a straightforward connection: harsh chemicals go in, and the essential bacteria that break down waste get wiped out. The Good Guys: Plant-Based and Mineral-Based Cleaners Septic-safe cleaners draw their power from ingredients that are tough on stains but gentle on your pipes and tank. These ingredients work with nature, not against it, breaking down into harmless bits and pieces once their job is done. Look for products that lean on ingredients like these: Plant-based surfactants: These create the suds and lifting action you need, but they come from sources like coconut or corn and biodegrade with ease. Citric acid: Pulled from citrus fruits, this is a fantastic natural acid for dissolving mineral deposits and hard water stains without being overly aggressive. Enzymes: These are biological proteins that zero in on specific types of waste (like proteins and starches), helping to break them down just like the bacteria in your tank do. Baking soda (Sodium bicarbonate): A mild alkali and gentle abrasive that helps scrub away grime and zap odors. These are the ingredients that clean your toilet effectively without declaring war on your septic tank’s bacterial workforce. The Bad Guys: Chemicals to Avoid at All Costs On the other side are the ingredients that can bring your septic system to a screeching halt. These are potent, broad-spectrum chemicals that completely disrupt the natural decomposition process. In fact, just two gallons of chlorine bleach can kill all the functioning bacteria in a standard 1,000-gallon septic tank. The most common culprits in conventional toilet bowl cleaners are chlorine bleach, ammonia, and antibacterial agents. While they’re great at sterilizing surfaces, that’s the very reason they pose a direct threat to the living ecosystem inside a septic tank. To help you spot the difference on product labels, here's a quick reference guide comparing common ingredients and their impact. Septic-Safe vs Septic-Harmful Cleaner Ingredients Ingredient Effect on Septic System Recommendation Chlorine Bleach Kills beneficial bacteria, disrupting the waste breakdown cycle. Avoid Completely Ammonia Toxic to the bacterial environment and can contaminate groundwater. Avoid Completely Antibacterial Agents Designed to kill bacteria, which is the exact opposite of what your septic tank needs. Avoid Completely Plant-Based Surfactants Biodegrade quickly and do not harm the system's bacteria. Embrace Citric Acid Breaks down mineral stains without disrupting the tank's ecosystem. Embrace Enzymes & Bacteria Actively help break down waste, supporting the septic system's natural process. Embrace By understanding these key differences, you can confidently choose a toilet bowl cleaner that keeps your bathroom sparkling and your septic system running just the way it should. How to Choose the Right Septic-Safe Cleaner Knowing which ingredients to steer clear of is a great start, but standing in the cleaning aisle can still feel a bit overwhelming. How do you actually spot the right product for your home in Madison? The good news is that manufacturers are making it easier than ever to pick a toilet bowl cleaner safe for septic tanks . Your best strategy is to become a quick and effective label reader. A few key phrases and symbols can instantly tell you if a product is a friend or foe to your home’s plumbing. Look for Clear Indicators When you're scanning the shelves, keep an eye out for labels that explicitly say the product is " septic-safe ." This is the most direct confirmation you can get. It also helps to look for cleaners that are biodegradable and phosphate-free , as these terms signal that the ingredients will break down naturally and won't harm the good bacteria. Another powerful symbol to watch for is the EPA's "Safer Choice" logo . This certification means the U.S. Environmental Protection Agency has reviewed every single ingredient in the product. It confirms the cleaner meets their strict criteria for both performance and safety for human health and the environment. Think of it as a gold standard for septic-friendly products. Trusted Brands and Formulations You don’t have to stick to niche, hard-to-find brands to protect your septic system. Many mainstream companies have reformulated their products to be safer and more effective. For example, some formulations of Lysol Toilet Bowl Cleaner have been a reliable choice since they were updated in the early 2000s. Their labels now confirm they’re safe for all plumbing types, thanks to biodegradable ingredients. In a 2023 evaluation of over 20 top toilet bowl cleaners, septic-safe models like those from Lysol scored high for effectiveness, removing 95% of stains and killing 99.9% of germs without harming delicate systems. This performance stands in contrast to many bleach-based rivals that underperformed in septic compatibility tests. You can learn more about these septic-safe cleaner findings . Besides reformulated classics, there are plenty of excellent plant-based options available that deliver a powerful clean. Brands that use citric acid, enzymes, and plant-derived surfactants are fantastic choices. These cleaners prove that "septic-safe" doesn't mean sacrificing a brilliant shine. For a deeper look into the power of natural ingredients, check out our guide to plant-based bathroom cleaners . By knowing what to look for on the label, you can easily choose a product that keeps your toilet sparkling and your septic system healthy. Effective DIY Septic-Safe Toilet Cleaner Recipes For Madison homeowners who love a good DIY project or just need a quick cleaning fix from the pantry, you don't have to buy a special product. It’s surprisingly easy to whip up a powerful and completely septic-safe toilet bowl cleaner using a few common household items. These recipes get the job done, are easy on the wallet, and give you total control over what goes down your drains. The real magic here is just simple science. Ingredients like baking soda act as a gentle, deodorizing abrasive, while the mild acidity in white vinegar works wonders on mineral deposits and hard water stains- a common headache in many Wisconsin homes, especially after dealing with our hard water. Simple Scouring and Deodorizing Cleaner This is the go-to recipe for routine cleaning. It uses two powerhouse ingredients to keep your toilet bowl fresh without disrupting the delicate ecosystem in your septic tank. Step 1: Pour about one cup of white vinegar into the toilet bowl. Swish it around with your toilet brush to make sure you coat all the sides. Step 2: Sprinkle about half a cup of baking soda right into the bowl. You’ll see a satisfying fizzing reaction as the two get to work. Step 3: Let the mixture sit for 10-15 minutes . This gives it enough time to break down grime and knock out odors. Step 4: Give the bowl a thorough scrub with your brush, then flush. If you're dealing with more stubborn spots, you might want to check out our guide on how to remove tough toilet ring stains , which has extra tips that are also septic-safe. Heavy-Duty Stain Removing Paste For more challenging stains or mineral buildup, a thicker paste gives you more scrubbing power. This recipe takes a tiny bit more effort but delivers excellent results for a deep clean. Combine a half-cup of baking soda with just enough liquid castile soap to form a thick, scrubbable paste. Apply it directly to the stained areas of the bowl, let it sit for 15-20 minutes, then scrub away with a toilet brush before flushing. The baking soda provides the grit, while the castile soap helps lift and wash away the grime. Best Practices for Total Septic System Maintenance Picking the right toilet bowl cleaner is a huge step in the right direction, but keeping a septic system healthy involves more than just smart cleaning choices. Think of it like a car- you can use the best oil, but you still have to check the tires and get a regular tune-up. Taking care of the whole system helps you dodge costly emergencies and keeps your home running without a hitch. This is especially true for homeowners all over the Metro metro area, from busy family neighborhoods in Verona to the new builds in Waunakee. A little bit of preventative maintenance goes a long way in protecting your investment. A Simple Septic Health Checklist You don’t have to do a ton of work to keep your system happy- just a few smart habits will do the trick. Weaving these practices into your daily routine can seriously reduce the strain on your tank and add years to its life. Here are a few key tips every homeowner with a septic system should live by: Watch What Goes Down the Drain: Your toilet is not a trash can. The only things that should ever get flushed are human waste and toilet paper. Steer clear of flushing items like so-called "flushable" wipes, paper towels, dental floss, and feminine hygiene products. They just don't break down and can cause some nasty clogs. Keep Grease Out of the Kitchen Sink: Cooking grease, fats, and oils are public enemy number one for a septic system. When they go down the drain, they cool off and turn solid, creating blockages in your pipes and drain field. The better move is to pour used grease into a disposable container and toss it in the trash once it hardens. Conserve Water: The less water you send down to your septic tank, the better it can do its job. Pushing too much water through the system doesn't give it enough time to properly treat waste. Simple fixes like repairing leaky faucets, putting in high-efficiency toilets, and spreading out your laundry loads can make a massive difference. The Importance of Professional Care Even if you follow all the rules, your septic system still needs a professional's touch now and then. Just like you'd call a mechanic for your car, you need to lean on septic pros for inspections and maintenance. Most experts recommend having your septic tank professionally inspected every one to three years . During an inspection, a pro will check for leaks, look at the sludge and scum layers, and make sure all the mechanical parts are in good working order. On top of that, your tank will need to be pumped every three to five years , though the exact timing depends on how big your household is and how much water you use. Pumping gets rid of all the built-up sludge and scum, stopping it from clogging your drain field- a problem that can lead to an expensive and messy system failure. This proactive approach is hands-down the best way to make sure your septic system remains a reliable, unseen hero for your home. Let Madison Professionals Keep Your Home Sparkling For busy Madison families, juggling work, school, and life’s other demands is a full-time job. Keeping up with the cleaning is tough enough, let alone adding “research every toilet bowl cleaner for septic safety” to the to-do list. It’s no surprise that scrubbing toilets often falls to the bottom of the list when weekends are your only chance to unwind. That’s where bringing in a professional can make all the difference. It’s not just about getting a clean home; it’s about reclaiming your time and getting the peace of mind that the job is done right- without accidentally harming your home’s septic system. Your Trusted Partner for Septic-Safe Cleaning Choosing a cleaning service that gets the specifics of a septic system is key. The wrong team might grab a bottle of something harsh off the shelf, not realizing it could disrupt your tank’s delicate ecosystem and lead to bigger problems down the line. You need a partner who understands and respects your home’s infrastructure. At Shiny Go Clean, our teams are trained to use septic-safe products and methods that protect your home. We serve homeowners across the Madison metro, from Verona to Waunakee, with reliable service you can count on. Whether it’s a one-time deep clean, a detailed move-out cleaning, or a recurring maid service, we adapt to what your home needs. We're happy to work with products you provide or use our own trusted, septic-friendly solutions. We believe in making your life easier with transparent, flat-rate pricing and a satisfaction guarantee. You won’t find any surprise fees or awkward upsells here- just a consistently clean home. It’s time to take back your weekends and enjoy a spotless home without the worry. We handle the details so you can focus on what really matters. If you're ready to learn more, our guide on how to keep your house sparkling with local cleaning is a great place to start. Give us a call today at (515) 446-9726 or book your service online in just a few minutes. Got a Septic System? Quick Answers to Your Cleaning Questions Even with the best intentions, it's easy to second-guess what’s safe to use when you have a septic tank. To finish up, here are some straightforward answers to the questions we hear most often from homeowners in Madison. Are "Flushable" Wipes Really Okay for a Septic Tank? Simply put, no. Most wipes labeled “flushable” just don't break down the way toilet paper does. They can clump together and create serious clogs in your pipes and tank, leading to backups that are messy and expensive to fix. It's always a safer bet to toss all wipes in the trash, no matter what the package says. How Often Can I Clean My Toilets with a Septic System? Using a septic-safe toilet bowl cleaner once or twice a week is completely fine and won't throw your system out of balance. The key is moderation and choosing the right product. A gentle, regular cleaning schedule actually prevents the kind of heavy buildup that makes people reach for harsh chemicals in the first place. What About Bleach Alternatives or "Color-Safe" Bleach? Yes, oxygen-based bleaches are a much better choice for septic systems than standard chlorine bleach. Products that use ingredients like hydrogen peroxide break down into simple water and oxygen, so they don't harm the good bacteria your tank relies on. Just like with any cleaner, follow the directions and don't overdo it. Worried you’ll have to micromanage your cleaning service to protect your septic tank? You shouldn't have to. At Shiny Go Clean, we’re happy to use specific septic-safe products you provide, or we can bring our own approved cleaners to get the job done right. Will Hiring a Cleaning Service Harm My Septic System? Not if you hire a team that gets it. A professional service like Shiny Go Clean understands the delicate balance required for homes with septic systems all over the Madison metro. Just give us a heads-up that you have a septic tank when you book your service. We make sure our cleaning methods protect your system, leaving you with a home that shines and zero worries. Give us a call at 608-292-6848 to talk about your home's needs. Ready to get your time back and enjoy a sparkling home without wondering if you're harming your septic tank? The professional team at Shiny Go Clean is here to help. Book your Madison house cleaning service online in just a few minutes.
- How to Clean Between Glass on Oven: A Madison Guide
Cleaning your oven is one thing, but figuring out how to clean between the glass on the oven door feels like a whole different challenge. That hazy, greasy film trapped between the panes is stubborn, but completely fixable with either a bit of DIY effort or a quick call to a professional. The key is understanding that you can safely access that space for a crystal-clear finish. Finally Tackle That Hazy Film Between Your Oven Glass It’s a frustrating sight for any Madison homeowner: that stubborn, cloudy film trapped between the glass panes of your oven door. It makes your whole kitchen look a little less clean, no matter how much you scrub elsewhere. This happens from a mix of grease splatters and condensation that get sealed in over time, especially after a long Wisconsin winter of hearty meals. But here’s the good news—a sparkling oven door is completely achievable, giving your kitchen that polished look you want. In this guide, we'll walk you through two reliable paths to a crystal-clear view: The DIY Approach: This path requires a bit of patience and the right tools but can be very rewarding. The Professional Route: This option guarantees a perfect, streak-free result without any of the hassle or guesswork. The challenge of this specific task is so common that it has driven significant growth in the global oven cleaners market, valued at approximately USD 2.5 billion in 2024 . Many homeowners turn to aerosol sprays and gels designed to penetrate tight spaces, which can reduce cleaning effort by up to 40% compared to manual scrubbing alone. Deciding Your Cleaning Path Before you start, it helps to know what you’re getting into. To begin your journey towards a sparkling oven, you might want to look at a comprehensive guide to proper oven cleaning for some foundational knowledge. Deciding between doing it yourself and calling for help often comes down to time, confidence, and how complicated your oven model is. For many in Madison, the decision is clear. If you’re short on time or nervous about taking your appliance apart, a professional oven cleaning Madison service is the fastest way to get it done right. At Shiny Go Clean, we have the experience to handle any oven door, ensuring a perfect clean without any risk to your appliance. You can reach us at 608-292-6848 to get it sorted. DIY vs Professional Oven Glass Cleaning At a Glance Sometimes a quick comparison is all you need to decide whether to tackle this job yourself or call in the experts from Shiny Go Clean in Madison. Factor DIY Method Professional Service (Shiny Go Clean) Time Investment 2-3 hours on average, depending on oven model and grease buildup. Typically under 1 hour . Cost Low initial cost for supplies (cleaner, cloths, maybe a tool). Higher upfront cost but includes all labor, tools, and expertise. Risk Factor Moderate risk of scratching glass, breaking clips, or reassembly issues. Zero risk. Our technicians are trained and insured for any appliance. Results Can be very good, but streaks or missed spots are common without experience. Guaranteed streak-free, crystal-clear finish. Convenience Requires you to find the time, gather supplies, and follow instructions carefully. Just a quick phone call. We handle everything from start to finish. While the DIY route can save a bit of money, calling a professional saves you the time, hassle, and potential frustration of dealing with a tricky appliance. It really comes down to what you value more—your time or your budget. Figuring Out Your Oven Door Type Before You Start Before you even think about grabbing a screwdriver, the first step is to play detective with your oven door. Not all doors are made the same, and trying to force one open the wrong way is a fast track to frustration—or worse, a broken appliance. Nobody needs that headache. Knowing whether your door was actually designed for easy disassembly is the most important thing you can figure out right now. It saves a ton of time, keeps you from snapping a hidden plastic clip, and makes sure this whole project starts off on the right foot. Most oven doors you'll run into in Madison homes fit into one of a few common designs. Doors with Visible Screws This is the most straightforward setup, and you’ll often find it on slightly older models. Take a good look around the inside edge of your oven door. You're looking for screws holding the inner and outer panels together. Where to look: Scan along the top, bottom, and side edges of the door’s interior frame. What it means: If you spot them, you're in luck. This design is almost always meant to be taken apart for cleaning. You’ll just need the right screwdriver to get going. Seeing those screws is a great sign. It means the manufacturer expected homeowners to want to get in there and clean. Doors with Hidden Latches or Clips Many newer ovens have a much sleeker, more modern look, especially the kind you see in the new builds popping up around Madison, WI. To keep things clean, they often hide the fasteners. Instead of screws, you might find hidden latches or clips. This design is a little trickier. You might find small release buttons, tiny slots meant for a flathead screwdriver, or a bottom drawer that has to be removed to get to the release mechanism. They're designed to be out of sight. A Neighborly Tip: If you can't find screws or any obvious latches, don't just start prying at things. The last thing you want is the sound of a plastic clip snapping, leaving you with a door that won't close right. Finding Your Oven Manual Online What if you misplaced the original manual? It happens to the best of us. Your secret weapon here is the oven's model number, which is almost always on a sticker somewhere inside the door frame or on the back of the unit. Just type "[Your Oven Brand] [Model Number] manual" into a search engine, and you'll almost certainly find a PDF version. That guide is gold—it will show you exactly how your specific door is put together and the proper steps for taking it apart. If the manual looks like an engineering schematic or makes it clear the door is a sealed unit, it might be a good time to pause. Some modern ovens simply aren't designed for a DIY cleaning. If that's the case, or if you'd just rather not risk it, that’s where a professional oven cleaning Madison service comes in handy. Our team at Shiny Go Clean knows these models inside and out. Just give us a call at 608-292-6848 , and we’ll handle it for you—no manual needed. A Practical Guide to Accessing the Inner Glass Safely Alright, now for the hands-on part. Getting to that inner glass is the most technical step of this whole process, but don't let that scare you. With a little preparation and a steady hand, you'll have that door apart in no time. The key is to work smart, not hard, and to always put safety first. First things first, get your workspace ready. Lay a thick, soft towel or an old blanket on the floor right in front of your oven. This gives you a safe, padded spot to place the oven door once it’s off, preventing any scratches to your floor or the door itself. Essential First Steps Before you even think about touching a screw, unplug your oven from the wall or switch it off at the circuit breaker. This is a non-negotiable safety step. You’ll also want to be absolutely sure the oven is completely cool. Next, gather a few basic items. You’ll likely need: A Phillips head screwdriver . A flathead screwdriver (sometimes needed for prying clips). A small bowl or magnetic tray to keep screws and tiny parts from rolling away and getting lost forever. Having the right equipment on hand is half the battle. If you're looking to build up your home maintenance kit, our guide on the best tools for a deep cleaning home has some great suggestions. Removing the Oven Door Most modern oven doors are actually designed to come off for easier cleaning. Open the door all the way and look for the small hinges where it connects to the oven frame. You should see a little locking tab or lever on each hinge. Flip these levers up and into their locked position. Once the locks are engaged, slowly start to close the door. You’ll feel it catch and stop at a certain point—this is the removal position. Now, just gently lift the door up and away from the oven frame. It might be heavier than you expect, so use both hands and get a solid grip. Our Pro Tip: Take photos with your phone at every single step of this process. It sounds simple, but having a visual guide of where each screw and clip belongs will make reassembly a thousand times easier. It’s a trick that has saved us from major headaches countless times. Opening Up the Door Panels With the door safely resting on your towel-covered floor, you can start taking it apart. This is where your earlier detective work comes in handy. The flowchart below shows the two main types of door constructions you're likely to run into. This visual guide helps you quickly figure out whether you should be looking for obvious screws or searching for more subtle hidden latches. For Doors with Visible Screws: Carefully unscrew them and place them in your parts bowl. The inner panel should then lift off. Be gentle, as there might be a thin gasket or seal around the edge you don't want to damage. For Doors with Hidden Latches: Look for small slots or clips along the bottom or side edges. You may need to use a flathead screwdriver to gently pop them open. Never use force. If something isn't moving, take a step back. Double-check your owner’s manual or re-examine the door for a missed latch. Once the panels are separated, you’ll finally have clear access to both sides of the inner glass. Now, the real cleaning can begin. Choosing the Best Cleaning Solutions for Baked-On Grime Once you’ve safely accessed the inner glass, the real work begins. That stubborn, brownish haze of baked-on grime needs the right kind of cleaning solution to break it down without causing any damage. You have a couple of great options here—a gentle but effective DIY paste or a targeted commercial cleaner for tougher jobs. Most of the time, a simple homemade solution is all you need. It’s gentle on the glass, you probably already have the ingredients, and it avoids the harsh fumes that can fill your kitchen. Our Go-To DIY Cleaning Paste This is our favorite method for tackling moderate grease and food residue. It’s a classic for a reason—it just works. Mix a thick paste: Combine about a half-cup of baking soda with just enough water to form a thick paste. You want a consistency similar to toothpaste so it clings to the glass instead of dripping right off. Apply it generously: Spread the paste all over the greasy areas of the glass. Don’t be shy here; a thick, even layer is your best bet for breaking down the grime. Let it sit: Give the paste at least 20-30 minutes to work its magic. This dwell time lets the baking soda do the heavy lifting, which means a lot less scrubbing for you. After it has sat, grab a spray bottle filled with a bit of white vinegar and lightly spray the paste. It will start to fizz and foam, which helps lift the loosened grime off the surface. From there, use a non-abrasive sponge or a soft cloth to gently scrub the glass clean. A plastic scraper can also be your best friend for any really stubborn spots, as it won't scratch the glass. We often recommend these simple but effective methods in our guide to natural cleaning products that actually work because they’re safe and surprisingly powerful. When to Use a Commercial Cleaner Sometimes, especially if it’s been a while since the last deep clean, you might be facing years of baked-on grease that a DIY solution just won't cut through. In those cases, a store-bought oven cleaner can be the right tool for the job. The oven cleaner market is quite diverse, with gels holding a 45% market share because they are ideal for clinging to surfaces like glass. Interestingly, the popularity of DIY methods has also grown, with vinegar-steam techniques known to loosen up to 85% of debris in double-pane ovens. Read more about these oven cleaning market trends . If you opt for a commercial cleaner, follow these tips for safe and effective use: Read the Instructions: Always follow the manufacturer’s directions precisely regarding application and wait times. This isn't the time to guess. Ventilate Your Space: Open up some windows or turn on your kitchen’s exhaust fan before you start. These products can have pretty strong fumes. Wipe Thoroughly: After scrubbing, make sure you wipe away all of the cleaning residue with a clean, damp cloth. You don't want any chemical residue left behind when you heat your oven next. Whether you go the DIY route or use a commercial product, the goal is a sparkling, streak-free finish. And if this part of the process feels like too much of a hassle, remember that our team at Shiny Go Clean is always ready to step in. We handle oven cleaning Madison jobs every day—just call us at 608-292-6848 for a spotless result without the effort. Reassembling Your Oven Door Without a Headache Getting that glass sparkling clean feels great, but the job isn't finished until the door is back together correctly. This is where a bit of patience—and those photos you took earlier—really pays off. Putting your oven door back together is pretty much the reverse of taking it apart, but I have a few tips to help it go smoothly. First things first: make sure every piece of glass is completely dry . Any lingering moisture can turn into ugly streaks or condensation once you heat up the oven. Grab a dry, lint-free cloth and give every surface one last wipe-down before you start. Aligning and Securing the Glass Carefully slide the inner glass pane back into its frame, checking your photos to make sure it’s oriented the right way. Some glass panes actually have special coatings and need to be installed facing the correct direction. Next, pay close attention to any rubber or silicone seals you removed. These gaskets are crucial for keeping your oven’s temperature steady and efficient. Check Their Condition: Look them over to make sure the seals aren't cracked, brittle, or damaged. Seat Them Properly: Gently press them back into their grooves so they sit flush and create a tight seal. A loose seal means lost heat. If a seal seems worn out, it might be a good idea to order a replacement from the manufacturer. It's a small part that makes a huge difference in your oven's performance. Once the glass and seals are in place, reattach the inner door panel. Replace all those screws you carefully saved, tightening them until they are snug. Don't go overboard here—over-tightening can crack the glass or strip the screw threads. Our Neighborly Advice: Tighten the screws in a star or crisscross pattern, just like you would when changing a tire. This distributes the pressure evenly and helps prevent the glass from shifting or cracking under stress. The Final Test With the door reassembled, it's time to put it back on the oven. Line up the hinges with the slots on the oven frame and slide it back into place. Once it's seated, open the door fully and flip the hinge locks back down to their original, unlocked position. Gently open and close the door a few times. You want to make sure it moves smoothly and seals tightly against the oven frame. If everything feels secure, you can plug the oven back in. This last check ensures all your hard work results in a fully functional—and beautifully clean—oven. If you hit a snag or just don't have the time for this project, remember that a professional oven cleaning Madison service is always an option. Our team at Shiny Go Clean can handle the entire process for you. Just call us at 608-292-6848 - we're happy to help. When to Call for Oven Cleaning in Madison Sometimes, what looks like a simple DIY job can quickly eat up your entire afternoon. You’ve had a look at your oven door, maybe you've even tried taking it apart, but something just isn’t clicking. That's completely fine—knowing when to hit pause and call in a pro is often the smartest move you can make. After a long Wisconsin winter, the last thing you want is to spend a beautiful day wrestling with a stubborn appliance. If you feel like you’re in over your head, it might be time to let a professional service take over. Signs It's Time for a Professional Certain situations make calling an expert the safer, better choice. It saves you time, prevents accidental damage, and guarantees a result you’ll be happy with. Think about calling us if you hit any of these roadblocks: Complex Oven Designs: A lot of newer ovens, especially those in the new builds around Waunakee and Verona, have complicated door designs that aren’t meant for easy disassembly. If you can’t find clear instructions or feel like you have to force a part, it’s best to stop. Brittle or Damaged Seals: When you open the door, do the rubber seals look cracked or feel stiff? An old, brittle seal can tear easily during cleaning, which will mess with your oven's efficiency. Our technicians know how to assess and clean around them safely. Years of Baked-On Grease: If the grime between the glass is thick, black, and stubborn, a DIY paste probably won’t be enough. We use professional-grade solutions that dissolve years of buildup without harming the glass. We handle this exact task every day in homes across Madison and surrounding areas. A professional service like Shiny Go Clean not only saves you the headache but ensures a perfect, streak-free finish without any risk. This is especially true as oven technology gets more advanced. Self-cleaning features, like heat cleaning ovens, are designed to tackle the very issue of hard-to-reach grime. These ovens use intense pyrolytic cycles that can reach 900°F to turn residue into ash, eliminating 99% of baked-on grease without chemicals. This can reduce the need for manual cleaning by 80% per cycle. We Are Your Helpful Neighbor with the Right Tools Think of us as the neighbor you can call when a project gets a bit too tricky. While this guide offers a solid walkthrough for cleaning your oven glass, some problems need more than just a good scrub. If you run into issues beyond cleaning or reassembly, remember that professional stove and oven repair services are available to handle mechanical problems. For a spotless clean without all the hassle, our Madison oven cleaning team is ready to step in. Just give us a call at 608-292-6848 , and we'll get that oven door looking brand new in no time. Common Questions About Cleaning Oven Door Glass Even when you know the steps, it’s normal to have a few questions before you start taking an appliance apart. We hear these all the time from our neighbors in the Madison area who are trying to get that pesky oven glass clean. Here are some straightforward answers to help you out. Can I Use a Razor Blade on the Glass? We strongly advise against using a metal razor blade to scrape off baked-on grease. It’s a risky move that can easily leave permanent scratches on the glass surface. You just don't want to take that chance. Instead, a much safer and still very effective option is a simple plastic scraper or a non-abrasive scouring pad. When you pair these with a good cleaning solution, you’ll get all the leverage you need to lift tough grime without damaging anything. It’s all about working smarter, not harder. What if My Oven Door Has No Screws? This is a common puzzle, especially in the newer homes you see in Madison and surrounding areas. Many modern ovens are designed with a sleek, seamless look, which just means the fasteners are cleverly hidden. If you don't see any visible screws, your door most likely uses a system of hidden latches or clips. You’ll usually find release mechanisms along the bottom or sides of the door frame. Before you try prying anything open, your best bet is to find your oven’s manual online using its model number. That guide will show you exactly how your specific door is meant to be opened safely. A friendly tip from your neighbors at Shiny Go Clean: If it feels like you have to force a part, it's best to stop. A broken clip can be a much bigger problem than a dirty piece of glass. How Often Should I Clean Between the Glass? For most households here in the Madison area, a deep clean between the oven door glass is something you only need to tackle about once a year . You might do it more often if you notice a significant, hazy buildup starting to form that just won't wipe away. A great way to prevent this from becoming a major project is to stay on top of regular maintenance. Wiping down the exterior and interior glass after spills—once the oven is completely cool, of course—can make a huge difference. This simple habit stops grease from getting baked on in the first place, keeping your view clearer for longer. The same principles apply to other glass surfaces, and you can find more tips in our guide on how to clean windows without streaks . Is It Safe to Use Harsh Chemical Cleaners? While powerful commercial oven cleaners can be very effective, they should be used with caution, especially in the tight space between glass panes. These harsh chemicals can sometimes damage the delicate rubber seals or special coatings on the glass if they aren't used carefully. We always recommend starting with a gentler, DIY solution like a baking soda paste. It’s surprisingly effective and much safer for your appliance. If you do decide a stronger commercial cleaner is necessary, make sure your kitchen is well-ventilated by opening a window and always follow the product's instructions to the letter. Feeling like this project is more than you want to handle? The team at Shiny Go Clean has the tools and expertise to get your oven glass sparkling clean without any of the hassle. Give us a call at 608-292-6848 or visit us online to book your Madison oven cleaning service today.
- The Ultimate Cleaning Checklist for Moving Out of an Apartment in Madison
Moving out of your apartment in Madison can feel overwhelming. Juggling packing, logistics, and a final deep clean is a lot to handle-especially when your security deposit hangs in the balance. Landlords have a sharp eye for detail, and a simple oversight can cost you. From lingering grease on the range hood to hard water spots common in Madison homes, every detail matters. Missing scuff marks on a wall or forgetting to wipe down inside kitchen cabinets are common mistakes that can lead to frustrating deductions. This guide provides a comprehensive, room-by-room cleaning checklist for moving out of an apartment , designed to help you leave your space looking better than when you found it. We'll walk through every essential task, offer practical tips, and show you how to tackle the job efficiently. Our goal is to ensure a smooth transition and help you secure that full deposit refund, taking the guesswork out of the process. Whether you're moving out of a modern loft in the Waunakee or a family-friendly complex in Verona, this is your blueprint for a successful move-out clean. We’ll cover everything from degreasing the kitchen to sanitizing the bathroom, giving you a clear, actionable plan. If the task seems too daunting, remember that professional help, like the move out cleaning Madison services from Shiny Go Clean, can handle the dirty work for you, guaranteeing a landlord-approved result. Let’s get started on your stress-free move-out plan. 1. Kitchen Deep Clean & Degreasing The kitchen is often the most scrutinized room during a move-out inspection. Months or even years of cooking can leave behind a stubborn layer of grease and grime that regular cleaning might miss. A thorough kitchen deep clean and degreasing involves more than just wiping down surfaces; it’s a comprehensive, top-to-bottom restoration that tackles every appliance, cabinet, and corner to ensure the space is pristine for the next tenant. This step is a non-negotiable part of any serious cleaning checklist for moving out of an apartment . For landlords and property managers, particularly in areas like Madison, the kitchen's condition is a direct reflection of how the apartment was maintained. A sparkling clean kitchen sets a positive tone for the entire final walkthrough, significantly boosting your chances of a full security deposit return. Actionable Tips for a Flawless Kitchen Clean To tackle this critical task effectively, follow a strategic order of operations. This approach saves time and prevents you from re-cleaning areas. Start with Appliances: Begin with the oven and refrigerator. Apply a heavy-duty oven cleaner or degreaser and let it sit while you work on other tasks. Empty, defrost (if needed), and clean the refrigerator and freezer with a food-safe cleaner. Tackle Cabinetry: Empty all cabinets and drawers. Wipe them down inside and out. Pay special attention to the areas around knobs and handles where grease and fingerprints accumulate. For stubborn, sticky residue, you can learn more about specialized techniques for how to remove grease from cabinets in this Madison homeowner's guide . Scrub the Stovetop: For tough, cooked-on grime, apply a quality degreaser and let it penetrate for 15-20 minutes before scrubbing with a non-abrasive pad. Remove and soak burner grates and knobs. Wipe Down Surfaces: Clean and disinfect all countertops, the backsplash, and the sink. Don't forget to clean and polish the faucet and sink fixtures. Document Your Work: Once the kitchen is spotless, take clear, well-lit photos from multiple angles. This documentation serves as proof of the apartment's condition should any disputes arise with your landlord. 2. Bathroom Sanitization & Tile Restoration Alongside the kitchen, the bathroom is a high-stakes area during move-out inspections. Over time, bathrooms accumulate soap scum, hard water deposits, and potential mold or mildew in grout lines, which are immediate red flags for landlords. A complete bathroom sanitization and tile restoration goes beyond a simple wipe-down; it's a deep-cleaning process designed to eliminate germs, restore shine, and address the specific buildup common in high-moisture environments. This is a crucial component of any comprehensive cleaning checklist for moving out of an apartment . For property managers in Madison, the bathroom's state of hygiene is non-negotiable. Lingering hard water stains from local tap water or discolored grout can lead to significant security deposit deductions. Presenting a sanitized, sparkling bathroom demonstrates care and respect for the property, greatly improving your final walkthrough outcome. Actionable Tips for a Spotless Bathroom A methodical approach is key to ensuring no surface is missed. Follow these steps to restore your bathroom to move-in condition. Tackle Grout and Tile First: Start with the toughest job. Create a paste of hydrogen peroxide and baking soda to scrub mold and mildew from grout lines. For larger or more stubborn areas, it's important to understand the common mistakes in bathroom grout cleaning and how to avoid them . Dissolve Hard Water Stains: Combat the mineral buildup common in Madison water by using a white vinegar solution. Spray it on shower doors, faucets, and showerheads, let it sit for 20-30 minutes, and then scrub and rinse thoroughly. Sanitize the Toilet, Tub, and Sink: Clean and disinfect the toilet bowl, base, and tank. Use a non-abrasive cleaner for the tub and sink to avoid scratching the finish. A pumice stone can be gently used to remove stubborn rings inside the toilet bowl. Don't Forget the Details: Clean the exhaust fan cover to remove dust and prevent mold spores from circulating. Wipe down mirrors, medicine cabinets (inside and out), light fixtures, and baseboards. Document the Final Result: Just as with the kitchen, take detailed photos of the clean bathroom. Capture the shiny fixtures, clean grout, and spotless surfaces as proof of your thorough cleaning effort. 3. Floor Restoration (Vacuuming, Mopping & Baseboards) Floors are one of the largest surfaces in any apartment, and their condition is a dead giveaway of the overall level of care a tenant has provided. From tracked-in Wisconsin winter slush to everyday spills and pet hair, floors bear the brunt of daily life. A comprehensive floor restoration-not just a quick sweep-is essential for passing the final walkthrough and is a cornerstone of any effective cleaning checklist for moving out of an apartment . For property managers in Madison, floors are a major inspection point. Scuffs, stains, and dusty baseboards can quickly lead to deductions from your security deposit. A truly clean floor looks and feels restored, creating a positive first impression for the landlord and the next resident. Actionable Tips for Spotless Floors and Baseboards A systematic approach ensures no spot is missed, from the corners to the high-traffic zones. This process will leave both carpet and hard surfaces looking their best. Vacuum Thoroughly and Strategically: Start by vacuuming all flooring, even hard surfaces, to remove loose dirt and debris. On carpets, use slow, overlapping passes in multiple directions to lift embedded dirt and pet hair. Don't forget to use attachments to reach along baseboards and under any remaining fixtures. Wipe Down Baseboards: After vacuuming, wipe down all baseboards with a damp microfiber cloth. Work from top to bottom to catch any lingering dust that could fall onto your clean floors. This small detail makes a huge difference in the overall appearance of the room. Mop Hard Surfaces Correctly: Use a pH-neutral cleaner on hard floors to prevent damage and avoid leaving behind a sticky film. For a streak-free finish, it's crucial to understand why floors get sticky after mopping and how to fix it . Allow floors to dry completely before the inspection. For homeowners looking for deeper insights into floor care, these essential hardwood floor cleaning tips can help maintain their beauty long-term. Address Stains Immediately: Treat any visible carpet stains or floor scuffs with an appropriate spot cleaner before you begin the general mopping or deep cleaning. Photograph the Final Result: Once the floors are pristine and dry, take detailed photos. This is your proof that you left the floors in excellent condition, protecting you against potential security deposit disputes. 4. Bedroom & Closet Deep Clean While kitchens and bathrooms often get the most attention, the bedroom is a sanctuary that landlords expect to be completely refreshed for new tenants. A deep clean of bedrooms and closets goes beyond a quick dusting, addressing accumulated allergens, scuff marks, and hidden dirt. This process ensures the private spaces of the apartment are immaculate, a crucial step in any comprehensive cleaning checklist for moving out of an apartment . For property managers in the Madison metro, particularly in busy family neighborhoods in Verona and Waunakee, the cleanliness of bedrooms is a high priority. Potential tenants, especially those with young children or allergies, will scrutinize these spaces. Presenting a pristine, allergen-free bedroom significantly improves the final inspection outcome and supports a full security deposit refund. Actionable Tips for an Immaculate Bedroom Clean A systematic approach is key to cleaning bedrooms efficiently. Working from top to bottom ensures you capture all dust and debris without having to re-clean any surfaces. Start High, Finish Low: Begin by dusting ceiling fans, light fixtures, and the tops of window and door frames. Use a microfiber cloth to trap dust instead of just moving it around. This allows any falling debris to be vacuumed up at the end. Wipe Down Walls and Surfaces: Gently wipe down walls and baseboards to remove scuffs and fingerprints. Pay close attention to high-touch areas like light switches and doorknobs, disinfecting them thoroughly. Focus on Closets: Empty the closet completely. Wipe down all shelving, rods, and walls. Inspect shelves for old liners-remove and clean any adhesive residue left behind. A clean, empty closet makes the space feel larger and well-maintained. Clean the Floors Last: After all other surfaces are clean, thoroughly vacuum the entire floor. Use attachments to get into corners, along baseboards, and especially under where the bed was, as this area collects significant dust. For hard floors, finish with a proper mopping. Document the Final State: Once the room is sparkling, take several clear, well-lit photos. Capture the clean floors, empty closets, and smudge-free walls as evidence of your thorough work for the final walkthrough. 5. Window, Mirror & Glass Cleaning Streaky windows and smudged mirrors can make an otherwise clean apartment look dirty and poorly maintained. These surfaces catch the light and are often the first thing a landlord or property manager notices during a final walkthrough. A professional, streak-free cleaning of all windows, mirrors, and glass surfaces is a crucial step in any cleaning checklist for moving out of an apartment because it dramatically improves the overall brightness and perceived cleanliness of the space. For properties throughout the Madison metro, from downtown apartments in the East Village to family homes in surrounding areas, clean glass makes a significant first impression. Sparkling windows allow natural light to flood in, showcasing the hard work you’ve put into cleaning every other part of your home and helping secure that full security deposit return. Actionable Tips for Streak-Free Glass Achieving a flawless, crystal-clear finish requires the right technique and tools. Follow these steps to ensure every reflective surface in your apartment is spotless. Choose the Right Day: Avoid cleaning windows and glass on a hot, sunny day. Direct sunlight causes the cleaning solution to evaporate too quickly, which is a primary cause of streaks. An overcast day is ideal. Clean Frames and Sills First: Before tackling the glass, wipe down all window frames, sills, and tracks. This prevents dirty water and dust from dripping onto your freshly cleaned panes. This is especially important for tackling spring pollen buildup. Use the Squeegee Method: For larger windows, a squeegee is your best tool. Wet the glass with your cleaning solution, then pull the squeegee from top to bottom in a single, smooth motion. Wipe the blade with a clean cloth after each pass. Rely on Microfiber: For mirrors and smaller glass surfaces, use two microfiber cloths instead of paper towels, which can leave behind lint. Use one cloth to apply the cleaner and a second, dry cloth to buff the surface to a streak-free shine. Tackle Hard Water Stains: Wisconsin's water can leave stubborn mineral deposits, especially on shower doors. A solution of equal parts white vinegar and water can help dissolve these stains. For tougher spots, a specialized mineral deposit remover may be necessary. 6. Wall Spot Cleaning & Scuff Mark Removal Over time, walls inevitably collect scuffs, marks, and fingerprints from daily life. These seemingly minor blemishes are one of the most common reasons landlords deduct from a security deposit. A thorough wall cleaning and scuff removal process restores the paint to its original condition, demonstrating meticulous care for the property. This task is an essential and often overlooked part of a successful cleaning checklist for moving out of an apartment . For property managers in Madison, pristine walls signal a well-maintained apartment ready for the next tenant without needing immediate repainting. Taking the time to address these imperfections can make a significant difference during the final walkthrough, directly impacting your security deposit return. Homes with children or pets often require extra attention, especially on lower wall sections, corners, and around door frames. Actionable Tips for Spotless Walls A systematic approach ensures you address every mark without damaging the paint finish. Always work in a well-lit room to spot all imperfections. Test Your Cleaner First: Before tackling a visible spot, test your cleaning solution (like a magic eraser or a mild detergent mix) on an inconspicuous area, such as inside a closet or behind a door. This ensures it won’t lift the paint or damage the finish. Use Gentle Pressure: When using a magic eraser or a soft cloth, apply light, circular pressure. Aggressive scrubbing can remove the paint's sheen or even the paint itself. The goal is to lift the mark off the surface, not scrub it away. Address Specific Stains: For crayon or pen marks, a small amount of hairspray or rubbing alcohol on a clean cloth can often break down the ink before you wipe it clean. For greasy fingerprints, a simple solution of dish soap and warm water is effective. Clean High-Traffic Areas: Don't forget to wipe down light switch plates, outlet covers, and the areas around doorknobs. These spots accumulate a surprising amount of grime and are a clear indicator of a detailed cleaning job. Document the Final Condition: After cleaning, take clear photos of the walls from various angles. This visual proof is invaluable if any disputes over the wall's condition arise with your landlord. 7. Appliance Exterior & Fixture Polishing After the deep scrubbing is done, the final polish on appliances and fixtures is what creates a truly move-in-ready impression. This step involves meticulously cleaning and polishing all visible hardware, from the front of the refrigerator and dishwasher to faucets, door handles, and cabinet knobs. It’s the finishing touch that elevates a clean apartment to a professionally detailed one, demonstrating exceptional care to your landlord. This detail is a crucial part of a comprehensive cleaning checklist for moving out of an apartment . For property managers in Madison, polished fixtures are non-negotiable for listing photos and tenant walkthroughs. The gleam of stainless steel and chrome signifies that the property has been maintained to a high standard. This attention to detail can be the deciding factor in securing a full security deposit return and leaving on excellent terms. Actionable Tips for a Flawless Finish To achieve a professional, streak-free shine, the right products and techniques are essential. Follow these expert tips for pristine results. Choose the Right Cleaner: Use products specifically formulated for the material you’re cleaning. A dedicated stainless steel polish will protect the finish, whereas an all-purpose cleaner can leave it dull or streaky. Similarly, use a chrome-specific polish for faucets and handles. Follow the Grain: When polishing stainless steel appliances, always wipe in the direction of the metal's grain. This prevents micro-scratches and ensures a smooth, uniform appearance. Use Microfiber Cloths: Exclusively use clean, dry microfiber cloths for applying polish and buffing surfaces. They are non-abrasive and effectively lift away residue without leaving behind lint or causing scratches. Polish as the Final Step: Complete all other wet cleaning in the area first. Polishing should be the very last thing you do to avoid water spots or new smudges on your perfectly shined surfaces. Buff Thoroughly: After applying the polish, use a second clean microfiber cloth to buff the surface until all product residue is gone. This final buff is what creates that brilliant, streak-free shine that impresses landlords. 8. Air Vents, Ducts & HVAC Filter Cleaning Often overlooked, air vents, ducts, and the HVAC filter are critical components that trap dust, allergens, and lingering odors. Cleaning them is a vital step in ensuring the apartment is truly fresh for the next resident, not just visually clean. This task goes beyond surface-level wiping and directly impacts the indoor air quality, making it an essential part of a comprehensive cleaning checklist for moving out of an apartment . For property managers in Madison, addressing air quality is a sign of a diligent and respectful tenant. In older apartment buildings common throughout the city, years of dust and dander can accumulate in the ductwork. A proactive cleaning demonstrates a commitment to leaving the property in better condition than you found it, which can be a key factor in securing your full security deposit. Actionable Tips for Fresher Air Quality A systematic approach to vents and filters ensures no dust or allergens are left behind, preventing issues like odor carryover or problems for allergy-sensitive incoming tenants. Replace the HVAC Filter: This is the single most important step. Purchase a new, high-quality filter to effectively capture fine particles like pollen and dander, a common concern during Wisconsin's spring season. Note the date of the change for your landlord. Vacuum Vents and Registers: Use a vacuum with a brush attachment to thoroughly clean all supply and return air vents. Pay close attention to the return vents, as they typically accumulate the most visible dust and pet hair. You can find more detailed advice for tackling this in our guide to solutions for dusty air vents in your home . Wipe Down All Surfaces: After vacuuming, wipe the vent covers (registers) with a damp microfiber cloth and a mild cleaner to remove any remaining grime or sticky residue. Clean Exhaust Fans: Don't forget the bathroom and kitchen exhaust fans. Wipe down the covers and fan blades to ensure they are free of dust and can properly ventilate the space for the new resident. Document the New Filter: Take a clear photo of the newly installed HVAC filter in its slot. This simple picture provides concrete proof to your landlord that you've completed this important maintenance task, leaving no room for dispute. 8-Point Move-Out Cleaning Comparison Service 🔄 Implementation Complexity ⚡ Resource Requirements & Time ⭐ Expected Outcome / 📊 Impact Ideal Use Cases 💡 Key Tips Kitchen Deep Clean & Degreasing High (🔄🔄🔄) — multi-surface, heavy soiling Specialized degreasers, oven tools; 45–90 min ⭐⭐⭐⭐ — strong grease removal, odor reduction, better deposit recovery 📊 Move-out inspections, heavily used kitchens, listing prep Start with major appliances; let degreaser dwell; photograph results Bathroom Sanitization & Tile Restoration Medium-High (🔄🔄) — mold/grout treatment Bleach/fungicide, grout tools, ventilation; 30–60 min ⭐⭐⭐⭐ — removes mold/hard water, improves hygiene & inspection outcomes 📊 Bathrooms with grout issues, allergy-sensitive units, older builds Ventilate when using bleach; use peroxide+baking soda for grout; replace damaged caulk Floor Restoration (Vacuuming, Mopping & Baseboards) Medium (🔄🔄) — depends on area/type HEPA vacuum, mop, spot cleaners; 40–75 min ⭐⭐⭐ — improves appearance & allergen removal; may not fix set-in stains 📊 Whole-apartment turnovers, pet-owner units, allergy-conscious tenants Vacuum overlapping passes; spot-treat stains first; ensure complete drying Bedroom & Closet Deep Clean Medium (🔄🔄) — detailed dust/allergen work Microfiber, vacuum, step stool; 30–45 min/bedroom ⭐⭐⭐ — reduces allergens, improves perceived cleanliness 📊 Families, tenants with sensitivities, staging bedrooms Dust high surfaces first; vacuum under beds; inspect closet shelving Window, Mirror & Glass Cleaning Medium (🔄🔄) — technique-sensitive Squeegee, microfiber, vinegar/mineral remover; 30–45 min ⭐⭐⭐⭐ — boosts natural light and perceived quality; high visual impact 📊 Units with large windows, listing photography, hard-water areas Use squeegee technique; avoid sunny-day cleaning; clean frames first Wall Spot Cleaning & Scuff Mark Removal Low-Medium (🔄) — quick but careful Magic eraser, touch-up paint, cloths; 20–35 min ⭐⭐⭐ — removes common scuffs, reduces deposit deductions 📊 Homes with scuffs (kids/pets), final move-out prep Test on hidden area first; use light pressure; document wall condition Appliance Exterior & Fixture Polishing Low (🔄) — fast, material-specific Material-specific polishes, microfiber; 15–25 min ⭐⭐⭐ — quick visual upgrade; prevents tarnish and fingerprints 📊 Modern kitchens, listing-ready properties, stainless-steel appliances Polish after wet cleaning; follow grain; use correct product for material Air Vents, Ducts & HVAC Filter Cleaning Medium-High (🔄🔄🔄) — access-dependent Vacuum, quality filters, duct tools; 20–30 min (basic) ⭐⭐⭐⭐ — improves air quality, reduces odors/allergens 📊 Older properties, units with persistent odors, allergy-sensitive tenants Replace filters; vacuum returns; note full duct cleaning may need pros Ready for a Flawless Move-Out? Let Shiny Go Clean Handle the Details. Moving out of an apartment in Madison is a big job. This comprehensive cleaning checklist for moving out of an apartment was designed to be your roadmap, guiding you through every nook and cranny-from degreasing the kitchen stove to sanitizing bathroom tiles and restoring the gleam to your floors. By systematically tackling each room and task, you empower yourself to leave your old space in impeccable condition, significantly boosting your chances of a full security deposit return. The journey from a lived-in apartment to a move-in-ready space is all in the details. Remember the importance of not just the obvious surfaces but also the often-overlooked spots: the inside of cabinets, the baseboards collecting dust from a busy family neighborhood in Verona, and the scuff marks on the walls from moving furniture. Each cleaned surface is a step toward satisfying your landlord's expectations. Your Final Walk-Through: The Key to Success Before you hand over the keys, the most critical step is your own final inspection. Use this very checklist as your guide. Put yourself in your landlord's shoes and look at the apartment with a critical eye. Check High-Touch Areas: Are light switches and doorknobs free of fingerprints? Inspect at Eye-Level and Below: Are baseboards and outlet covers clean? How do the floors look from a kneeling position? Look Up: Are ceiling fans, light fixtures, and the tops of cabinets free of dust? Document Everything: Take clear, well-lit photos or a video of every room. This documentation is your ultimate protection in case of any disputes over your security deposit. This final, meticulous review is your last line of defense. It’s the proof that you’ve honored your lease agreement and respected the property. If you're considering professional assistance for your move-out, understanding what's included in a professional move-out clean can help manage your expectations and ensure a flawless handover. The True Value of a Professional Move-Out Clean While this guide provides a clear path to a DIY clean, the reality of moving can be overwhelming. Juggling packing, logistics, and setting up a new home leaves little time or energy for the deep, detailed cleaning required. This is where professional help becomes not just a convenience, but a smart investment. A professional move out cleaning Madison service like Shiny Go Clean doesn't just clean; we restore the property to its best possible condition. We understand the specific standards that Madison landlords expect. We handle the tough jobs-like scrubbing ovens and removing stubborn soap scum-so you can focus on the excitement of your new home. Our experienced team uses efficient techniques and professional-grade supplies to deliver a level of clean that is difficult to achieve on your own, especially under the pressure of a move. Don't let the final clean-out add stress to your move. Instead, close this chapter with confidence, knowing every corner of your old apartment is spotless. Ready to ensure a stress-free move and get your full security deposit back? Let Shiny Go Clean handle the dirty work with our expert move out cleaning Madison service. Book your appointment online in minutes by calling us at 608-292-6848 and step into your new beginning with peace of mind.
- A Guide To Carpet Pet Hair Removal In Madison Homes
Effectively removing pet hair from your carpet involves using tools that create friction or static-like a rubber squeegee or glove-to loosen embedded fur before vacuuming. For best results, always vacuum slowly in overlapping, multi-directional patterns to lift the maximum amount of hair from the carpet fibers. The Never-Ending Battle With Pet Hair On Your Carpets If you're a pet owner in Madison, you know the struggle all too well. One moment your carpet looks clean, and the next, it’s a magnet for fur. This is especially true when that Wisconsin winter slush and salt gets tracked in or when muddy paws from the spring thaw make their way inside your home. This constant cycle can feel incredibly frustrating. Standard vacuuming often leaves behind those fine, stubborn hairs that seem woven directly into the carpet fibers. It’s no wonder so many homeowners feel like they’re fighting a losing battle. Why Pet Hair Is So Hard to Remove The real challenge with pet hair isn't just the sheer volume-it's the science. Pet hair has a unique texture and often carries a slight static charge, which makes it cling tightly to carpet fibers. This grip makes it surprisingly resistant to the simple suction of most household vacuums. Just think about these common scenarios for Madison residents: High-Traffic Areas: Entryways and living rooms in busy family neighborhoods in Monona / Maple Bluff see the worst of it. Cozy Nooks: Pets love to curl up in the same spots, leading to concentrated, matted-down patches of fur by the sofa or in a favorite corner. Seasonal Shedding: That spring pollen buildup on your windowsills is a sure sign that shedding season is also in full swing inside. You're definitely not alone in this. The demand for effective solutions is massive. In fact, U.S. pet households shed enough fur annually to fill over 500,000 trash bins , which is driving a rapidly growing market for pet fur removal tools. Discover more insights on the growing pet fur remover market . The good news is that you don't need expensive gadgets to see a major improvement. The right techniques can transform your cleaning routine, but for a truly deep clean, sometimes you need professional help. When you feel overwhelmed, remember that a professional pet hair removal cleaning Madison service can offer a fresh start. But first, let’s explore some practical, real-world solutions that actually work, starting with simple tricks you can use today. Effective DIY Carpet Pet Hair Removal Techniques Before you even think about plugging in the vacuum, a few surprisingly simple manual methods can make a world of difference. These techniques use basic physics-like friction and static-to pull stubborn, embedded fur from carpet fibers. Think of it as pre-treating the problem before the main event. Many homeowners in Madison find this extra step makes their vacuuming far more effective, especially in those high-traffic spots where pets love to lounge. You don’t need fancy gadgets, either. A few common household items can work wonders. Harnessing Friction with Simple Tools One of the most popular and effective methods involves nothing more than a tool with a rubber edge. A standard window squeegee is perfect for this. Just drag the rubber edge of the squeegee across the carpet in short, firm strokes. You’ll be amazed as it gathers hidden hair into clumps, making it easy to pick up by hand or with your vacuum. The magic is in the friction-the rubber grips the carpet fibers and pulls the hair loose. Another fantastic tool you probably already own is a pair of rubber cleaning gloves. Put on a standard rubber dish glove. Dampen the glove slightly with water-it shouldn't be dripping wet. Wipe your hand across the carpet surface. The combination of the dampness and the rubber's texture acts like a magnet for pet hair, balling it up as you go. This trick is especially useful for smaller areas, carpeted stairs, and even furniture. If you want to learn more about tackling furniture, check out our guide on pet hair removal tips for fabric furniture . Pro Tip: Always work in one direction to create neat piles of fur. Going back and forth can sometimes push the hair right back into the fibers, undoing all your hard work. Choosing the Right Manual Tool While a squeegee or glove is a great starting point, other tools are also available. Each one has its strengths, depending on your carpet type and just how bad the hair buildup is. For residents in newer Waukee homes with plush carpets, a carpet rake might be a better choice to avoid putting too much friction on delicate fibers. To help you decide, here’s a quick look at some of the most common DIY tools and what they do best. DIY Pet Hair Removal Tool Comparison This table breaks down a few go-to options for tackling pet hair without plugging anything in. Tool Best For How It Works Pro Tip Rubber Squeegee Low-pile carpets, area rugs Creates intense friction to pull up embedded surface hair. Use short, firm strokes pulling toward you to create hair piles. Damp Rubber Glove Stairs, spot treatment, upholstery Damp rubber generates static, causing hair to cling to the glove. Rinse the glove periodically to remove collected fur and keep it effective. Carpet Rake/Brush Medium to high-pile carpets Long bristles agitate carpet fibers to loosen deep-down hair. A gentle raking motion "fluffs" the carpet while dislodging fur. Pumice Stone Heavily soiled, durable carpets The porous surface gently scrapes and lifts stubborn, matted fur. Test on a small, hidden area first to ensure it doesn’t damage the fibers. Ultimately, the best tool is the one that works for your specific carpet and saves you the most effort. Don't be afraid to experiment to see what lifts the most fur with the least amount of scrubbing. Mastering Your Vacuum For Maximum Hair Removal Having a good vacuum is a great start, but it's only half the battle in the war against pet hair. How you use it is what really turns a routine chore into an effective carpet-cleaning strategy. Instead of making a few quick, random passes across the room, it’s time to get a little more strategic. A powerful vacuum is your best friend here, but the real secret is in your technique and knowing which attachments to grab. Most vacuums have a motorized brush for big, open areas and a crevice tool for the edges. Using them to their full potential is what gets the job done right. The goal is to agitate the carpet fibers from multiple angles to pull up every last stubborn strand of fur. The Art of the Slow and Systemic Pass The single biggest mistake most of us make is vacuuming too quickly. When it comes to deep cleaning, speed is your enemy. Pet hair loves to cling to carpet fibers, and your vacuum’s beater bar needs time to do its thing-brushing, agitating, and pulling the hair free so the suction can finally grab it. For the best results, adopt a more methodical pattern: First Pass: Move the vacuum slowly across the room in one direction, say north-to-south. Make sure each new pass slightly overlaps the last one so you don't miss any spots. Second Pass: Once you’ve covered the entire carpet, do it all over again. This time, work in the perpendicular direction, like east-to-west. This simple crisscross pattern ensures the brush hits the carpet fibers from all sides, dramatically increasing the amount of embedded hair it lifts. It might take a few extra minutes, but the clean, hair-free result is absolutely worth the effort. Don't Forget the Attachments and Maintenance Those extra tools that came with your vacuum aren't just for decoration. That long, skinny crevice tool is perfect for getting the hair that piles up along baseboards and in tight corners. Likewise, a smaller motorized brush or upholstery attachment is a game-changer for carpeted stairs, which are notorious collection spots for pet fur. For more ideas, you can check out some of the top tools for deep cleaning your home . Proper vacuum maintenance is non-negotiable. A clogged filter or a beater bar tangled in hair will absolutely cripple your machine's suction power, leaving fur behind no matter how perfect your technique is. Get in the habit of checking and cleaning these key parts to keep your vacuum running at peak performance: Empty the Canister or Bag: Never let it get more than two-thirds full. A full container reduces airflow and kills suction. Clean the Beater Bar: At least once a month, grab some scissors and carefully cut away any tangled hair and string from the brush roll. Wash or Replace Filters: Clogged filters are one of the main reasons for lost suction. Follow your manufacturer's instructions for cleaning or replacing them every few months. The infographic below highlights a few simple, non-electric tools that can help lift hair before you even plug in the vacuum. This quick guide shows how basic items like a window squeegee or a rubber glove use friction to pull hair loose from the carpet, making your vacuuming session even more effective. When To Call For Professional Carpet Cleaning You’ve tried the squeegee, mastered the crisscross vacuuming pattern, and even spent time on your hands and knees with a rubber glove. Sometimes, even with the best DIY efforts, the pet hair problem just won't quit. So, how do you know when you’ve reached the limit of what home equipment can do? Recognizing when to call for backup is key to maintaining a truly clean and healthy home. Certain telltale signs show that the fur, dander, and odors have gone deeper into your carpet fibers than any consumer-grade machine can ever hope to reach. Signs Your Carpet Needs Professional Help If you're noticing any of the following issues, it's a strong signal that it’s time to bring in the pros. These problems often go beyond surface-level hair and point to deeper, embedded grime. Lingering Pet Odors: You clean and clean, but a faint, persistent pet smell remains, especially on humid days. This usually means odor-causing bacteria from dander, oils, or tiny accidents have settled deep into the carpet pad itself. Worsening Allergies: Are you or your family members sneezing or dealing with watery eyes more often at home? This can be caused by a buildup of pet dander-those microscopic skin flakes that are a major allergen-buried deep within the carpet. Visibly Matted Fur: In high-traffic areas or your pet’s favorite nap spot, the hair can become so trampled and matted into the carpet fibers that it resists even the most powerful household vacuums. Dull and Dingy Appearance: Even after a thorough vacuuming, does your carpet still look flat and discolored? Embedded dirt, oils, and fine pet hairs create a dingy film that DIY methods just can't lift. When your own efforts aren't enough to tackle the stubborn pet hair, considering professional carpet cleaning services can provide a much deeper, more effective clean. The difference in equipment and technique is significant and delivers results you can see and feel. Your time is valuable. If you spend hours every week fighting a losing battle against pet hair, hiring a professional isn't just about getting a cleaner carpet-it's about reclaiming your time and energy. The Professional Advantage Over DIY Let's be honest-consumer-grade equipment simply can’t compete with the power and technology used by professional cleaners. Our teams at Shiny Go Clean use commercial-grade hot water extractors that do far more than just vacuum-they flush out the deepest layers of your carpet. This process injects a specialized cleaning solution deep into the fibers and then immediately extracts it along with all the dissolved dirt, dander, allergens, and stubborn hair. For homeowners in Verona or Waunakee this kind of professional intervention can be a total game-changer. Commercial extraction cleaners can pull out 90% more embedded hair and dirt than even the highest-end household vacuums. It's a completely different level of clean. Our tailored pet hair removal cleaning Madison focus at Shiny Go Clean ensures you get spotless results every time. Our background-checked teams save you hours of work and provide a level of cleanliness that restores your carpet’s freshness and can even prolong its life. If you're wondering if your carpets have reached this point, you might be interested in the common signs that your carpet needs professional shampooing . Your Madison Solution For Pet Hair-Free Carpets When you're finally ready to move beyond the daily struggle with pet hair, Shiny Go Clean is your local expert for carpet pet hair removal in Madison. We get the unique challenges Wisconsin pet owners face-from the spring shedding that hits right alongside pollen season to the winter slush that gets tracked into entryways. Our professional, background-checked teams specialize in tackling the toughest pet messes, and we serve homeowners across the entire Madison metro, from the busy family neighborhoods in Johnston to the new builds popping up in Waunakee. The Shiny Go Clean Difference We don’t just clean your carpets-we restore them. Our crews show up with powerful, commercial-grade systems built to pull out the deeply embedded hair, dander, and odors that DIY methods always seem to leave behind. Your home vacuum and those manual tools can only do so much. The real problem is buried deep within the carpet pile and even the padding underneath, where allergens and smells settle in for good. Our approach is to flush out and remove these contaminants right at the source for a truly deep clean. At Shiny Go Clean, we win on reliability, quality, and communication-not gimmicks or awkward upsells. Our goal is to provide a trustworthy service that makes your life easier and your home healthier. Why Professional Service Is Worth It The impact of professional equipment isn't just something you can see-it's backed by data. In a market expected to hit USD 1.75 billion by 2032 , professional-grade carpet extraction cleaners are a dominant force, especially here in North America. With nearly 70 million U.S. households owning dogs, the demand for effective solutions is clear. Professional methods can extract allergens 80% more effectively than other common techniques, which makes a huge difference in your home's air quality. Our local focus also means we understand the specific needs of Madison homes. Choosing a professional service means choosing peace of mind. To learn more, check out our guide to finding a cleaner that is safe for your pets in Madison . Reclaiming your home from persistent pet hair has never been easier. With our simple online booking, transparent flat-rate pricing, and a satisfaction guarantee, you can finally win the battle. Ready for a fresh start? Call us at 608-292-6848 to schedule your pet hair removal cleaning Madison service today. Answering Your Top Questions About Pet Hair Removal Even with the best game plan, some questions always pop up when you're dealing with stubborn pet fur. We hear them all the time from homeowners across Madison. Here are some of the most common ones, with answers to help you handle pet hair like a pro. How Often Should I Really Be Vacuuming? In a home with pets, your vacuum is your best friend-and frequency is key, especially when they're shedding. As a general rule, we suggest vacuuming high-traffic spots like living rooms and hallways 2-3 times a week . The whole house should get a thorough vacuum at least once a week. Of course, if you have a heavy shedder or a multi-pet household, you might find that daily vacuuming in the main living areas is what it takes. Staying on top of it prevents hair from getting ground deep into the carpet fibers, which makes every future cleaning session that much easier. Can Professional Cleaning Actually Get Rid of Pet Smells? Yes, it absolutely can. That musty pet odor you can’t seem to shake is usually caused by bacteria hiding deep in the carpet padding, far beyond where your home vacuum can ever reach. Our commercial-grade hot water extraction systems are built to flush out not just the carpet but the pad underneath it, too. This process removes the source of the smell-dander, oils, and other gunk-instead of just covering it up. The result is a carpet that’s genuinely fresh and clean, from the inside out. A professional clean doesn't just lift surface hair-it targets the microscopic dander and bacteria that cause lingering odors and can trigger allergies. It’s a reset for your entire room. Are Your Cleaning Products Safe for My Kids and Pets? Absolutely. At Shiny Go Clean, the safety of your family-furry members included-is our number one priority. We only use high-quality, effective cleaning products that are completely safe for homes with children and pets. We also know every home is different. If you have specific sensitivities or product preferences, just let us know. Our team makes sure to leave your carpets thoroughly clean without any harmful residues, so you can enjoy your fresh, hair-free floors with total peace of mind. Will Regular Professional Cleaning Help with Allergies? It can make a huge difference. The main trigger for most pet allergies isn't actually the hair, but the dander-those microscopic skin flakes. Dander, along with dust mites and other allergens, settles deep into your carpet and becomes a constant source of irritation. Our powerful extraction methods are proven to remove a very high percentage of these trapped allergens. By significantly improving your home’s indoor air quality, a regular professional carpet pet hair removal service can lead to a noticeable drop in allergy symptoms for your family. When your best DIY efforts just aren't cutting it anymore, Shiny Go Clean is ready to help you reclaim your Madison home. Our professional deep cleaning services are designed to eliminate the toughest pet hair, dander, and odors for good. Book your cleaning easily online and let us handle the rest.
- Should you tip a house cleaner? A Madison, WI Guide
When the dust has settled and your home is sparkling, one last question often comes up: should I tip my house cleaner? While it’s never required here in Madison, offering a tip has become a common and genuinely appreciated way to say thank you for a job well done. For most regular cleanings, a tip of 15-20% is a great starting point. A simple flat amount works just as well. The Tipping Standard in Madison Think of a tip as a personal thank-you for the tough, physical work that goes into making your home feel fresh. It’s a simple gesture that acknowledges the effort behind those gleaming countertops and spotless floors. It shows you value their work and often encourages consistently great service. Most industry guides suggest tipping 15-20% of the total cleaning cost. In the Madison area, for a standard clean that might run between $100 and $150 , a tip would be around $15-$30 —a small amount that can make a real difference in your cleaner’s day. To help you decide what works best, this guide breaks down the two most common ways to tip. Whether you prefer a percentage or a flat rate, both are excellent ways to show your appreciation. When you’re happy with the results, either approach is a welcome gesture that recognizes the hard work that just went into your home. If you're still looking for the right fit, you can also check out our guide on what to look for in local Madison, WI house cleaners . How Tipping Varies for Different Cleaning Services Not all cleaning jobs are the same, and your tip can reflect that. The amount that feels right often comes down to the kind of work that was done. A regular, recurring clean is like a weekly tune-up for your home, while a deep clean is a full overhaul. Both are incredibly helpful, but the elbow grease involved is on a different level. Adjusting your tip is a great way to recognize that. For Standard and Recurring Cleans When you have a cleaner coming in regularly to keep your Madison home tidy, a tip of 15-20% is a solid rule of thumb. This service is all about maintenance—handling the floors, surfaces, kitchens, and bathrooms to keep things from building up. Many people in Madison find a flat-rate tip easier. A tip of $10-$20 per cleaner is a common and appreciated gesture for these standard jobs. For a slightly bigger task, bumping that up to $20-$30 works well, too. It’s a simple, consistent way to show thanks for the work that keeps your home feeling fresh week after week. Tipping for Deep Cleans and Move-Out Services Deep cleaning and move-out cleans are a whole other story. These are the jobs that tackle everything from dusty baseboards and grimy light fixtures to buildup that’s been hiding for months. Because the work is so much more demanding, it’s customary to tip a little more generously. Deep Cleans: Leaning closer to a 20% tip is a great way to acknowledge all the detail work. A flat amount of $20-$40 per cleaner is also a fantastic way to show your appreciation. Move-Out Cleans: This is often the toughest job of all. A generous tip recognizes the incredible top-to-bottom effort it takes to get a home ready for its next resident. The more intensive the work, the more your tip says, "I see and appreciate the hard work you did." It’s a direct acknowledgment of the elbow grease that went into transforming your space. Still a little fuzzy on what separates a standard spruce-up from a deep scrub? We've got an article that breaks down the differences between regular cleaning vs. deep cleaning for Madison homeowners . It can help you figure out the level of effort involved and land on a tip that feels right. Understanding How Company Policies Affect Tipping The rules around tipping can feel a bit fuzzy, and they often change depending on who you hire. Some national cleaning chains have no-tipping policies because they build gratuity into their higher prices. On the flip side, most independent cleaners and local Madison companies see tips as a welcome and appreciated gesture. At Shiny Go Clean, we keep it simple. Our cleaners work incredibly hard to make your Madison home sparkle, and a tip is a personal thank-you for their effort. Best of all, 100% of it goes straight to them . Does Every Company Allow Tipping? It’s always a good idea to ask, but most cleaning companies in Madison do allow and encourage tipping. While some larger corporate services prohibit tips to standardize pay, the vast majority don't. In fact, surveys show that many customers tip their cleaners, and this simple act often ties back to higher long-term satisfaction. We recommend a quick check with any service beforehand, but you can feel confident that a tip for our team is a direct thank-you for their hard work. This kind of transparency is important to us. We want to be a straightforward, trusted partner for homeowners in Madison. You should feel comfortable and clear on every part of the process, from booking the service to showing your appreciation at the end. If you're still weighing your options, learning how to choose the right cleaning service in Madison can help you find a company whose policies are a great fit for you. When You Might Want to Adjust Your Tip Amount While the standard 15-20% is a solid rule of thumb, some situations just call for a little extra. Tipping is really about showing appreciation for the effort involved, and there are times when a cleaner goes above and beyond. Adjusting your tip is the perfect way to say, “I see the hard work you put in, and thank you.” Think about what your home looked like before they arrived. Was it a particularly tough job this time? A bigger tip shows you recognize the extra work that went into getting things back in order. Times to Consider Tipping More Some cleans just require more elbow grease. Bumping up your tip is a great gesture when your cleaner tackles messes like these: Post-Party Cleanup: The aftermath of a party always leaves behind more than just a few crumbs, from sticky floors to extra dishes. Serious Pet Hair: Heavy shedding from a furry family member takes a lot more time and detailed vacuuming to handle properly. Challenging Conditions: If a home hasn't been cleaned in a while, there’s often significant buildup that needs extra attention. Madison Winter Mess: This is a big one here. Carefully cleaning up all the tracked-in salt, slush, and mud from entryways is no small task. When your cleaner goes the extra mile to tackle a tough job with care, a larger tip is the perfect way to acknowledge their hard work. It builds a great relationship and shows genuine gratitude. When It Is Okay to Tip Less On the flip side, a tip is a reward for a job well done, not an automatic fee. If a cleaning doesn't meet your expectations and the issues aren't fixed, it’s completely acceptable to tip less or not at all. Your feedback matters, and your satisfaction should always come first. At Shiny Go Clean, your happiness is our priority. We always stand by our work with a satisfaction guarantee to make sure every job is done right, leaving you with a sparkling clean Madison home you can feel good about. Meaningful Alternatives to a Cash Tip Cash is always a kind gesture, but it’s not the only way to show you loved the work your cleaner did. Some of the most valuable forms of appreciation create a lasting impact that helps both our cleaners and our company long after the service is complete. These actions let our team know their hard work is genuinely valued. It’s gestures like these that are key to increasing employee engagement and job satisfaction in home cleaning . Write a Positive Online Review A few words on Google or Yelp can be a game-changer for a local Madison business like ours. Your honest feedback is one of the most powerful tools you can give us, helping other homeowners find a service they can trust. Your review is a powerful vote of confidence. It not only supports our team but also guides your neighbors in Madison in making a great choice for their own homes. Referrals and Recurring Business For a local company, word-of-mouth means everything. When you recommend us to friends, family, or neighbors here in the Madison area, it’s one of the highest compliments we can receive. Even better? Becoming a regular client. Consistent work provides our team members with the stability and reliable income they count on. It lets us build a real, trusting relationship with you and your home. If you're curious about what makes for fair pay in our industry, we dig into whether $30 an hour is good for house cleaning in another one of our articles. Ready to Book Your Madison Cleaning Service? We believe everything about our service should be straightforward, from how you can show appreciation to your cleaner to how you schedule a visit. If you’d like to leave a tip, you can simply leave cash in a marked envelope or add a gratuity right through our online payment system. When you're ready for a reliable, high-quality clean that comes with zero guesswork, we're here to help. Our booking process is designed to be just as transparent as our pricing—it only takes a few minutes to get a quote and get on the schedule. We've seen firsthand how much a simple, modern system can improve the experience for homeowners. It’s why we’ve invested in ours. For any cleaning pros reading this, a good website builder for cleaning services with a booking system is what makes a smooth process like this possible for everyone involved. Let our team take the cleaning off your plate. We're ready to bring a consistent, detailed touch to your space so you can get back to enjoying your Madison home. Get a Fast Quote in Madison Ready for a spotless home? It only takes a minute to get started. Book Online: Check availability in Madison Call or Text: 608-292-6848 Email Us: madison@shinygoclean.com We look forward to making your Madison home shine. Common Questions About Tipping House Cleaners Tipping etiquette can feel a bit confusing, but it doesn't have to be. Here are a few straightforward answers to the questions we hear most from Madison residents, so you can feel good about how you show your appreciation. Do I Tip Each Cleaner if a Team Shows Up? Yes, it’s always a good idea to make sure each person on the team gets a tip. The easiest way is to give a flat amount, like $10-$20 , directly to each cleaner. Another option is to calculate 15-20% of your total bill and ask the main office to divide it evenly among the crew who cleaned your home. Should I Tip Every Time for a Recurring Service? Consistency is what matters most here. Some clients prefer to give a smaller tip after every single visit, which is a great way to provide steady feedback. Others choose to give a larger, lump-sum tip once a month or a special thank-you bonus around the holidays. Both approaches are thoughtful and very much appreciated. Is It Rude Not to Tip in Madison? It’s definitely not considered rude, especially if the cleaning didn't meet your expectations. You should never feel obligated to tip for service you weren’t happy with. That said, tipping for a job well done has become a common custom here in Madison. It’s simply a recognized way to acknowledge excellent work and say thanks. Ready for a home that consistently shines? The team at Shiny Go Clean Madison is here to deliver reliable, high-quality cleaning you can trust. Get your fast, no-obligation quote and book your cleaning service in Madison in minutes.
- How to Kill Mold in Your Shower: A Madison Guide
Dealing with mold in the shower is a common headache for Madison homeowners. Figuring out how to kill it for good starts with understanding why it showed up in the first place. That stubborn black, pink, or green stuff is more than just an eyesore-it’s a clear sign of a persistent moisture problem. To get rid of it effectively, you have to tackle both the visible mold and the damp, warm conditions that let it grow back. Why Your Madison Shower Is a Perfect Home for Mold If you've noticed dark spots creeping into your grout or caulk, you're definitely not alone. Here in the Madison area, we get the double whammy of humid Wisconsin summers and the lingering dampness from winter slush, creating the perfect storm for mold to thrive. Your shower is its favorite spot for a few simple reasons. A shower provides the three things mold needs to survive: Constant Moisture: Daily showers leave behind water on walls, doors, and especially in porous grout lines. A Food Source: Soap scum, body oils, and even tiny particles in the water give mold something to feed on. It's one of the main reasons why bathrooms don't stay clean long without regular attention. Warmth and Poor Airflow: A steamy bathroom that stays warm long after you've dried off is an open invitation for mold spores to settle in and multiply. This combination makes showers-from Waunakee to Verona-a constant battleground. The mold you’re seeing is often a common household variety, but that doesn't mean you should ignore it. It can release spores into the air, which may trigger allergies or respiratory irritation for your family. The key takeaway is this: simply scrubbing the mold away isn't enough. To truly win the fight, you have to disrupt its ideal living conditions by controlling moisture and keeping surfaces clean. Understanding this cycle is the first step. That pesky mold isn't a sign of a dirty home-it's a sign of a high-moisture environment. Acting fast not only restores your shower's sparkle but also protects your home's air quality. Now, let's get into the practical steps to safely and effectively kill that mold for good. Your Practical Guide to Removing Shower Mold Ready to get your shower sparkling again? Tackling that stubborn mold can feel like a chore, but with the right game plan, you can reclaim your space and get rid of that gross buildup for good. Here’s a practical, safety-first guide to get the job done right. First things first, let's get your tools together. You’ll absolutely need protective gear like gloves and safety glasses -this is non-negotiable. Then, grab a good scrub brush (an old toothbrush is perfect for tight grout lines), a few microfiber cloths, and your cleaning solution of choice. Choosing Your Mold-Fighting Solution You’ve got a few options here, each with its own strengths. Some people reach for store-bought mold and mildew removers, which are definitely powerful but often come with strong fumes. On the other hand, natural alternatives can be just as effective and are much easier on your home's air quality. Here are a few of my go-to solutions: White Vinegar: This is an excellent natural choice. Its acidic properties are fantastic for killing many common types of household mold. Just spray undiluted white vinegar directly on the moldy spots and let it sit for about an hour before scrubbing and rinsing. Easy. Hydrogen Peroxide: Another great non-toxic option. Use a 3% solution in a spray bottle. Let it sit on the mold for about 10 minutes , then get to scrubbing. It’s a natural anti-fungal that also helps lighten any stains left behind. Baking Soda Paste: For a little extra scrubbing power, mix baking soda with a small amount of water until it forms a thick paste. Apply it right onto the mold, let it dry, then spray it with water or vinegar and scrub it all away. The gentle abrasion works wonders on tough spots. To make it easier to decide, here’s a quick rundown of what works best for different situations. DIY Mold Killing Solutions Comparison Solution Effectiveness Best For Safety Notes White Vinegar High Killing surface mold, dissolving soap scum, mild stains. Strong odor, but non-toxic. Avoid use on natural stone like marble. Hydrogen Peroxide (3%) High Killing mold, whitening grout, disinfecting surfaces. Can lighten colored grout. Non-toxic but can cause skin irritation. Baking Soda Paste Moderate Scrubbing away stubborn mold spots, deodorizing. Very safe. Works best when combined with vinegar or peroxide. Bleach Solution Very High Killing mold on non-porous surfaces, removing dark stains. Harsh fumes; requires excellent ventilation. Never mix with other cleaners. Remember, choose the solution that feels right for your home and the severity of your mold problem. CRITICAL SAFETY NOTE: Never, ever mix cleaning chemicals, especially bleach and vinegar or bleach and ammonia. This combination can create dangerous toxic gases. Stick to one method at a time. The Cleaning Process, Step-by-Step With your supplies ready, it’s time to get to work. Ventilation is absolutely key, so open a window or crank up the bathroom exhaust fan before you start. This helps clear out any fumes and will speed up the drying process later on. Apply your chosen cleaner liberally to all visible mold. Pay extra attention to grout lines, caulk, and those tricky shower corners where moisture loves to hide. Now, let the solution sit for the recommended time-this is the most important part! Giving it time to work allows it to penetrate and kill the mold at its roots, not just wipe it off the surface. After waiting, grab your scrub brush and start agitating the area. You should see the mold begin to lift pretty easily. For tough grout stains, you might need to put a little extra elbow grease into it. Once you’ve scrubbed everything clean, rinse the entire shower thoroughly with warm water to wash away all the loosened mold and cleaning residue. It all starts with moisture. This is how a simple damp spot turns into a full-blown mold problem if you let it. This just goes to show that controlling humidity is the first and most critical step in stopping the mold growth cycle before it even starts. And it’s a surprisingly common issue. One 2015 study found mold growing in 49% of shower grouts across 160 homes, even though most people knew their bathrooms were moisture traps. It’s a perfect example of how easily shower mold can take hold if you don't stay on top of it. Finally, dry the shower completely with a clean towel or a squeegee. This is your best defense against the mold coming right back. Getting rid of that lingering moisture makes a huge difference. While you're at it, a good cleaning can tackle other stubborn issues, too. Check out our guide on removing stubborn soap scum from shower tiles for a truly deep clean. The Real Reason Your Shower Mold Keeps Returning It's a frustrating cycle-you scrub the mold away, and a few weeks later, those dark spots are creeping back into your grout. If it feels like a losing battle, you're not alone. The secret to winning isn't just about how you kill mold in the shower ; it's about making your bathroom an environment where mold can't survive in the first place. The real culprit is almost always the same thing: excess moisture . Your bathroom, especially after a hot shower, becomes a tropical paradise for mold spores. The steam creates high humidity, and water droplets cling to every surface, providing the perfect breeding ground. Here in Madison, this is especially true during our sticky summer months or even in winter when homes are sealed up tight. The Power of Good Ventilation Your bathroom’s exhaust fan is your number one ally in the fight against moisture. It’s not just there for smells-its primary job is to pull that damp, steamy air out of the room before it has a chance to settle and cause problems. A common mistake is turning the fan off the second you step out of the shower. To be truly effective, you should let it run for at least 20-30 minutes after you’re done. This gives it enough time to clear out the lingering humidity and start drying out the surfaces. An easy trick is to wire your fan to a timer switch. That way, you can set it and forget it, ensuring your bathroom gets the ventilation it needs every single time without you having to remember. Simple Habits That Make a Big Impact Beyond your exhaust fan, a few other simple habits can drastically reduce moisture levels. These small adjustments disrupt the environment that mold needs to thrive. Open the Door: After you finish your shower, leave the bathroom door wide open. This allows the damp air to circulate out and be replaced by drier air from the rest of your home. Wipe Down Surfaces: A quick wipe-down with a squeegee or a microfiber towel after each shower can make a massive difference. Focus on the glass door, tile walls, and even the tub floor. It only takes a minute but removes the standing water mold loves. Controlling moisture is the cornerstone of preventing mold. Health and environmental research confirms that warm, damp conditions are ideal for mold growth. Maintaining indoor humidity below 60% is a key strategy to inhibit its development and protect your home and family. You can learn more about the science behind indoor mold and its prevention from the EPA. By focusing on ventilation and quick drying habits, you're not just cleaning-you're creating a long-term solution. Simple Habits to Keep Your Shower Mold-Free You’ve put in the work to scrub, spray, and get your shower looking brand new. Now, let’s make sure it stays that way. Preventing mold really comes down to small, consistent habits that stop moisture from settling in. It's so much easier to spend a minute a day on prevention than an hour on a weekend scrubbing. Think of it as creating a "no-go zone" for mold. These simple, actionable tips can easily become part of your daily and weekly routine, saving you from having to fight a major outbreak down the road. Daily Habits for a Drier Shower The golden rule of mold prevention is to get rid of moisture as quickly as possible. The less water left behind after a shower, the less of a welcome mat you’re rolling out for mold. Squeegee After Every Shower: It might seem like a small thing, but using a squeegee on glass doors and tile walls removes over 90% of the moisture. It only takes about 30 seconds and is the single most effective habit you can adopt. Dry Off Towels and Mats Properly: Don't leave damp towels bunched up on the floor or hanging in a humid bathroom. Take them out of the bathroom to dry, or even better, run them through the dryer. The same goes for your bathmat-hang it over the tub or shower rod to let it air out completely. Mold can begin to grow on damp surfaces in as little as 24 to 48 hours . By removing excess water immediately, you're constantly resetting that clock and keeping your shower inhospitable to mold spores. Weekly Maintenance Checks Once a week, take a moment to give your shower a little extra attention. This quick check-up can help you spot potential problems before they become big ones. Staying on top of these small tasks is a key part of building your best house cleaning schedule and keeping your whole home feeling fresh. A few things to look for include: Inspect Grout and Caulk: Check the seals around your tub, fixtures, and along the tile seams. Look for any cracks, gaps, or areas where the caulk is peeling away. These are tiny entry points for water to seep behind your tiles where you can’t see it. Use a Weekly Cleaner: A quick spray with a daily or weekly shower cleaner helps dissolve soap scum, which is a primary food source for mold. This simple step keeps surfaces clean and much less inviting for mold to take hold. By building these small habits into your routine, you’re not just cleaning; you’re actively preventing the conditions that allow mold to thrive. It’s the easiest way to ensure you won't have to kill mold in your shower again anytime soon. When to Call for Bathroom Mold Removal in Madison Sometimes, a mold problem in your shower is bigger than a bottle of vinegar and some serious elbow grease. While DIY methods are great for dealing with surface-level spots, it’s just as important to recognize the signs that you’re dealing with something more serious. Knowing when to put down the scrub brush and pick up the phone can save you a ton of time, stress, and potential damage to your home. If you’ve tried everything and that stubborn mold keeps coming back, it’s a clear sign the problem lies deeper than the grout. Persistent mold often means there's an underlying moisture issue that surface cleaning just can't fix. Signs of a Deeper Mold Problem A few red flags almost always mean it's time to call in the professionals. Don't ignore these-they often point to a more significant infestation that requires specialized tools and expertise. The Mold Covers a Large Area: If you’re seeing mold that covers more than a few square feet, it’s generally considered a large-scale problem. That’s a job best left to the experts. You Suspect Mold is Behind the Tiles: Are your tiles loose or bulging? Is the drywall next to the shower soft or discolored? These are classic signs that moisture has gotten behind the wall, creating a hidden breeding ground for mold. A Persistent Musty Odor: If that damp, earthy smell won’t go away no matter how much you clean and ventilate, it’s a strong indicator of hidden mold growth you can't see. The biggest concern is often mold growing on drywall. It can start to colonize a wet surface in as little as 24 to 48 hours , feeding on the paper facing and gypsum core. This not only damages your home's structure but can seriously impact your indoor air quality. For more on this, you can discover some insights about preventing mold on bathroom drywall from HomeCleanse.com . Why a Professional Cleaning Service Is Your Best Bet When you’re facing a serious mold issue, especially with tricky grout, a professional service offers peace of mind. Our teams at Shiny Go Clean have the experience to tackle these tough jobs head-on. We get into the details in our guide on professional solutions for bathroom grout problems . We use commercial-grade equipment and solutions to not only remove the visible mold but also to help identify the source of the moisture that’s causing it in the first place. Don't let a major mold problem compromise your home's health. If you’re in Madison, Verona, or the surrounding areas, we're just a call or an email away at 608-292-6848 or madison@shinygoclean.com . A Few Common Shower Mold Questions We get it-finding mold in your shower can bring up a lot of questions. We hear these all the time from our neighbors around Madison, Verona, and Waunakee, so let's clear up a few of the most common ones. What Is the Difference Between Mold and Mildew? It’s really easy to confuse the two, but there are some key differences. Think of mildew as mold's less aggressive, surface-level cousin. Mildew usually looks like a flat, powdery patch of gray or white. It sits right on the surface and, in most cases, you can just wipe it away without much of a fight. Mold , on the other hand, is the real troublemaker. It’s often slimy or fuzzy and can show up as black, green, or other dark splotches. The biggest issue is that mold doesn’t just sit on top-it penetrates deeper into grout, caulk, and even the drywall behind your tiles. While mildew is an annoyance, mold is the one that really needs your attention. It's the one that causes actual damage and can mess with your home's air quality. Can I Just Paint Over the Mold in My Shower? This is a shortcut we see people try all the time, and the answer is always a hard no . Painting over mold is like putting a small bandage on a deep wound. It hides the ugly spot for a little while, but it does absolutely nothing to fix the underlying problem. Worse, the mold will continue to feed on the moisture trapped behind the new layer of paint. Before you know it, it will eat its way right through your fresh coat, leaving you with a peeling, bubbling mess that’s even harder to deal with than before. Always, always kill and remove the mold completely before you even think about picking up a paintbrush. How Can I Tell If Mold Is Behind My Shower Tiles? Sometimes, the worst mold problems are the ones you can’t even see. If you have a nagging feeling that something is growing behind your shower wall, you're probably picking up on a few classic warning signs. Here’s what to look out for: A Persistent Musty Smell: Does your bathroom have a damp, earthy odor that never really goes away, no matter how much you clean or spray air freshener? That's a huge red flag for hidden mold. Loose or Bulging Tiles: When moisture gets behind tiles, it weakens the adhesive holding them to the wall. If you notice tiles that feel loose, seem to be shifting, or are bulging outward, it’s a sign of a serious moisture problem. Cracked or Discolored Grout: Grout that is constantly crumbling, cracking, or has dark stains that you can't scrub away often points to a long-term moisture issue lurking behind the wall. If you spot any of these signs, it's probably time to call in a professional. A behind-the-wall mold problem isn't a DIY job-it often requires opening up the wall to properly fix the damage, and that's best left to the experts. Is Black Mold in the Shower Dangerous? The term "black mold" immediately makes people think of the toxic stuff, Stachybotrys chartarum . But the truth is, not all mold that looks black is that specific, infamous type. Plenty of common household molds are black in appearance. But here’s the bottom line: regardless of its color or scientific name, all mold has the potential to cause health issues. For sensitive individuals-like young children, the elderly, or anyone with asthma or a compromised immune system-it can trigger allergic reactions and respiratory problems. The safest approach is to treat all mold with the same level of caution. The goal should always be to kill mold in the shower as soon as you spot it to protect your home and your family's well-being. Feeling overwhelmed by a stubborn mold problem? The team at Shiny Go Clean has the tools and expertise to tackle tough bathroom cleaning jobs, so you don't have to. We'll help restore your shower's sparkle and give you peace of mind. Get a fresh start by booking your professional cleaning service today .
- How to Eliminate Pet Odors: A Guide for Madison Homeowners
Loving your pets and loving a fresh-smelling home shouldn’t have to be a choice. If you're a pet owner in Madison, you know the struggle is real. That lingering "pet smell" is a common challenge, caused by a mix of dander, the natural oils on your pet's fur, and-of course-the occasional accident that seeps into carpets or upholstery. This isn’t just in your head-it’s a massive concern for homeowners. The market for pet stain and odor control products shot up to $8.4 billion in 2022 and just keeps growing. It shows how much people care about a clean, fresh environment. In Madison, where many of us live in apartments or townhomes in areas like the East Village, those odors can feel amplified and almost impossible to shake. In fact, some reports show that 75% of pet owners find themselves battling smells on a weekly basis. You can find more details on these consumer trends in this market report . Where Are Those Smells Actually Coming From? Before you can fix the problem, you have to know what you're up against. Pet odors are way more complex than just a "wet dog" smell. They usually stem from a few key culprits: Urine and Feces: Accidents are the most potent source, hands down. They contain ammonia and bacteria that create a pungent, lasting smell if not treated right away and with the right stuff. Dander and Fur: Those microscopic skin flakes and all that loose fur carry your pet's unique scent. They get trapped everywhere-fabrics, carpets, and even your air filters. Body Oils: Just like us, pets have natural oils on their skin. These oils transfer to furniture, bedding, and their favorite nap spots. Over time, the buildup creates a noticeable, musty odor. Saliva: All that licking-paws, toys, or even your couch-leaves behind saliva that can turn pretty smelly as bacteria get to work on it. The real key to success is realizing that you have to truly eliminate the odor-causing bacteria , not just cover it up with air fresheners. Masking the scent is a temporary fix, but the underlying problem will always come back until the source is properly cleaned. This guide is your emergency response plan for getting some immediate relief. Think of these first steps as quick wins that will make a noticeable difference before we get into the more intensive cleaning methods. For a deeper look at what a comprehensive clean really involves, check out our guide on the true deep cleaning meaning for your Madison home . Quick Fixes for Common Pet Odors When you need to tackle a smell right now , here are a few immediate actions you can take for the most common pet-related odors in your home. Odor Source Quick Fix Solution Pro Tip Urine Spot on Carpet Blot with paper towels, then spray with an enzymatic cleaner until saturated. Avoid using steam cleaners on fresh urine stains, as the heat can permanently set the odor. "Wet Dog" Smell Open windows for ventilation and sprinkle baking soda on carpets. Let sit for 15-20 minutes , then vacuum. Wash pet bedding and fabric toys in hot water with a cup of white vinegar to neutralize odors. Musty Furniture Vacuum the upholstery thoroughly, paying special attention to crevices. Mist lightly with a fabric-safe odor neutralizer. A handheld fabric steamer can also help kill odor-causing bacteria without harsh chemicals. Litter Box Area Scoop waste immediately. Sprinkle a layer of baking soda at the bottom of the clean litter box before adding fresh litter. Place an open box of baking soda or an activated charcoal pouch near the litter box to absorb ambient odors. These quick fixes are great for managing day-to-day smells, but for more stubborn or widespread odors, you'll need to move on to a deeper cleaning strategy. Deep Cleaning Odors from Carpets and Upholstery Soft surfaces are magnets for pet odors. Think about it-your carpets, sofa, and even curtains act like giant sponges, trapping everything from dander and fur to the microscopic aftermath of an accident. Here in Madison, that problem gets a lot worse when the spring thaw brings in muddy paws or the Wisconsin winter slush gets tracked inside. Tackling these smells requires more than just a quick surface spray. You have to get deep into the fibers to break down whatever is causing the odor in the first place. The Power of Enzyme Cleaners When you’re dealing with pet urine, an enzyme cleaner is your best friend. These aren't just scented soaps. They are specialized formulas loaded with beneficial bacteria that produce enzymes, and these enzymes are designed to break down the specific organic proteins found in pet waste. Essentially, they "eat" the source of the smell on a molecular level. That’s what separates true odor removal from just masking it with a fragrance. A regular cleaner might get rid of the visible stain, but it often leaves behind uric acid crystals. The moment humidity kicks in, those crystals reactivate, and the smell comes right back. When you’re treating a spot, remember a few key things: Blot, Don't Scrub: Your first instinct might be to scrub, but don't. Always blot a fresh accident with a clean cloth or paper towel. Scrubbing just grinds the urine deeper into the carpet padding, making your job a lot harder. Saturate the Area: Be generous with the enzyme cleaner. Apply it to the stain and a few inches around it. Urine spreads out under the surface, so what you see is usually just the tip of the iceberg. Give It Time: Enzymes aren't instant; they need time to work their magic. Check the product instructions, but you'll often need to let the cleaner sit for several minutes, or sometimes even hours. For a really tough spot, you can cover the area with a damp towel to keep the enzymes active longer. Here’s a simple way to visualize the immediate relief process. This breaks down the essentials-finding the source, airing out the room, and using the right product-into a straightforward plan. DIY Solutions for General Freshness For those less severe, more general "pet smells" that seem to weave themselves into your upholstery or carpets, a few household staples can make a huge difference. Baking soda, for instance, is a fantastic and completely natural odor absorber. A simple trick I recommend is to generously sprinkle baking soda all over your carpet or on your sofa cushions. Just let it sit for at least 30 minutes -or a few hours for tougher odors-and then vacuum it up thoroughly. It does a great job of pulling trapped smells out of the fabric. If you want to learn more about using this common pantry item, check out our guide on baking soda carpet cleaning for stains and odors . While these methods are great for maintenance, they do have their limits, especially when you're up against deep-set urine stains. For those really stubborn accidents, it helps to explore strategies designed to permanently eliminate urine odor from all sorts of surfaces. Sometimes, you just need a more intensive approach. Knowing When to Call for a Professional Deep Clean There comes a point where DIY methods just can't get to the root of the problem. If you've tried everything and that smell keeps coming back, or if an accident has soaked right through the carpet into the padding or subfloor, it’s probably time to call in the professionals. You might need our help if: The odor returns on humid days. You can't pinpoint where the smell is coming from. The stains are old and have been set for a long time. The smell seems to fill the entire room, not just one spot. A professional service like ours uses commercial-grade equipment to perform hot water extraction. This process injects a powerful, pet-safe cleaning solution deep into the carpet fibers and immediately pulls out all the dirt, allergens, and odor-causing bacteria. It's a level of clean that rental machines and household products simply can't achieve. Don't let stubborn pet odors take over your Madison home. If you're struggling, give us a call at 608-292-6848 . Our Madison team is ready to help restore freshness to your carpets and upholstery so you can get back to enjoying your furry family members, worry-free. Neutralizing Smells on Hard Surfaces and in the Air While carpets and couches get most of the blame, pet odors are sneaky. They can work their way into hardwood floors, cling to the paint on your walls, and just hang in the air you breathe. A truly fresh-smelling home means tackling these less obvious spots. For homeowners here in Madison, that means knowing how to handle muddy paw prints after a spring thaw without ruining your laminate flooring. It’s also about wiping down the wall where a wet dog decided to shake off after a walk. If you skip these areas, you’re only solving half the problem. Tackling Hard Floors Without Causing Damage Every floor type needs a different approach. Using the wrong cleaner can strip the finish, cause warping, or discolor your floors-creating a much bigger headache than the odor itself. With sealed hardwood, vinyl, and laminate floors , a gentle touch is always best. A simple mix of warm water and a few drops of pH-neutral dish soap is often all you need. For a bit more deodorizing power, you can use a solution of one part white vinegar to ten parts water. The real key is to never soak the floor; use a damp mop that you’ve wrung out completely. Tile and grout , on the other hand, can take a bit more muscle. Grout is porous, which means it can soak up urine and trap odors like a sponge. After you’ve cleaned the tile surface, go back and treat the grout lines with an enzyme cleaner. Just let it sit for a bit before giving it a gentle scrub with a brush and rinsing it clean. A quick guide to keep in mind: Avoid Harsh Chemicals: Bleach and ammonia-based products can wreck your floor’s finish and are dangerous for your pets. Wipe Up Spills Immediately: Don't give accidents time to soak in. This is especially true for wood or porous surfaces like unsealed concrete. Regular Mopping is Key: Consistent cleaning stops the slow buildup of dander and oils that cause that general "pet smell." Remember, the goal is to clean without causing damage. Always test a new cleaning solution on a small, hidden area first-like inside a closet or under a rug-to make sure it won’t mess with your flooring's color or finish. Don't Forget Your Walls and Baseboards Ever notice how your dog loves to lean against the wall or shake off right after coming inside? Over time, that transfers oils, dirt, and dander, creating a faint but persistent smell that most people completely overlook. Baseboards are especially bad for collecting dust, fur, and dander. For painted walls, a simple wipe-down works wonders. Use a soft sponge or microfiber cloth with a mild mix of water and a little dish soap. To avoid streaks, start from the bottom and work your way up. Pay extra attention to the spots around your pet’s bed or their favorite napping corners. You can clean baseboards the same way, but vacuum them first with a brush attachment. Getting all that loose fur and dust off first makes a surprisingly huge difference in how fresh a room feels. Improving Your Home's Air Quality Sometimes the smell isn't coming from one spot-it’s just everywhere . When that happens, it means the odor particles are floating in the air. Tackling your home's air quality is a critical part of winning the battle for a fresh-smelling home. One of the most effective things you can do is change your HVAC filter regularly . A clogged filter can’t trap dander, dust, and pollen, so it just ends up pushing those smelly particles back into every room. This is especially important in Madison during the spring pollen buildup, when indoor air quality can feel even worse. You can also try these strategies: Invest in an Air Purifier: A quality air purifier with a HEPA filter is built to capture tiny particles, including the pet dander that causes both odors and allergies. Ventilate Your Home: Whenever the Wisconsin weather cooperates, open your windows. Letting fresh air circulate is a simple way to flush out stale, odorous air. Clean Pet Bedding Often: Make it a habit to wash your pet's bed, blankets, and fabric toys at least once a week in hot water to get rid of trapped smells. If you’ve scrubbed the floors, wiped the walls, and cleared the air but still can't shake that stubborn smell, it might be time for professional help. Our pet hair removal cleaning Madison service goes beyond the surface to get to the root cause of odors. Give us a call at 608-292-6848 when you’re ready for a truly fresh start. Preventing Pet Odors Before They Start The best way to handle pet odors is to stop them from ever really taking hold. It’s all about getting ahead of the problem instead of scrambling to fix it later. By building a few simple habits into your week, you can cut down on the sources of smells before they have a chance to settle into your home. For busy families in Verona or Waunakee, this proactive approach is a total game-changer. It means less time spent on emergency deep cleans and more time enjoying a home that just feels fresh, even with your furry companions around. Start With Smart Grooming Habits A surprising amount of that stubborn "pet smell" comes directly from loose fur, dander, and oils that your pet sheds every day. A consistent grooming routine is your first and most powerful line of defense. Just brushing them a few times a week removes loose hair before it ends up tangled in your carpet fibers or stuck to the sofa. For dogs, this also helps spread their natural skin oils, which keeps their coat healthy and tones down that classic "doggy" smell. And don't forget about their teeth. Bad breath can easily contribute to the overall odor in a room, so regular brushing or a good dental chew can make a bigger difference than you’d think. Manage High-Traffic Pet Areas Your pet’s favorite spots are always going to be odor hotspots. Their bed, the floor around their food bowls, and the litter box need consistent attention. If you let these areas go for even a few days, you'll notice the smell starts to spread. Staying on top of these zones is all about routine: Washable Bedding: Get a pet bed with a removable, machine-washable cover. Tossing it in the laundry once a week with hot water and a cup of vinegar will knock out odors and kill bacteria. Litter Box Diligence: If you have cats, scoop the litter box daily. It's a non-negotiable. Then, do a full litter change once a week. A mat placed underneath can also catch stray litter and make cleanup a lot simpler. Protective Covers: If your dog has claimed a specific spot on the couch, cover it with a washable blanket or a nice-looking furniture protector. It’s so much easier to wash a cover than to deep-clean your entire sofa. When you're shopping for new furniture, think ahead. Choosing the best fabric for dogs and your sofa can make a huge difference by resisting hair and smells from the start. Choose Your Cleaning Products Wisely It’s no surprise that people are looking for effective solutions. The global market for pet odor neutralizers hit USD 2.34 billion and is expected to climb to USD 4.32 billion by 2033 . This boom is fueled by over 70 million US households with pets, all wanting to keep their indoor air fresh and clean. With so many products out there, it’s crucial to pick ones that are both effective and safe for your animals. Lots of commercial cleaners contain harsh chemicals that can be harmful if your pet ingests or inhales them. When prevention isn't quite enough, you need the right tools for the job. Take a look at our guide on finding a cleaner safe for pets in Madison to learn more about making pet-friendly choices. By mixing smart prevention with safe cleaning, you create a home that’s welcoming for everyone-on two legs or four. When to Call a Professional for Pet Odor Removal in Madison You’ve tried everything-the enzyme sprays, the baking soda trick, and hours spent blotting and scrubbing. Yet, that stubborn pet odor lingers. It’s a frustrating reminder that sometimes, DIY efforts just aren’t enough. This is a common story for pet owners all across Madison. It's especially true when an odor has had time to soak deep into carpets, upholstery, or even the subfloor itself. Recognizing the limits of at-home solutions is the first step toward getting a truly fresh home back. If you find yourself in a cycle of cleaning only to have the odors return, it's a clear sign the source is deeper than your products can reach. Signs You Need Professional Help Persistent odors usually mean the problem has moved way beyond the surface fibers of your carpet. Urine, for example, can soak right through the carpet backing, into the padding, and even seep into the wooden or concrete subfloor underneath. Once it hits those layers, no amount of surface spraying is going to fix the issue. You should think about calling in a professional service if you notice a few key things: The Smell Returns on Humid Days: This is the classic sign that uric acid crystals from old urine stains are still hiding in your carpet or padding. Humidity reactivates them, releasing that pungent ammonia smell all over again. You Can't Pinpoint the Source: If the odor seems to be everywhere and nowhere at once, it’s likely coming from multiple hidden spots or has deeply saturated a large area. Professionals use tools like blacklights to find every single spot, even the ones you can't see. You're Preparing for a Move: Whether you're moving out of an Madison apartment or selling your family home in Verona, making sure the property is odor-free is crucial. A move out cleaning Madison service guarantees a deep, restorative clean that satisfies landlords and impresses potential buyers. When you're dealing with smells that have become part of the house itself, you're no longer just cleaning a stain-you're treating an environmental issue. Professional-grade equipment and solutions are designed to handle this exact scenario. For a clearer picture of when it's time to call for backup, our article on the signs your carpet needs professional shampooing can be a big help. What a Professional Service Does Differently When you book a pet hair removal cleaning Madison service with Shiny Go Clean, you’re not just getting a stronger version of what you can do yourself. Our approach is systematic and uses commercial-grade technology to get rid of odors right at their source. We use hot water extraction machines that do more than just wet the carpet. They inject a powerful, pet-safe cleaning solution deep into the fibers under high pressure, flushing out embedded dirt, dander, bacteria, and those pesky uric acid crystals. Almost immediately, the machine’s powerful vacuum extracts all the dirty water, pulling the source of the odor out of your home for good. This is a massive industry for a reason. North America dominates 51.42% of the global pet odor control market, which makes sense when 66% of US households own pets. In places like Waunakee and Verona, where busy families juggle careers and pets, professional enzyme treatments show a 90% effectiveness rate compared to DIY sprays. For the one in four Americans with allergies, a professional clean can slash airborne irritants by 70% . You can dive deeper into these trends in this detailed report . Fresh Starts for Every Madison Home The need for a professional clean isn't always about a major accident. Maybe you've just moved into a new construction home in Waunakee and want to ensure a pristine environment before your pets make their mark. Or perhaps you live in a downtown Madison apartment where smells concentrate quickly and you just need a seasonal reset. Whatever your reason, our goal is to make getting help easy. We offer simple online booking and clear, flat-rate pricing so you know exactly what to expect. No awkward upsells or hidden fees. Just a reliable, high-quality clean that lets you get back to loving your pets-without worrying about the smell. When you're ready to permanently solve your pet odor problem, give our friendly local team a call or text at 608-292-6848 . We're here to help restore freshness and peace of mind to your Madison home. Your Top Pet Odor Questions, Answered As a cleaning service in the Madison area, from Verona to Waunakee, we get a lot of questions about pet odors. It’s a constant battle for many homeowners, so it's completely normal to wonder if you're handling it the right way. We've pulled together the most common questions we hear to give you some straightforward answers. We’ll cover everything from product safety to what you can realistically expect when you finally decide to tackle those smells for good. Are Pet Odor Products Actually Safe for My Pets and Family? This is, without a doubt, the top concern for most pet owners. And for good reason-the safety of your kids and furry family members comes first. While plenty of store-bought cleaners claim to work, some are packed with harsh chemicals that aren't great to have lingering in the air or on surfaces. Your best bet is to look for products clearly labeled "pet-safe" or "non-toxic." Enzyme cleaners are almost always a solid choice. They use natural bacteria and enzymes to literally digest the organic matter causing the smell, instead of just covering it up with strong chemicals. A few tips for using any product safely: Read the Label: Always, always follow the manufacturer's directions for how to apply it and how long it needs to dry. Get Some Airflow: Crack open a few windows or turn on a fan. Good ventilation helps any fumes dissipate quickly. Keep Pets Away: It’s safest to keep your pets out of the room until the cleaned spot is 100% dry . For a deeper dive, our guide on finding a cleaner safe for pets in Madison has even more detailed advice. How Long Does It Really Take to Get Rid of Pet Smells? This one truly depends on the source and how long it's been there. If you catch a fresh accident on the carpet, you can often neutralize the odor within a few hours. Quick blotting followed by a good enzyme cleaner lets the product do its work as the area dries. That general "doggy" smell might fade in an afternoon with thorough vacuuming, a load of pet bedding in the wash, and airing out the house. Older, set-in stains are a completely different beast. When urine has soaked deep into carpet padding or, even worse, the subfloor, that smell can hang around for weeks or months. These situations often take multiple treatments and sometimes professional help to fully resolve. A key thing to remember is that urine odors will not go away on their own. As the urine decomposes, the smell actually gets stronger and more concentrated. Fast, proper cleaning is your best defense. Why Does the Urine Smell Come Back on Humid Days? It’s one of the most frustrating things for pet owners. You're sure you cleaned that spot perfectly, but the first humid Wisconsin summer day rolls in, and the smell is back with a vengeance. This happens because of something called uric acid crystals . Most standard cleaners can't break down these crystals because they aren't water-soluble. So, while the spot seems clean and smells fine when it's dry, any moisture in the air-from humidity, mopping, or even steam from a shower-reactivates them. That's when you get hit with that pungent ammonia smell all over again. This is exactly why enzyme cleaners are so important. The enzymes are specifically designed to target and destroy the uric acid, truly getting rid of the odor at its source instead of just temporarily masking it. What Should I Expect from a Professional Pet Odor Service? When you bring in a professional service like ours for a pet hair removal cleaning Madison , you’re paying for a much deeper, more permanent fix. Our process just goes far beyond what you can achieve with store-bought products. Here's what you can expect: A Thorough Inspection: We use specialized tools, sometimes including blacklights, to find every single affected area-even old spots you can't see anymore. Commercial-Grade Gear: Our hot water extraction machines use a combination of high pressure and powerful suction to flush odor-causing bacteria from deep inside carpet and upholstery fibers. Specialized, Safe Solutions: We use professional-strength, non-toxic enzymatic treatments that are formulated to completely break down uric acid and other organic messes. A Genuinely Fresh Home: The goal isn't to leave behind a perfume scent. The goal is the complete removal of the odor's source, creating a healthier, more pleasant home for you and your family. Hiring a pro is about hitting the reset button on your home, making sure those stubborn, lingering odors are finally gone for good. When you're tired of fighting a losing battle against pet odors, Shiny Go Clean is here to help. Our Madison team has the tools and expertise to restore freshness to your home. Book your cleaning service online in just 60 seconds and enjoy a clean home without the stress.
- A Homeowner's Guide to Cleaning Refrigerator Mold in Madison
Finding mold in your refrigerator is unsettling, and for good reason. It's more than just an unsightly blemish on a shelf; it’s a clear signal that something is off in your food storage environment. This is especially true here in Madison, where our humid summers can create the perfect breeding ground for spores, even inside a chilled appliance. Those spots—whether they look black, green, or like fuzzy white cotton—are active fungi colonies. They thrive on moisture and the tiniest of food particles, often hiding out in corners, vegetable crispers, and especially deep within the rubber door seals. Letting even a tiny patch go can quickly spiral into bigger problems, from stubborn odors to contaminated groceries. The Health Risks Hiding in Your Fridge The biggest concern with refrigerator mold is the potential effect on your family’s health. While not every type of mold is toxic, many common varieties can still cause problems. Allergic Reactions: Spores can easily trigger allergy symptoms like sneezing, itchy eyes, and skin irritation in anyone who's sensitive. Respiratory Issues: For people with asthma or other respiratory conditions, inhaling mold spores can make their symptoms much worse. You can learn more about how to improve your home's air quality with deep cleaning . Food Contamination: Mold doesn't stay put. It can spread from the fridge surfaces to your food, causing it to spoil faster and creating a risk of foodborne illness. Did you know that over 70% of household refrigerators worldwide are home to mold spores? That startling number really highlights why tackling refrigerator mold is so critical for food safety. The World Health Organization has noted that improper food storage is a major contributor to millions of cases of foodborne diseases each year, and a contaminated fridge is often the starting point. For a deeper dive into why mold is such a concern in any part of the house, this guide on Mold In Your Home: Signs, Risks And Solutions is a great resource. It helps explain the "why" behind the "how," and reassures you that simple, effective solutions are right around the corner. And for those times when the job feels like too much to handle, your Madison neighbors at Shiny Go Clean are always here to help. Your Action Plan for Safe Mold Removal Alright, ready to tackle that mold and get your fridge back in order? Just like any home project, taking a few minutes to get organized first makes the whole job faster, safer, and way more effective. A little prep work now saves a lot of headaches later. First thing’s first: unplug the refrigerator. This is non-negotiable. It gets rid of any electrical risk and stops the compressor from kicking on while you’re trying to work. Next, let's get your supplies together. You won’t need harsh chemicals—in fact, it’s better to skip them entirely in a place where you store food. Gather Your Gear Dealing with mold means protecting yourself from spores, which can get kicked up into the air pretty easily. Before you start spraying or scrubbing, make sure you have your personal protective equipment (PPE) ready to go. Gloves: A good pair of rubber or disposable gloves keeps your hands clean and protected from direct contact. Mask: An N95 mask is your best bet here. It’ll stop you from breathing in any of those airborne mold spores. Eye Protection: Simple goggles or safety glasses are perfect for shielding your eyes from cleaning solution splashes or stray particles. Cleaning Cloths: Grab a few microfiber cloths for wiping and drying. Soft Brush: An old toothbrush or a small, soft-bristled brush is a lifesaver for getting into tight spots like the grooves in the door seals. Once you’ve got your safety gear on, you can get the fridge ready. Empty and Disassemble Now it’s time to clear the deck. Take every single food item out of the refrigerator and freezer. This is the perfect chance to check expiration dates and toss anything that’s seen better days. Pop any perishables into a cooler with ice packs to keep them chilled while you work. With the food out, remove all the shelves, drawers, crispers, and any other organizers that come out. This step is critical because mold absolutely loves to hide in the little nooks and crannies where these parts meet the fridge walls. Set everything aside near your sink so you can give each piece a thorough, separate cleaning. This simple flowchart shows just how easily mold can take hold once it has the right ingredients. As you can see, all it takes is one stray spore finding a bit of moisture for a colony to start growing, which is why a deep, comprehensive clean is so important. Mix Your Cleaning Solution You can make a powerful, food-safe mold killer using things you probably already have in your kitchen. Distilled white vinegar is fantastic for this job because its natural acidity breaks down and kills most common types of mold without leaving behind toxic fumes. Pro Tip: Never, ever use bleach inside your refrigerator. The harsh fumes can get absorbed by the plastic interior and transfer to your food later. On top of that, it’s not as effective as vinegar on porous surfaces where mold roots can hide. For a quick reference, here are a few simple DIY solutions that work wonders on fridge mold. DIY Mold Cleaning Solutions Solution Mixing Ratio Best For White Vinegar 1 part vinegar to 1 part warm water General mold cleaning and sanitizing on all surfaces. Baking Soda Paste 3 parts baking soda to 1 part water Scrubbing stubborn spots and neutralizing odors without scratching. Lemon Juice Juice of 3-5 lemons in 1 cup of water Cutting through grease and leaving a fresh, natural scent. These simple mixtures are safe, effective, and easy to prepare right before you start cleaning. For most situations, the vinegar solution is all you'll need. Just mix one part white vinegar with one part warm water in a spray bottle, give it a good shake, and you’re ready to go. If you run into some really tough spots, a paste made from baking soda and a little water works as a great gentle abrasive. It helps lift grime without scratching the plastic. For a deeper look at using this kitchen staple, our guide on cleaning your refrigerator with vinegar has even more helpful tips. With your fridge empty, your gear on, and your solution mixed, you're all set to get in there and reclaim your space from mold for good. Advanced Techniques for a Truly Clean Fridge Getting rid of the visible mold is a huge step, but the real victory is making sure it doesn't come back. This means going beyond just cleaning and focusing on sanitizing, drying, and deodorizing every part of your fridge. Think of it as the difference between wiping up a muddy footprint after a spring thaw and truly deep cleaning the floor so no dirt remains. After you've scrubbed away the mold with your vinegar solution, the next job is to sanitize. Sanitizing kills the microscopic spores that you can't see, which are the culprits that start new colonies. For a food-safe approach, a light mist of 3% hydrogen peroxide is an excellent option. Just spray a fine layer on all the interior surfaces, let it sit and bubble for about 5-10 minutes , and then wipe it away with a clean, damp cloth. It’s a simple step that makes a huge difference in achieving a lasting clean. The Importance of a Bone-Dry Finish Mold’s best friend is moisture. Even a tiny bit of lingering dampness in a corner or along a seal is like rolling out the welcome mat for new growth. That's why drying your refrigerator components thoroughly is just as critical as cleaning them. Grab a clean, dry microfiber towel and wipe down every single surface you cleaned. Don’t forget these often-missed spots: The grooves in the door seals The channels where shelves and drawers click into place Any corners or crevices inside the main compartment Take your time with this step. It's better to spend an extra ten minutes ensuring everything is completely dry than to rush and find more mold in a few weeks. Leave the refrigerator door open for at least an hour after you're done to let any remaining moisture evaporate. Banishing Lingering Odors and Stains Even after a deep clean, a musty smell can sometimes hang around. This is where natural deodorizers come in handy. Instead of masking the smell with artificial fragrances, you want to absorb it. Place a small, open container of activated charcoal or a fresh box of baking soda on a shelf to soak up any leftover odors. Coffee grounds work well, too! Beyond just tackling specific mold spots, maintaining overall refrigerator hygiene is crucial. You can learn how to clean a smelly refrigerator quickly and effectively to ensure enduring freshness. What about those stubborn gray or black stains mold sometimes leaves behind on the plastic? These can be tricky. Try making a thick paste of baking soda and water, applying it to the stain, and letting it sit for an hour before gently scrubbing it off. For more tips on what to use in your home, explore our guide to the essential tools for deep cleaning your home . If stains persist, they may have permanently discolored the plastic, but rest assured, if you've sanitized the area properly, the threat is gone. How to Keep Mold from Coming Back After you’ve gone to the trouble of clearing out refrigerator mold, the last thing you want is for it to show up again. The best approach is a proactive one. It’s all about building simple habits that make it incredibly difficult for mold to get a foothold in the first place. Think of it as light, consistent upkeep to prevent a major cleaning project down the road. It all boils down to managing moisture and food sources—the only two things mold really needs to survive. A quick weekly wipe-down of shelves and drawers can catch spills before they become sticky, stubborn messes. Here in Madison, where spring pollen buildup on windowsills reminds us how fast grime can settle, the same logic applies inside your fridge. Master Your Food Storage The way you store food plays a massive part in keeping mold at bay. Forgotten leftovers and produce that wasn't stored quite right are usually the main culprits for creating a mold-friendly environment. Manage Leftovers: Use clear containers so you can actually see what’s inside. Try to eat them within a few days, and if you know you won’t get to it, just freeze it. Store Produce Properly: Wash and thoroughly dry your fruits and vegetables before putting them away. For some produce, like berries, it’s best to wash them right before you eat to keep extra moisture from encouraging mold growth. Wipe Down Jars: Sticky jars of jelly or sauce can leave a sugary residue on shelves, which is a perfect food source for mold. Give them a quick wipe before putting them back. These small actions cut off the food supply for any lingering spores. If you need a hand fitting this into your weekly flow, check out our tips for building your best house cleaning schedule . Promote Good Air Circulation A jam-packed refrigerator is just asking for trouble. When cold air can’t circulate freely, it creates stagnant, humid pockets where condensation builds up—and mold absolutely loves that. Refrigerator mold flourishes in the damp, dark corners of your kitchen, but a little airflow drastically cuts the risk. In the US, where families open their fridges up to 30 times a day , poor circulation from an overstuffed fridge is a factor in mold growth in 70% of units . Just leaving a small gap between items can make a huge difference. You can find more insights about preventing mold in refrigerators on atek.io . Key Takeaway: Think of your fridge like a small room—it needs breathing space. Avoid pushing containers all the way to the back wall. This can block air vents and mess with the cooling cycle, leading to uneven temperatures and even more moisture. By adopting these simple habits, you're not just cleaning; you're creating an environment where mold simply can't thrive. It’s the single most effective way to make sure your refrigerator stays fresh, clean, and safe for your family’s food. When to Call a Professional for Help You’ve put in the work to scrub, sanitize, and dry your refrigerator, and most of the time, that’s all it takes. But sometimes, a DIY job just isn’t the right answer. Certain situations really do call for a professional touch to ensure the job is done completely and safely, saving you time and giving you total peace of mind. Deciding when to call for help often comes down to the scale of the problem or your own schedule. If you’re a busy family in Johnston or dealing with a new build in Waukee, your time is already stretched thin. A deep clean can easily eat up an afternoon you just don’t have. Signs You Need an Expert Recognizing when a mold issue is beyond a simple wipe-down is key. Here are a few clear signs that it’s time to call in the professionals: Widespread Mold Growth: If mold covers large areas of the interior or has gotten deep into the appliance's mechanics, a professional has the right tools to tackle it. The Fridge Sat Unplugged: A refrigerator that has been turned off for an extended period with the door closed is a perfect incubator for severe mold. This often happens in garages or basements and requires a serious deep clean. Preparing for a Move: Whether you're moving out of an apartment in Madison or a house in Verona, a spotless fridge is non-negotiable for getting your deposit back. A professional move out cleaning Madison guarantees it’s done right. How a Professional Cleaning Service Helps At Shiny Go Clean, we go far beyond a surface wipe. Our deep cleaning Madison WI service for refrigerators is designed to completely reset your appliance. We disassemble all removable parts—shelves, drawers, and seals—to clean and sanitize every hidden surface where mold spores can linger. Our experienced, background-checked team knows exactly where to look for those trouble spots. Mold in a refrigerator is never truly dormant. Even at standard fridge temperatures, spores can continue to grow, creating what are known as mold chains that spread contamination . In Madison, where the climate shifts, areas like drip pans and seals are hotspots, and neglecting them can significantly increase health risks. When the job feels overwhelming, letting a trusted team handle it is the smart choice. You get a truly sanitized appliance without sacrificing your weekend or worrying about missed spots. If you’re facing a stubborn mold problem or simply want the job done right, we’re here to help. Give Shiny Go Clean a call at 608-292-6848 to discuss our oven and refrigerator cleaning services in Madison WI , or book your appointment online in just a few clicks. Common Questions About Refrigerator Mold Even after you've dealt with a mold problem, it’s normal to have a few questions hanging around. It’s a common issue for homeowners here in Madison, and getting clear, practical answers can bring a lot of peace of mind. We’ve pulled together some of the most frequent questions we hear to help you feel confident about keeping your fridge clean and safe. Is a Little Bit of Black Mold in My Fridge Dangerous? Yes, you should always take any amount of mold in your refrigerator seriously. While some molds are harmless, certain types of black mold can produce mycotoxins, which might trigger allergic reactions or respiratory issues. Since it’s impossible to tell what kind you’re dealing with just by looking at it, the only safe approach is to get rid of it completely. Consistent cleaning is what stops a few small spots from turning into a widespread problem. If you have a family member with allergies or asthma, a professional deep clean ensures every last trace is safely eliminated, giving you total confidence. Can I Use Bleach to Clean Mold in My Refrigerator? While bleach is a powerful disinfectant, it’s not something we ever recommend for cleaning inside your refrigerator. The harsh fumes can actually get absorbed by the plastic components and later transfer to your food, creating a totally unnecessary health risk. On top of that, bleach often isn't very effective on the porous surfaces where mold can hide its roots. A much safer and more effective solution is a simple mixture of white vinegar and water. Vinegar is a mild acid that kills most species of mold and helps stop it from coming back—all without leaving behind harmful residues. For a guaranteed safe and thorough job, our teams stick to eco-friendly, food-safe products only. How Often Should I Deep Clean My Refrigerator to Prevent Mold? For the best results and to really keep mold away, we recommend giving your refrigerator a full deep clean every 3-4 months . This means taking out all the shelves and drawers for a proper wash. In between those deep cleans, a quick weekly wipe-down of any spills and a regular check for old food can make a huge difference. Here in Madison, you might even think about cleaning it more frequently during our humid summer months. If you find yourself short on time, adding a fridge deep clean to a recurring house cleaning service is an easy way to stay on top of it without the hassle. My Fridge Still Smells Musty After Cleaning. What Can I Do? A lingering musty odor usually means a little moisture is still trapped somewhere, or a spot got missed during the clean-up. Double-check the rubber door seals and the drip pan underneath the appliance—these are the most common culprits. After you're certain everything is completely dry, you can place an open box of baking soda, a small bowl of fresh coffee grounds, or some activated charcoal inside to absorb any leftover odors. If the smell just won’t go away, it could point to a deeper issue. A professional cleaner can often pinpoint and resolve the source of stubborn smells during a detailed cleaning service. When DIY isn't enough, or you simply want the job done right without the stress, Shiny Go Clean is ready to help. Our deep cleaning services in Madison restore your refrigerator to a truly clean and sanitized state. Book your cleaning in 60 seconds and enjoy the peace of mind that comes with a professionally cleaned home.
- House Cleaning Services for Seniors in Madison, WI
For many seniors and their families in Madison, finding reliable house cleaning help is about so much more than a tidy home. It’s a key piece in maintaining safety, health, and independence. Professional house cleaning services for seniors in Madison, WI focus on what matters most-reducing fall risks, clearing the air of dust, and creating a comfortable space that supports aging in place with dignity. When you're ready to find help, this guide will show you exactly what to look for. Why a Clean Home Is Essential for Seniors in Madison For an older adult, keeping up with household chores can shift from a simple task to a real challenge. Things that were once easy, like scrubbing a tub or vacuuming stairs, often become difficult due to arthritis, limited mobility, or just a lack of energy. This is where professional house cleaning services for seniors become a vital support system, not a luxury. In Madison, a clean home is a safer home. Cluttered walkways, dusty surfaces, and grimy bathroom floors are more than just unsightly-they are real hazards. A professional cleaner tackles these issues, creating clear paths to lower fall risks and sanitizing surfaces to keep germs from spreading. It’s all about creating an environment where seniors in Madison can live comfortably and confidently. How Professional Cleaning Supports Senior Well-Being A professional cleaning routine does more than just make a home look nice. It directly impacts a senior's daily quality of life, from physical safety to mental clarity. Each task is designed to create a healthier, more manageable living space. Here’s how specific cleaning tasks connect to well-being: Benefit Impact on Senior Well-being Decluttering and Organizing Clears pathways and floors, significantly reducing the risk of trips and falls. Dusting and Vacuuming Improves indoor air quality by removing dust, dander, and other allergens that can worsen respiratory issues. Sanitizing Kitchens & Bathrooms Kills germs and bacteria on high-touch surfaces, lowering the risk of illness. Deep Cleaning Floors Eliminates slippery grime and buildup, providing safer, more stable surfaces to walk on. Managing Heavier Chores Prevents physical strain from tasks like scrubbing tubs or moving light furniture to clean behind it. This consistent care provides a foundation for safer independent living, giving both seniors and their families in Madison valuable peace of mind. More Than Just a Cleaning Service This isn't just a local trend. As the senior population grows, so does the need for reliable home support. With projections showing that 1 in 6 people worldwide will be 60 or older by 2030 , more seniors are choosing to "age in place." That makes tailored, trustworthy cleaning services a must-have for supporting their independence. At Shiny Go Clean Madison, we see ourselves as your neighbors, here to offer that practical support. We get it-inviting someone into your home or a loved one's home requires a huge amount of trust. That's why we focus on providing a warm, friendly service that feels both reliable and reassuring. Our goal is simple: to make life a little easier for seniors and their families right here in Madison. A clean, organized home does more than just look good—it has a direct effect on mental well-being. Simply reducing clutter and creating a fresh environment can lower feelings of stress and being overwhelmed. Learn more about how a clean home is the secret to better mental health. We’re not a faceless corporation. We’re a local Madison team dedicated to providing the peace of mind that comes from knowing your home is in caring, capable hands. What Our Senior-Focused Cleaning Service Includes When cleaning for a senior, it’s about more than just making a place look neat. The right help translates directly into safety, comfort, and independence. We’ve built our services around this idea, focusing on practical tasks that make a real difference in daily life. Our service includes all the essential light housekeeping services needed to keep a home in Madison safe and orderly. We focus on the fundamentals because we know they have the biggest impact on well-being. Standard Cleaning for Consistent Upkeep Think of our Standard Clean as a reliable partner helping to maintain the home week after week. This recurring service, which can be scheduled weekly or bi-weekly, is designed to keep a living space hygienic and comfortable without you ever having to tackle the tough stuff. It’s the perfect way to maintain a healthy environment. A typical Standard Clean focuses on the most critical areas: Floors: We vacuum, sweep, and mop all accessible floors. This isn't just for looks-it removes dust that impacts air quality and clears debris that might become a trip hazard. Kitchens: Countertops are sanitized, appliance exteriors are wiped clean, and the sink is scrubbed. A clean kitchen is fundamental for safe food prep. Bathrooms: This is always a key focus. We sanitize toilets, showers, tubs, and sinks to get rid of germs and stop slippery mildew from building up. General Dusting: All key surfaces and furniture get a thorough dusting to cut down on airborne allergens, which is especially helpful for anyone with respiratory concerns. This regular upkeep turns cleaning from a demanding chore into a wellness routine you can count on. By keeping walkways clear and floors free of clutter, our Standard Clean directly helps reduce the risk of falls—a leading cause of injury for seniors. It’s a simple service with a powerful safety benefit. When a Deeper Reset Is Needed Sometimes, a home needs more than routine maintenance. That’s where our Deep Clean service comes in. It’s designed to get into all the forgotten corners and tackle built-up grime, which is perfect for a first-time service or a seasonal refresh-like after a long Madison winter dealing with salt and slush tracked indoors. A Deep Clean covers everything in our standard service, but adds detailed attention to things like baseboards, light fixtures, and ceiling fans. These are often the exact spots that are difficult and unsafe for seniors to reach. The goal is to leave the space feeling completely revitalized. You can learn all about what’s included in our standard cleaning in Madison, WI by checking out our detailed guide. The Health and Safety Benefits of a Deep Clean Keeping a home tidy is one thing, but a deep clean offers something more-a real investment in health and safety. It’s about reaching the hidden dust and grime that seniors often can’t safely get to, like on top of cabinets or behind appliances. This goes far beyond just making a home look spotless. For seniors living with respiratory conditions, a deep clean can make a world of difference. It’s about getting rid of allergens from the places they build up unnoticed. Creating a Healthier Breathing Environment A deep clean goes straight for the sources of poor indoor air. By wiping down baseboards, cleaning ceiling fans, and sanitizing vents, we can clear out built-up dust, dander, and pollen-a huge help for anyone in Madison with asthma or allergies, especially with all the spring pollen. In the bathroom, we do more than a quick surface wipe. Our team scrubs grout and tiles to stop mold growth, which is a common trigger for breathing issues. Every nook gets sanitized, creating a hygienic space that supports overall wellness. This is a core reason why so many families look for specialized house cleaning services for seniors in Madison, WI . We're seeing more aging homeowners in Madison who want a deeper clean. For seniors who have a harder time getting around, services that tackle allergens in vents, on baseboards, and on cabinet exteriors are becoming a priority for creating a healthier home. Safety and Peace of Mind Beyond air quality, a deep clean makes a home much safer. Clearing out clutter from closets or spare rooms removes hidden hazards. Something as simple as keeping pathways clear can help prevent elderly falls , a serious risk for seniors. There’s also real comfort that comes from an orderly space. For many seniors, not being able to handle deeper cleaning is a source of stress. Letting a professional take care of it restores a sense of calm and pride in their home. At Shiny Go Clean, we know we’re not just cleaning a house-we’re helping create a healthier, safer home for Madison's seniors. You can learn more about how we transform homes with our dedicated deep cleaning service in Madison, WI . How to Choose a Trustworthy Cleaning Service in Madison Inviting someone into your home, or the home of an older family member, is a big deal. When you're looking for house cleaning services for seniors in Madison, you want to feel sure that the people you hire are reliable, professional, and respectful. It’s tempting to go for a low-cost deal, but focusing on reliability leads to a better, safer experience. A good company is open about its practices and puts your family's security first. What to Look For in a Senior Cleaning Service Before you decide, there are a few things that just aren't negotiable. Think of these as the foundation for a safe and professional relationship. Fully Insured and Bonded: This is the most important check. Liability insurance protects you if something is damaged, and a bond protects against theft. Any serious cleaning service will have both. Background-Checked Professionals: Every person who might enter the home needs to have passed a thorough background check. For a company that works with seniors in Madison, this is an absolute must. Clear, Consistent Communication: Getting in touch should be simple. A reliable company will be happy to answer your questions without making you feel rushed. When a company has these three things in place, it shows they take their role in the Madison community seriously. You can read more about how we build our service on these values by learning about the team at Shiny Go Clean Madison . Key Questions to Ask Before You Book To feel good about your choice, it helps to have a few questions ready. A quality company won't just answer them-they'll appreciate that you're asking. A trustworthy cleaning service expects you to ask tough questions. In fact, they should be proud to tell you about their insurance, background check process, and satisfaction guarantee. It shows they have nothing to hide. Here are a few great questions to get you started: "Are all of your cleaning professionals insured, bonded, and background-checked?" The answer should be a quick and confident "yes." "Do you have experience working in homes with seniors in Madison?" This helps you figure out if they're familiar with the specific needs involved. "What is your satisfaction guarantee?" You need to know their plan if the service isn't what you expected. "Is your pricing transparent, or are there hidden fees?" Look for simple, flat-rate pricing so there are no surprises. At Shiny Go Clean Madison, we’ve built our entire service around these principles. We make sure every cleaner is vetted, we keep full insurance for your peace of mind, and our pricing is always straightforward. We want booking a cleaner in Madison to be an easy, secure decision for you. Customizing a Cleaning Plan for Your Needs and Budget Help around the house shouldn’t be one-size-fits-all. One person might just need a hand with heavy lifting, like scrubbing floors, while another might want comprehensive help to keep the entire home fresh. That's why a rigid cleaning service just doesn't work. At Shiny Go Clean Madison, we see it as a partnership. We start with clear, simple service options. From there, we work with you to build a plan that fits your specific home, health needs, and budget. Building Your Perfect Clean Everything starts with our three core services: a Standard Clean for regular upkeep, a Deep Clean for a thorough reset, or a Move-In/Out Clean for a completely fresh start. From there, you decide what else is needed. Need the inside of the oven scrubbed? We can add that. Worried about pet hair? We can focus extra time there. You only pay for the services you actually need. Here's a quick look at what's included in our most popular services. Comparing Our Most Popular Cleaning Services Feature Standard Clean Deep Clean Move-In/Out Clean Kitchen Surfaces Countertops, sink, exterior of appliances wiped Includes standard + inside of microwave, exterior of cabinets Includes deep clean + inside of all empty cabinets and drawers Bathrooms Toilets, showers, sinks, and mirrors cleaned Includes standard + detailed scrubbing of tile grout and fixtures Includes deep clean + inside of all empty vanities Living Areas Dusting, vacuuming/mopping floors Includes standard + baseboards, window sills, and light fixtures Includes deep clean + all interior closets (if empty) Baseboards Spot cleaned Wiped down throughout the home Wiped down throughout the home Interior Windows Not included Not included Included Inside Oven/Fridge Add-on service Add-on service Included (if empty) This table just outlines the basics. The real magic happens when we tailor the service to fit exactly what you need. This flexible approach is becoming more common as house cleaning is recognized as a key part of the larger senior home care market. With a growing preference for aging in place, this market is expected to expand. You can learn more about these trends and the growing market for in-home senior care. The flowchart below breaks down the simple but crucial steps for finding a service you can count on. This visual guide hits on the non-negotiables: always make sure a service is insured, uses vetted professionals, and offers transparent pricing from the start. Our goal is to remove the stress from getting help. With our simple online booking and transparent flat-rate pricing, you know exactly what to expect. You get the exact clean you need, every time. Whether you need help with a few difficult tasks or a complete top-to-bottom cleaning, we make the process straightforward. We provide a clear plan so you can feel confident and in control. Ready to build a plan that works for you? You can check availability in Madison and get a fast, no-obligation quote in minutes. Booking Your Senior Cleaning Service in Madison Is Easy We’ve talked about how a clean home makes a difference for health and safety. The next step should be the easiest one of all-getting that peace of mind for yourself or a loved one. At Shiny Go Clean, we're a local Madison team, and we care about the seniors in our community. We know that letting someone into your home is built on trust. That’s why we’ve made our process reassuring, clear, and completely straightforward. Your Path to a Spotless Home Getting help should never feel complicated. It should start with a friendly conversation about what you need. We give you a few simple ways to get in touch, so you can pick whatever feels most comfortable. You have three simple options to get started: Talk to Our Office Manager: Sometimes, you just want to talk to a real person. Give our friendly office manager a call at 608-292-6848 for a warm, helpful chat about what you’re looking for. Send a Quick Email: If email is more your style, just send a message to madison@shinygoclean.com . We’ll get back to you right away with clear answers. Book Online in Minutes: For the fastest route, our online booking system is open 24/7 . You can get a quick quote and schedule your first cleaning in just a few clicks. Getting started is designed to be stress-free. Our online system provides a fast, transparent quote, so you know exactly what to expect. Check availability in Madison and book your clean in just a few minutes. Choosing a reliable cleaning service is a wonderful way to make sure a home stays the safe, comfortable sanctuary it’s always been. It’s a practical step that gives back time, energy, and security. We’re here to make that decision feel easy and right for you. Frequently Asked Questions About Senior House Cleaning It’s normal to have questions before inviting someone into your home or a loved one’s home. We want you to feel completely comfortable, so we’ve answered some of the most common questions we hear from seniors and their families here in Madison. Our goal is to give you total peace of mind. How do you ensure your cleaners are trustworthy? This is the most important question, and we take it very seriously. Trust is everything. Before anyone from our team steps into a client's home, they must pass a rigorous, multi-step background check . For your complete protection, our entire team is also fully insured and bonded. We’ve built our service around earning your trust from the very first clean. Can we request specific cleaning products? Absolutely. We know many people have sensitivities to certain fragrances or simply prefer products they already trust. While we come prepared with our own high-quality, eco-friendly supplies, we are more than happy to use any specific products you provide. Just let us know when you book your service, and we'll follow your instructions. Your comfort and health are our top priorities. Whether you need us to use your preferred hypoallergenic cleaner or stick to simple vinegar and water, we are happy to customize our approach. What if we only need help with a few difficult tasks? This is a very common situation. You don't have to book a full house cleaning if you only need a hand with a few strenuous chores. Our services are flexible, so we can focus just on the tasks you find most challenging. For example, we can schedule a visit to handle just the physically demanding jobs, like: Scrubbing bathtubs and showers Mopping kitchen and bathroom floors Deep cleaning the inside of the oven Wiping down all the baseboards This way, you only pay for the help you truly need. How does your pricing work for a fixed income? We know that sticking to a budget is important, so we make our pricing simple. Shiny Go Clean Madison uses transparent flat-rate pricing , which means the quote you get is exactly what you’ll pay. There are no surprise hourly charges or hidden fees. You can plan for the cost without any stress, knowing you’re getting reliable service at a fair and predictable rate. Ready for a cleaner, safer home in Madison? Shiny Go Clean Madison makes it easy to get the help you need. Book your clean in minutes or give our friendly office a call at 608-292-6848 .