Top Tips: Your Madison Cleaning Checklist for Apartment Move Out
- Feb 3
- 16 min read
Updated: Mar 23
Moving out of your Madison apartment is exciting, but the final hurdle-the move-out clean-can feel daunting. One missed spot could be the difference between getting your full security deposit back and facing frustrating deductions from your landlord. Property managers, especially in busy family neighborhoods in Madison or new-build areas in Waunakee, have high standards, and a simple wipe-down just won't cut it. From scrubbing away slush tracked in during an Wisconsin winter to removing a season's worth of pollen from windowsills, the details truly matter.
This guide provides the ultimate cleaning checklist for apartment move out, breaking down the 10 critical areas property managers inspect most closely. Following a structured plan is the key to a successful clean that leaves a great final impression. To secure your full security deposit, a comprehensive apartment move-out cleaning guide can be an invaluable resource, ensuring no spot is missed. We’ll cover everything from deep cleaning kitchen appliances to documenting your work with photos for the final walkthrough. Follow these steps to leave your old place looking immaculate, satisfy your lease requirements, and learn when to call us for a professional move out cleaning in Madison .
1. Deep Clean All Flooring (Vacuuming, Sweeping, and Mopping)
The condition of your floors is one of the first things a landlord or property manager notices during a move-out inspection. Neglecting them is a costly mistake, as inadequate floor cleaning is a primary reason for security deposit deductions. This foundational task involves a multi-step process to ensure every surface-from carpet to tile to hardwood-is free of dirt, scuffs, and residue.

This process is a key part of any professional cleaning checklist for apartment move out. In Madison, landlords commonly deduct $200-$400 for poorly cleaned floors, a standard seen in strict inspections at properties across Madison.
Actionable Tips for Pristine Floors
To get your floors turnover-ready, follow a specific order of operations for the best results.
Start Dry, Finish Wet: Always vacuum or sweep before mopping. This removes loose debris like hair, crumbs, and dust, preventing you from just pushing around a gritty slurry with a wet mop.
Choose the Right Cleaner: Use a pH-neutral cleaner on hardwood or laminate to avoid damaging the finish. For tile and vinyl, a manufacturer-recommended solution works best. If you're struggling with residue, you can find out why floors get sticky after mopping and how to fix it.
Mop Strategically: Work in small, manageable sections, starting from the corner farthest from the door. Change your mop water frequently-once it looks dirty, you're just re-depositing grime onto the floor.
Don't Forget the Details: Pay extra attention to corners, along baseboards, and under cabinet overhangs where dust bunnies collect. High-traffic areas like entryways and kitchen work zones will likely need a second pass.
Allow for Drying Time: Let floors dry completely for at least 2-4 hours before the final walkthrough to prevent new footprints or marks.
2. Kitchen Deep Clean (Appliances, Cabinets, and Countertops)
The kitchen is the heart of the home, but during a move-out inspection, it's the #1 area for scrutiny. Landlords meticulously check for grease, food residue, and grime inside appliances and cabinets. A poorly cleaned kitchen is a guaranteed way to lose a significant portion of your security deposit, as it requires intensive professional labor to correct.

This task is a non-negotiable part of a cleaning checklist for apartment move out. In the Madison metro, kitchen deductions average $150-$300, and landlords in Madison are known to prioritize appliance cleanliness in their final walkthroughs. Some property managers even require photographic proof that appliances are spotless.
Actionable Tips for a Flawless Kitchen
A systematic approach is essential to tackle every surface and leave the kitchen inspection-ready.
Tackle the Oven First: Use a quality oven cleaner at least 24 hours before your final wipe-down. This gives the formula time to break down tough, baked-on grease. Remove racks and soak them separately for easier scrubbing.
Wipe Cabinets and Drawers: Empty all cabinets and drawers, then wipe the interior shelves and surfaces with a damp microfiber cloth to remove dust and crumbs without leaving streaks. Don't forget to wipe down the exterior cabinet faces and hardware.
Degrease and Sanitize: Clean countertops, backsplashes, and the stovetop using an appropriate degreasing agent that won't damage the finish. Pay special attention to the area around the stove burners where grease accumulates. Sometimes grime can get stuck in hard-to-reach places, and you might need to learn how to clean between the oven glass for a truly thorough job.
Inspect with a Flashlight: Before you finish, use your phone's flashlight to inspect the inside of the oven, microwave, and refrigerator. The bright light will reveal any missed spots or lingering residue.
Document Your Work: Take clear, well-lit photos of the clean appliances (inside and out), empty cabinets, and countertops. This documentation can be invaluable if a dispute over your security deposit arises.
3. Bathroom Sanitization (Tubs, Toilets, Tiles, and Ventilation)
The bathroom is a high-scrutiny area during any move-out inspection. Landlords and property managers look closely for signs of mold, mildew, soap scum, and hard water stains, as these issues suggest neglect and can be costly to fix. A thoroughly sanitized bathroom not only passes inspection but also demonstrates that you've cared for the property.
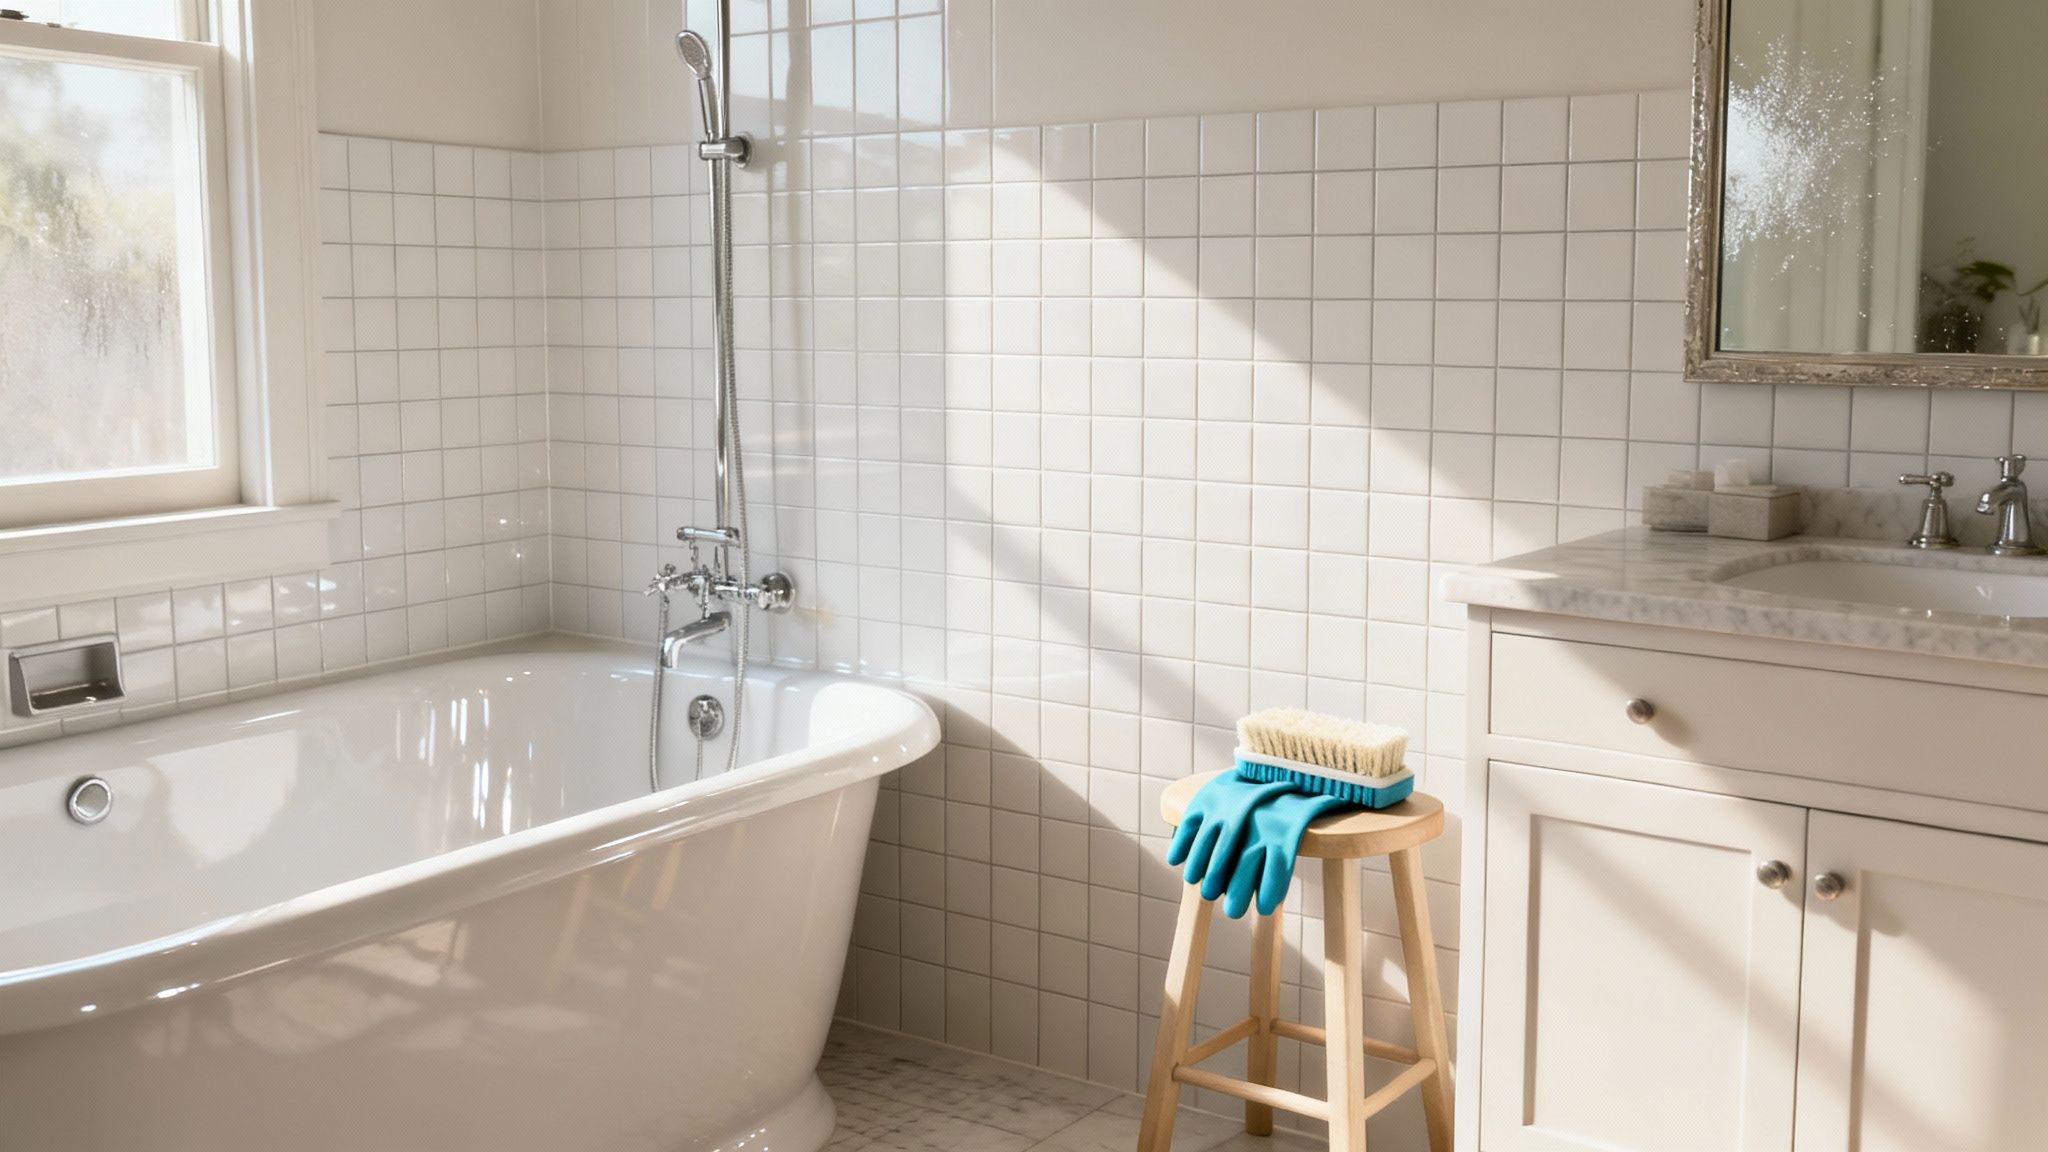
This step is a non-negotiable part of any complete cleaning checklist for apartment move out. In areas like Verona and Belleville, landlords frequently cite mildew-a common issue due to Wisconsin's humidity-as a reason for deductions. Similarly, Madisons' water quality often leads to stubborn hard water stains that require more than a simple wipe-down.
Actionable Tips for a Spotless Bathroom
Follow these steps to ensure every surface shines, leaving no reason for a landlord to withhold your deposit.
Tackle the Toilet First: Apply a quality toilet bowl cleaner and let it sit for at least 10-15 minutes before scrubbing with a stiff brush. Don't forget to wipe down the exterior, including the tank, base, and behind the seat. If you're dealing with stubborn rings, you can learn expert techniques for removing tough toilet stains.
Dissolve Soap Scum and Mildew: For tubs, showers, and tile, use a commercial cleaner specifically designed for soap scum and mildew. A paste of baking soda and water is a great alternative for scrubbing grout lines.
Clear the Air: Dust and wipe down the bathroom ventilation fan cover. A clean vent not only looks better but is essential for preventing the moisture buildup that leads to mold.
Make Surfaces Gleam: Clean the sink, vanity, and countertops thoroughly. Finish by cleaning the mirror with a streak-free glass cleaner for a polished look.
Test Cleaners Cautiously: If using a strong or acidic cleaner for hard water stains, always test it on a small, inconspicuous area of tile first to ensure it doesn't cause discoloration or damage.
4. Walls, Baseboards, Trim, and Door Frames Cleaning
Often overlooked during routine cleaning, walls, baseboards, and trim are meticulously inspected during a move-out. These surfaces accumulate dust, scuffs, fingerprints, and smudges over time, and leaving them dirty is a common reason for deposit deductions. A thorough wipe-down is a non-negotiable step to present a truly clean and well-maintained apartment.
This task is a critical part of a professional cleaning checklist for apartment move out. In Madison, property managers frequently cite dirty trim in deduction disputes, and wall marks from scuffs or crayon in family-heavy neighborhoods can easily lead to a $100-$300 charge if not addressed properly before the final walkthrough.
Actionable Tips for Spotless Walls and Trim
To restore these vertical surfaces to their original condition, follow these detailed steps.
Work Top-to-Bottom: Always dust and wipe trim and walls from the top down. This ensures any dislodged dust or debris falls onto uncleaned surfaces below, preventing you from having to re-clean areas.
Use a Damp Microfiber Cloth First: Before resorting to stronger cleaners, wipe baseboards, door frames, and window sills with a slightly damp microfiber cloth. This simple step removes the majority of dust and grime without damaging the paint.
Tackle Scuffs with Caution: For stubborn scuff marks, a magic eraser can be effective. However, always test it on an inconspicuous area first, like inside a closet. It can sometimes damage flat or matte paint finishes, leaving a noticeable patch.
Inspect with a Flashlight: Shine a flashlight parallel to the walls and along the trim. This low-angle light makes dust, fingerprints, and scuffs highly visible, helping you catch spots you might otherwise miss.
Don't Forget Nail Holes: If permitted by your lease, fill small nail holes with a speck of spackle, sand it smooth once dry, and touch it up with paint if you have the matching color.
5. Window and Mirror Cleaning (Interior and Exterior)
Streaky windows, dusty mirrors, and hard water spots on glass surfaces can make an otherwise clean apartment look neglected. A landlord's inspection often focuses on these details because they directly impact how bright and well-maintained the unit appears. Failing to properly clean all glass is a common reason for deposit deductions, as it signals a lack of thoroughness.
This task is a non-negotiable part of any cleaning checklist for apartment move out. In Madison, where hard water is common, landlords will specifically check for mineral buildup on shower doors and windows. A professional cleaning can cost $150-$250 to fix, so getting it right yourself is crucial for protecting your deposit.
Actionable Tips for Sparkling Glass
Achieve a professional, streak-free shine by following a specific process for windows and mirrors.
Use the Right Solution: A simple 50/50 mix of white vinegar and water in a spray bottle is highly effective and budget-friendly. For tough grime, a quality commercial glass cleaner works well.
Master the Squeegee: For larger windows, spray the surface, then pull a squeegee down in slightly overlapping vertical strokes. Wipe the squeegee blade with a clean microfiber cloth after each pass to prevent redepositing dirt.
Tackle Hard Water Stains: Madisons' hard water leaves mineral deposits. To remove them, apply a paste of baking soda and vinegar, let it sit for 15-20 minutes, then scrub gently with a non-abrasive sponge before rinsing and cleaning as usual.
Prioritize Microfiber: Ditch paper towels, which can leave behind lint. Use one microfiber cloth for cleaning and a separate dry one for buffing edges and catching any drips. You can learn more about how to clean windows without streaks for a perfect finish.
Clean in the Right Order: Clean windows after dusting and vacuuming to prevent new dust from settling on your clean glass. If you have accessible exterior windows, like on a balcony in an Ankeny apartment, clean the interior first to avoid smudging your work.
6. Closet and Storage Space Organization/Cleaning
Often overlooked, closets, pantries, and storage areas are meticulously checked by landlords to ensure a unit is truly empty and clean. Leaving behind even a single forgotten item or a layer of dust on a shelf can lead to frustrating and easily avoidable security deposit deductions. This task is a critical final step in any comprehensive cleaning checklist for apartment move out.
This task is a key part of any professional cleaning checklist for apartment move out. In Madison, property managers frequently cite the condition of closets in move-out reports, especially in Madison apartments where built-in pantries and extensive storage are common features that require special attention.
Actionable Tips for Spotless Closets
To ensure your storage spaces pass inspection, follow this systematic approach.
Empty Everything First: Remove every single item from the closet or pantry. This is the only way to ensure you haven't left anything behind and can access every surface.
Clean from Top to Bottom: Start by wiping down the top shelves and the clothing rod, as dust and debris will fall downward. Finish by vacuuming or sweeping the floor last.
Use a Flashlight for Inspection: Corners, shelf edges, and high-up areas can hide dust and cobwebs. A quick scan with your phone's flashlight reveals anything you might have missed in the dim lighting.
Address Sticky Residue: If you used shelf liners, peel them up carefully and use a gentle adhesive remover or a solution of warm water and dish soap to scrub away any sticky residue left behind.
Document Your Work: Once a closet is perfectly clean, take a quick, well-lit photo. This can be invaluable evidence if a dispute arises over the unit's condition during the final walkthrough.
7. Light Fixture and Switch Plate Cleaning
Often overlooked, light fixtures, ceiling fans, and switch plates are magnets for dust, grime, and fingerprints. A landlord or property manager will notice these details during the final inspection, as clean fixtures suggest a thorough and well-maintained property. This task involves more than a quick wipe-down; it means addressing every fixture, bulb, and plate to restore the apartment’s bright and cared-for appearance.
This step is a non-negotiable part of a professional cleaning checklist for apartment move out. In older Madison apartments with decorative fixtures, or newer units in Waukee with ceiling fans in every room, these areas are scrutinized for dust and grime buildup, which can lead to unnecessary deductions from your security deposit.
Actionable Tips for Bright and Clean Fixtures
To ensure your fixtures and switches pass inspection, a systematic, top-to-bottom approach is essential.
Prioritize Safety: Always turn off the power at the circuit breaker before cleaning any light fixture. Use a sturdy step ladder and never overreach-move the ladder as needed.
Contain the Dust: When cleaning ceiling fan blades, slide an old pillowcase over each blade and pull it back. This clever trick traps all the dust inside the case instead of letting it fall onto your clean floors below.
Clean Glass and Metal Carefully: Use a microfiber cloth lightly dampened with glass cleaner or a gentle all-purpose solution to wipe down glass globes, shades, and metal components. Dry them immediately to prevent streaks.
Detail Switch Plates: Magic erasers or a cloth with a bit of all-purpose cleaner work wonders on grimy switch plates and outlet covers, removing fingerprints and smudges instantly.
Replace Burned-Out Bulbs: It is almost always the tenant's responsibility to ensure all light bulbs are working. Replace any that are burned out or dim to present the apartment in the best possible light.
8. Carpet Stain Treatment and Spot Cleaning
Carpet stains are a leading cause of security deposit deductions, making spot treatment an essential step in your move-out process. Overlooking even small spots, pet accidents, or discoloration can result in hefty fees. This task involves carefully identifying, treating, and neutralizing stains and odors to restore the carpet to its original condition.
This is a critical part of any comprehensive cleaning checklist for apartment move out. In the Madison metro area, where humidity can worsen pet odors, landlords in Dane County frequently charge $300-$600 for stain remediation. For pet-friendly rentals, urine contamination is the most common and costly carpet issue landlords face.
Actionable Tips for Spotless Carpets
To effectively treat stains and avoid costly deductions, follow these proven steps.
Blot, Don't Rub: When a spill happens, immediately blot the area with a clean, white cloth, working from the outside in. Rubbing grinds the stain deeper into the carpet fibers and can make it permanent.
Test Your Cleaner: Before applying any cleaning solution to a visible stain, test it on an inconspicuous area, like inside a closet, to ensure it doesn't cause discoloration.
Use an Enzymatic Cleaner for Pet Stains: For pet urine or other organic stains, a standard carpet cleaner won't work. Use an enzymatic cleaner specifically designed to break down the proteins and eliminate the odor at its source.
Deodorize with Baking Soda: To tackle lingering odors, sprinkle baking soda liberally over the affected area. Let it sit for at least 30 minutes before vacuuming it up thoroughly.
Document Everything: Take clear before-and-after photos of the stains you treat. This documentation can be invaluable if there's a dispute over your security deposit.
9. Final Walkthrough Documentation (Photos and Inspection)
Your job isn't finished once the last surface is wiped down. The final walkthrough and documentation phase is your insurance policy, providing undeniable proof that you left the apartment in excellent condition. This crucial step involves systematically photographing the cleaned unit to create a visual record that can protect you from unwarranted security deposit deductions. Without this evidence, it's your word against your landlord's.
This final step is an essential part of any thorough cleaning checklist for apartment move out. Tenant protection advocates in Wisconsin strongly recommend photo documentation, as it can significantly strengthen a renter's position in a deposit dispute. In fact, Madison renters who comprehensively document the condition of their unit at move-out often recover a much higher percentage of their deposit compared to those who have no proof.
Actionable Tips for Bulletproof Documentation
To create a record that will stand up to scrutiny, follow these specific documentation steps.
Timestamp Everything: Use a smartphone app that overlays the date and time directly onto your photos. This proves when the images were taken, confirming they represent the apartment's condition after you finished cleaning and moved out.
Be Thorough and Methodical: Take wide-angle shots of every room from multiple corners to show the overall cleanliness. Follow up with close-up shots of commonly disputed areas: inside ovens, refrigerators, bathtubs, under sinks, and along baseboards.
Create a Digital Trail: Once you've taken all the photos, send them to your landlord or property manager via email or text immediately. This creates a time-stamped digital receipt showing that you provided them with the documentation on your move-out day.
Keep Your Own Copies: Save a copy of all photos and your written communication to a secure cloud drive. Hold onto this evidence until your full security deposit has been returned.
10. Odor Elimination and Air Freshening
Lingering odors from cooking, pets, or moisture are immediate red flags during a move-out inspection, often signaling neglect to landlords. Simply masking smells is not enough; true odor elimination requires identifying and neutralizing the source, a critical step to ensure you get your full security deposit back. A fresh, neutral-smelling apartment feels genuinely clean and well-maintained.
This task is a non-negotiable part of a thorough cleaning checklist for apartment move out. In Madison, where humidity can trap cooking and pet odors, landlords frequently deduct fees for unresolved smells. Pet-related odors are a common move-out complaint in Midwest rentals, and failing to address them can result in significant charges for professional deodorization services.
Actionable Tips for a Fresh, Neutral Scent
To permanently remove odors instead of just covering them up, follow these targeted steps.
Ventilate Aggressively: Before you start any cleaning, open all windows and doors for at least an hour. This initial airing out helps dissipate surface-level smells and provides fresh air while you work.
Use Baking Soda on Soft Surfaces: Sprinkle a generous amount of baking soda on all carpets, rugs, and upholstered furniture. Let it sit for at least a few hours-or ideally overnight-before vacuuming it up thoroughly. Baking soda is excellent at absorbing and neutralizing common household odors.
Target Pet Odors with Enzymes: If you had pets, standard cleaners won't work on urine spots. You must use an enzymatic cleaner, which contains special bacteria that break down and "eat" the organic matter causing the smell. This is the only way to fully eliminate pet odors.
Don't Forget the HVAC Filter: A dirty furnace or air conditioner filter can trap dust, dander, and odor-causing particles, continuously circulating them throughout the apartment. Replacing it with a fresh one is an inexpensive and highly effective final step.
Avoid Scented Sprays: Do not use plug-in air fresheners, candles, or scented sprays before the final walkthrough. Property managers can easily smell the difference between a clean space and one that is just masking an underlying odor, which can make them more suspicious during the inspection.
10-Point Apartment Move-Out Cleaning Comparison
Service | 🔄 Implementation Complexity | ⚡ Resource Requirements | ⭐ Expected Outcomes | 📊 Ideal Use Cases | 💡 Key Advantages / Tips |
|---|---|---|---|---|---|
Deep Clean All Flooring (Vacuuming, Sweeping, Mopping) | Medium–High — multi-stage, floor-type specific | Vacuum, mop, pH-neutral cleaners, microfiber, possible steam cleaner; 1–3+ hrs | High — removes visible and embedded dirt; inspection-ready | Move-outs with mixed flooring; high-traffic areas | Start with vacuuming; use pH‑neutral on hardwood; allow 2–4 hr drying |
Kitchen Deep Clean (Appliances, Cabinets, Countertops) | High — appliance interiors and heavy degreasing | Degreasers, oven cleaner, microfiber, scrubbing tools; 2–3+ hrs | Very High — strongest ROI for deposit recovery | Greasy kitchens; appliances inspected during walkthroughs | Soak ovens ahead of time; photograph appliance interiors for proof |
Bathroom Sanitization (Tubs, Toilets, Tiles, Ventilation) | High — grout, mold, ventilation require specialized methods | Grout cleaners/steam, disinfectants, brushes, ventilation tools; time-intensive | High — removes mold/mildew and hard-water stains; health-safe | Units with hard water or mold risk; bathrooms heavily inspected | Use grout-specific cleaners or steam; ventilate and test acidic cleaners |
Walls, Baseboards, Trim, and Door Frames Cleaning | Medium — detail work, spot-test paints to avoid damage | Microfiber, magic eraser, extension poles; low-cost but time-consuming | High — high visual impact; prevents mark-related deductions | Units with scuffs, white trim, family or long-term tenants | Work top-to-bottom; test magic eraser on hidden spot first |
Window and Mirror Cleaning (Interior and Exterior) | Low–Medium — technique-sensitive; exterior safety concerns | Squeegee, vinegar solution/professional glass cleaner, microfiber, ladder as needed | High — immediate brightness and perceived cleanliness boost | Units where light and curb appeal matter; shower glass/large windows | Squeegee in overlapping passes; clean mirrors last; treat mineral deposits |
Closet and Storage Space Organization/Cleaning | Low — simple tasks but often overlooked | Vacuum/sweep, microfiber cloth, flashlight; minimal supplies | Medium–High — signals thoroughness; reduces pest risk | Move-outs with many closets, pantries, or storage rooms | Use checklist; vacuum then wipe; photograph cleaned spaces |
Light Fixture and Switch Plate Cleaning | Low–Medium — safety for ceiling fixtures; careful handling | Ladder, microfiber, bulb replacements; low material cost | Medium–High — improves lighting and perceived care | Units with dusty fans, dim fixtures, or decorative lights | Dust fan blades with a pillowcase; replace burned-out bulbs safely |
Carpet Stain Treatment and Spot Cleaning | Medium–High — stain-specific methods; risk of setting stains | Spot cleaners, enzymatic cleaners, extractor/steam cleaning if needed | High (if correct treatment) — reduces common deposit deductions | Pet-occupied rentals; visible stains before inspection | Blot don't rub; test cleaner on hidden area; use enzymatic products for urine |
Final Walkthrough Documentation (Photos and Inspection) | Medium — systematic, time-consuming documentation | Camera/phone with timestamps, checklist, notes; minimal physical tools | Very High — critical evidence to contest deductions | All move-outs, especially dispute-prone situations | Take timestamped photos from multiple angles and send to landlord immediately |
Odor Elimination and Air Freshening | Medium–High — must identify and treat root causes | Enzymatic cleaners, baking soda, activated charcoal, ventilation, possible professional ozone | High when source addressed; variable if structural issues exist | Pet, smoke, or moisture-affected units; basement apartments | Use enzymatic cleaners for pet odors; avoid masking sprays; replace HVAC filter |
Make Your Madison Move-Out Stress-Free
Moving out of an apartment is a significant undertaking, often filled with the excitement of a new beginning overshadowed by the stress of logistics and final obligations. The comprehensive cleaning checklist for apartment move out we've detailed isn't just a list of chores- it's your strategic roadmap to securing your full security deposit and leaving your old space in impeccable condition. By systematically tackling everything from the kitchen appliances and bathroom grout to the often-overlooked baseboards and light fixtures, you are demonstrating respect for the property and fulfilling your lease agreement to the letter.
Key Takeaways for a Flawless Move-Out
Remember, a successful move-out clean is about more than just surface-level tidying. It requires a deep, methodical approach. Here are the most critical points to carry forward:
Documentation is Your Best Defense: Before you even begin cleaning, take "before" photos of any existing damage. Once you're finished, conduct your own final walkthrough and take extensive "after" photos and videos. This evidence is invaluable in case of any security deposit disputes.
Focus on the "Big Three": Landlords and property managers in Madison almost always scrutinize the kitchen, bathrooms, and floors most closely. Dedicate the majority of your time and effort to degreasing ovens, descaling faucets, and ensuring every inch of flooring is free of dirt, scuffs, and stains.
Don't Forget the Details: It's the small things that elevate a good clean to a great one. Wiping down switch plates, dusting ceiling fan blades, and cleaning inside window tracks shows a level of care that leaves a lasting positive impression.
Ultimately, mastering your move-out clean is about reclaiming control over a hectic process and maximizing your financial return. That security deposit is your hard-earned money, and a thorough cleaning is the final step to ensuring it comes back to you. The sense of accomplishment that comes from handing over keys to a spotless apartment allows you to close one chapter and start the next on a positive, stress-free note.
However, we understand that between packing, moving, and starting a new chapter, time and energy are precious commodities. Juggling these tasks, especially for busy professionals or families in Madison neighborhoods, can feel overwhelming. If the thought of scrubbing an oven or deep-cleaning carpets feels like one task too many, there is a professional, reliable solution.
Don't let the final clean stand between you and a smooth move. Shiny Go Clean offers expert move out cleaning services across the Madison metro, ensuring every item on your checklist is handled with professional precision. Visit us at Shiny Go Clean or call 608-292-6848 to book your service and make your move-out clean a guaranteed success.
Comments